Xendit
Xendit a Payment Gateway Uniquely built for Indonesia, the Philippines and Southeast Asia.
To set up Xendit integration in Powerlynx, ensure you've selected one of the following countries under Config/System/Localization: Indonesia 🇲🇨, Philippines 🇵🇭, Malaysia 🇲🇾, Thailand 🇹🇭, and Vietnam 🇻🇳
Configuration
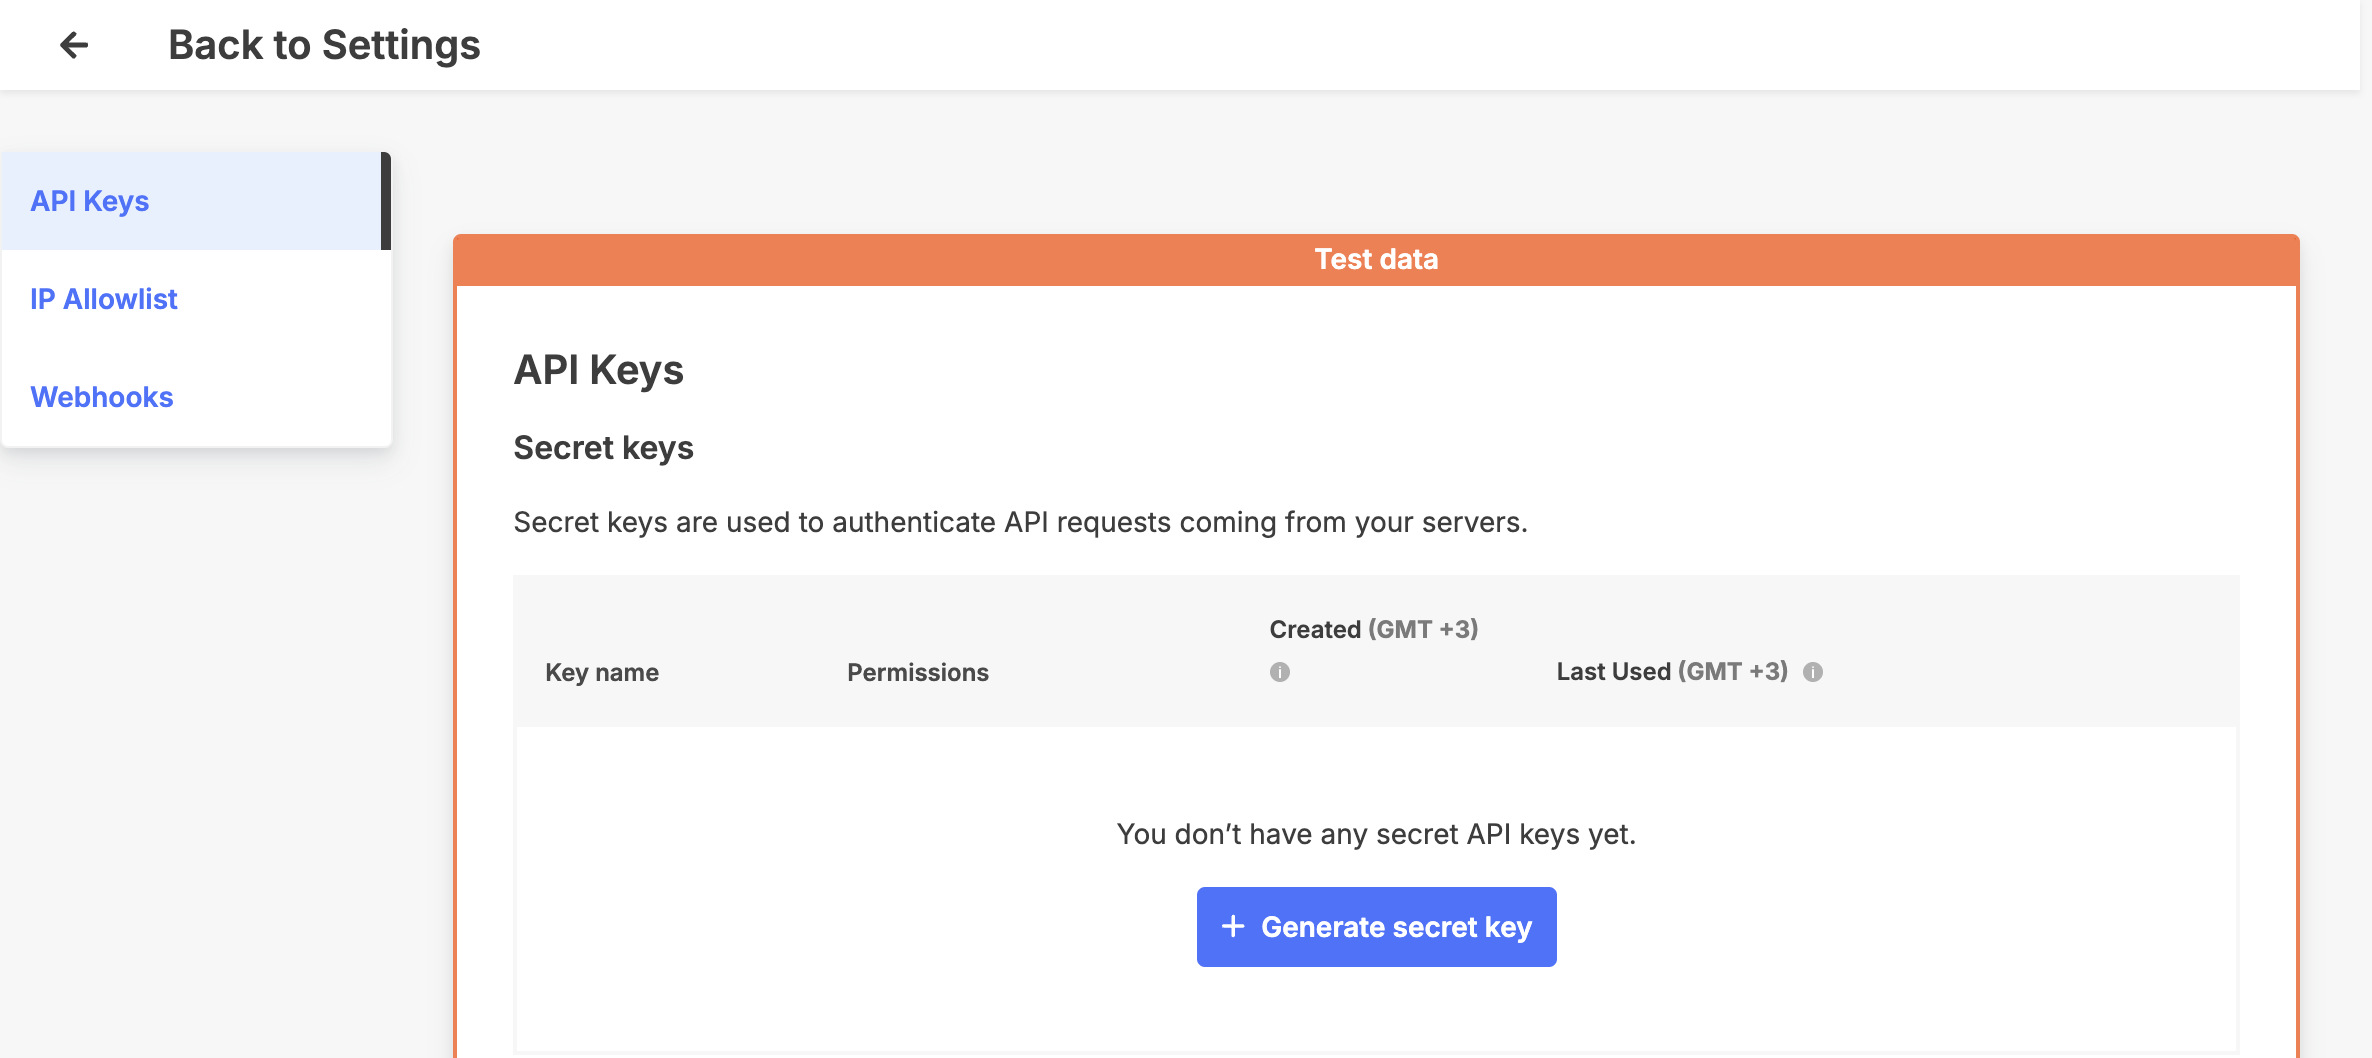
Open your Xendit account, navigate to Settings -> Developers -> API Keys. On that page, you will need to generate secret key:
with the "Write" permissions for the "Money-in Products" section:
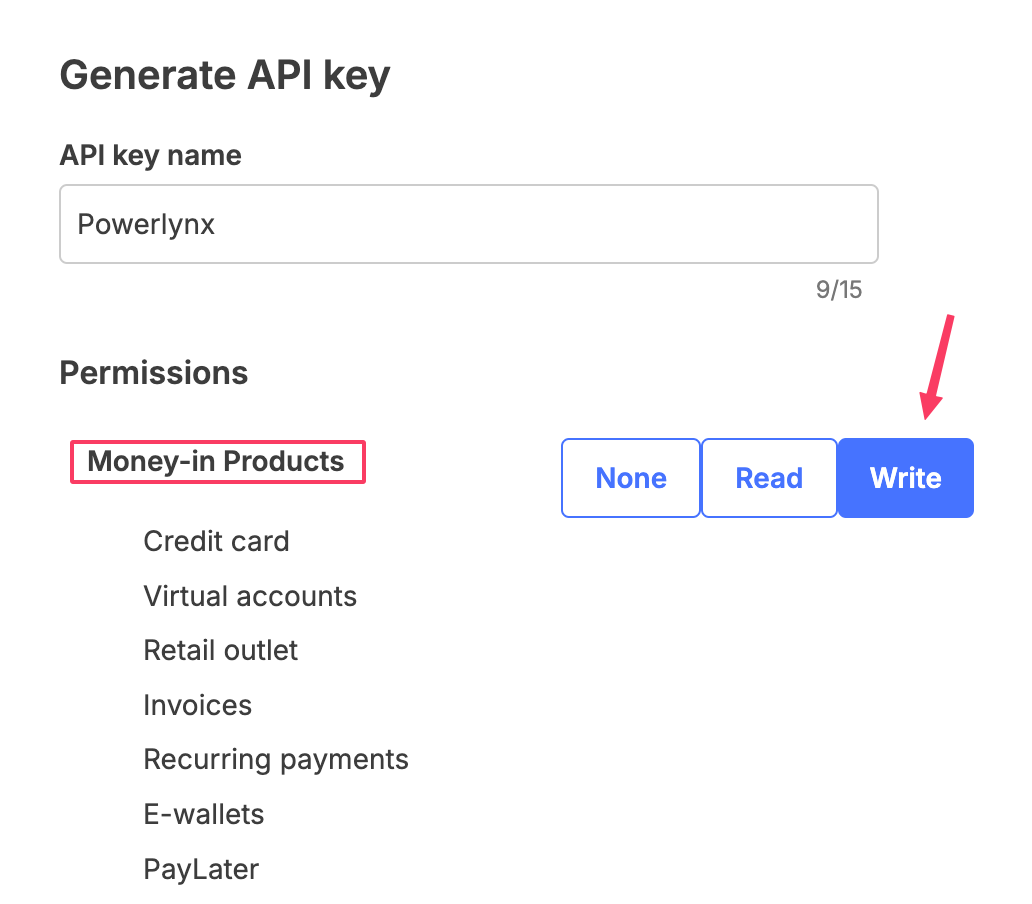
the received value should be copied and inserted into Powerlynx in the "API secret key" field under Config/Payment gateways/Xendit.
Next, you need to navigate to Settings -> Developers -> Webhooks in your Xendit account. On that page, you will need to click this button to get the webhook value:
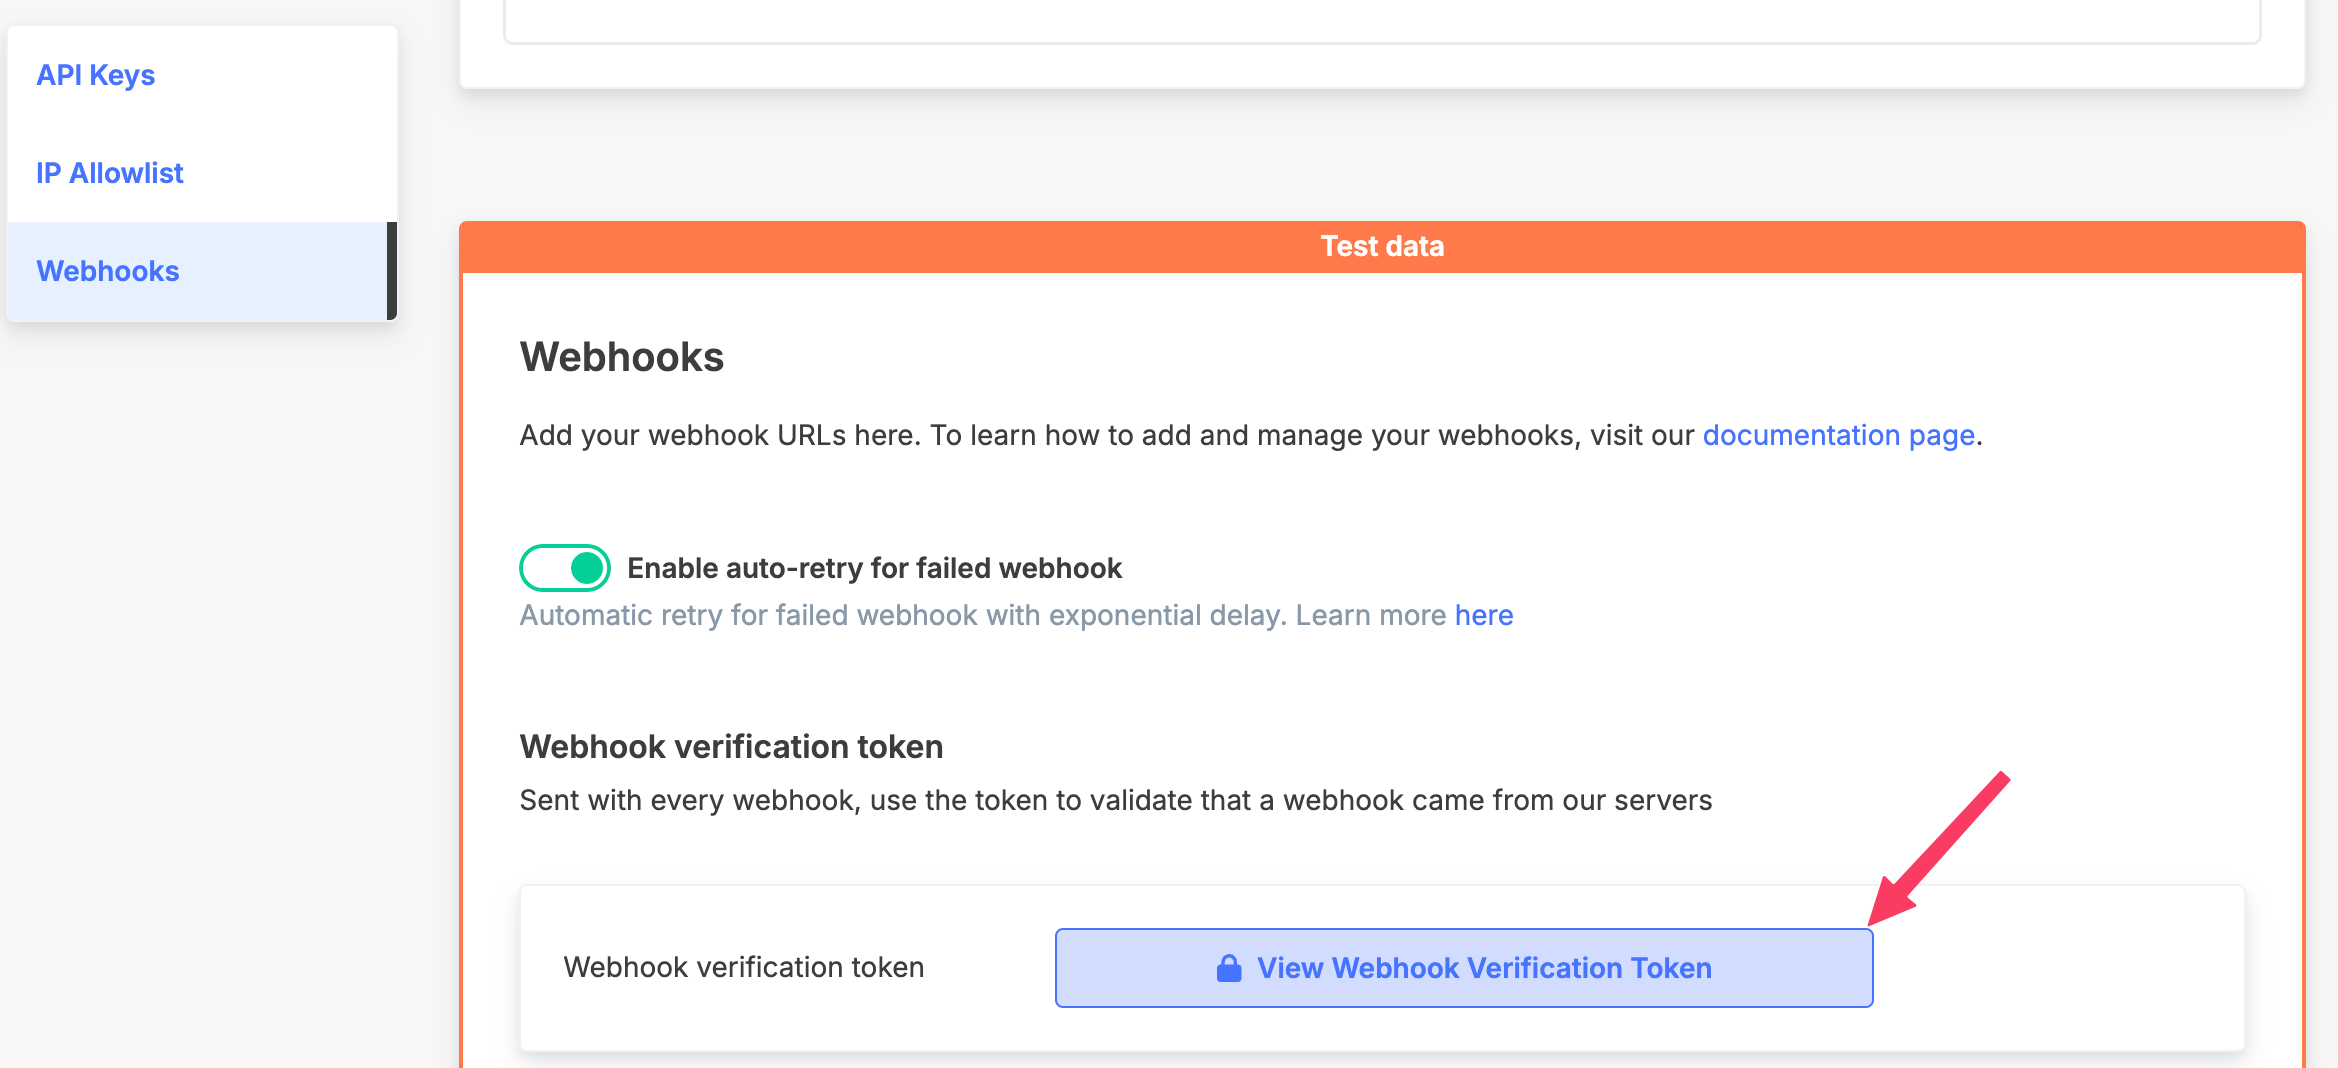
the received value should be copied and inserted into Powerlynx in the "Webhook verification token" field under Config/Payment gateways/Xendit.
Next, in your Xendit account navigate to Settings -> Developers -> Webhooks and find the "Webhook URL" section and scroll down to the "Invoices" settings:
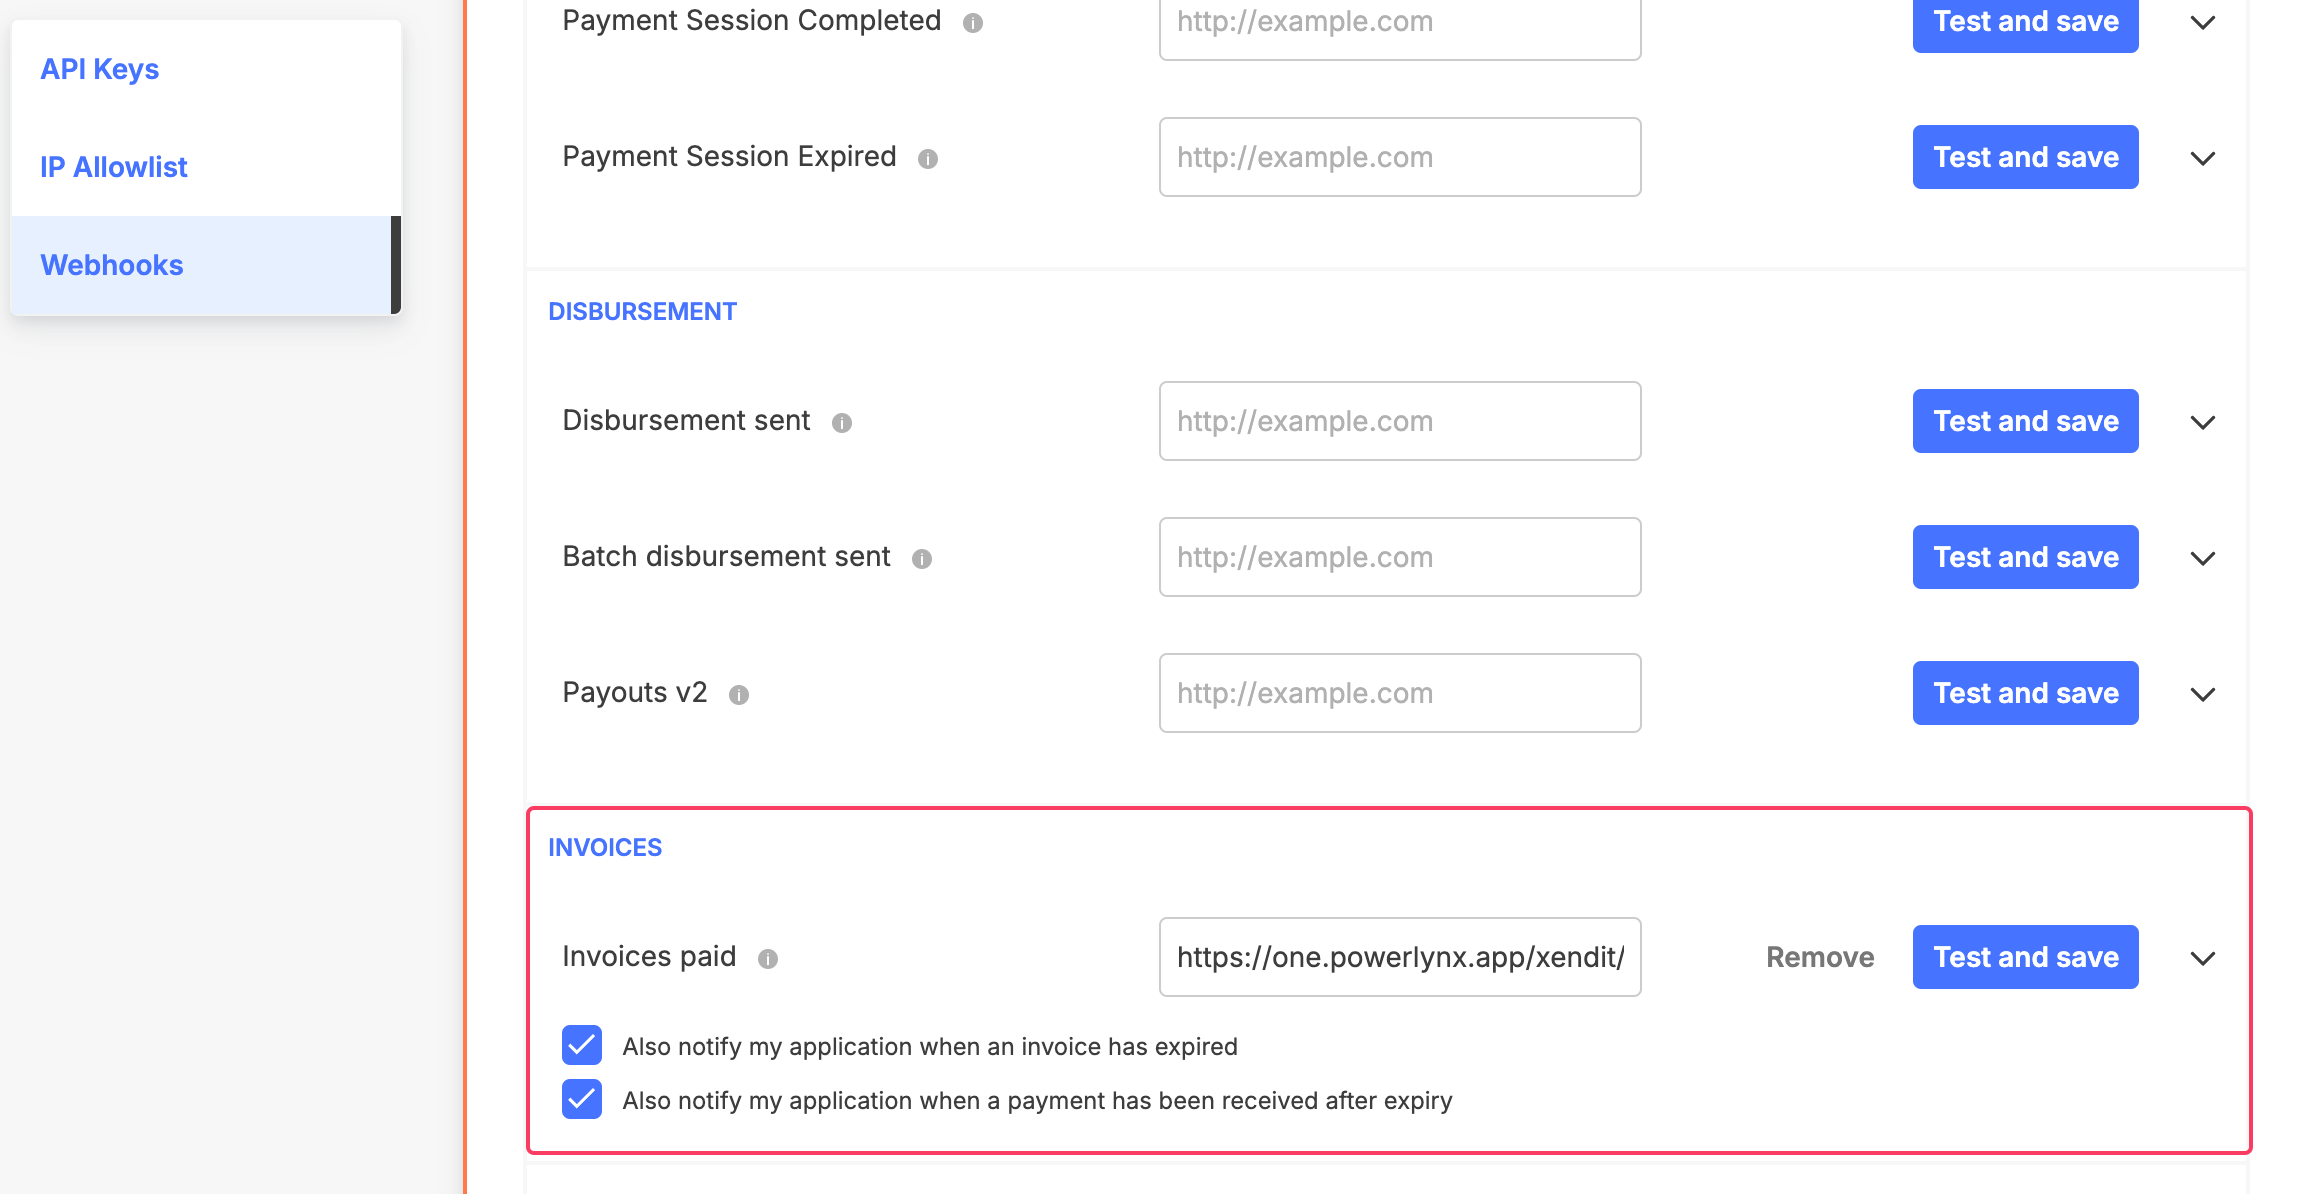
Activate 2 checkboxes as per our screenshot and insert the URL into the "Invoices paid" field. The URL should be in the following format:
https://one.powerlynx.app/xendit/notifyhttps://one.powerlynx.app/xendit/notifyMake sure you've replaced one.powerlynx.app with your Powerlynx URL. Click "Test and save" button.
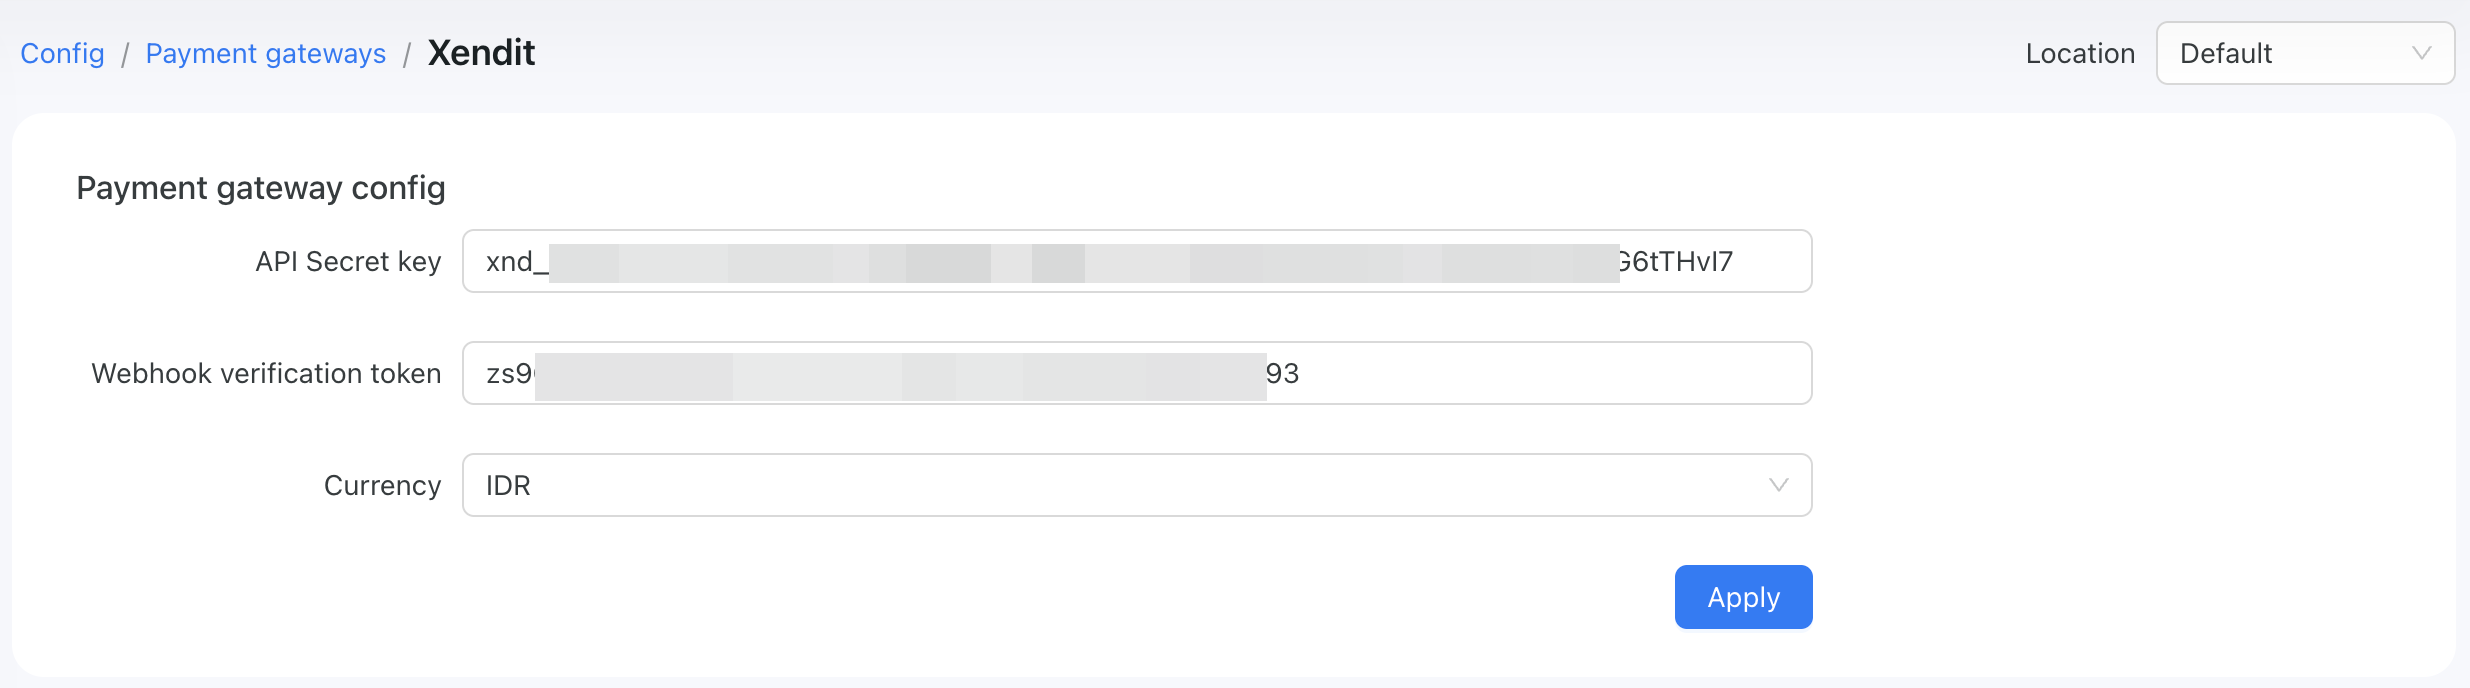
After that, in Powerlynx, under Config/Payment gateways/Xendit select your currency in the "Currency" field.
Your config of this integration should be as following:
Enable Payment Gateway for a Location
The next crucial step is to enable Xendit for a specific location. Navigate to Locations, select the desired location, and open the "Payment Gateways" tab. From there, enable Xendit for this location:
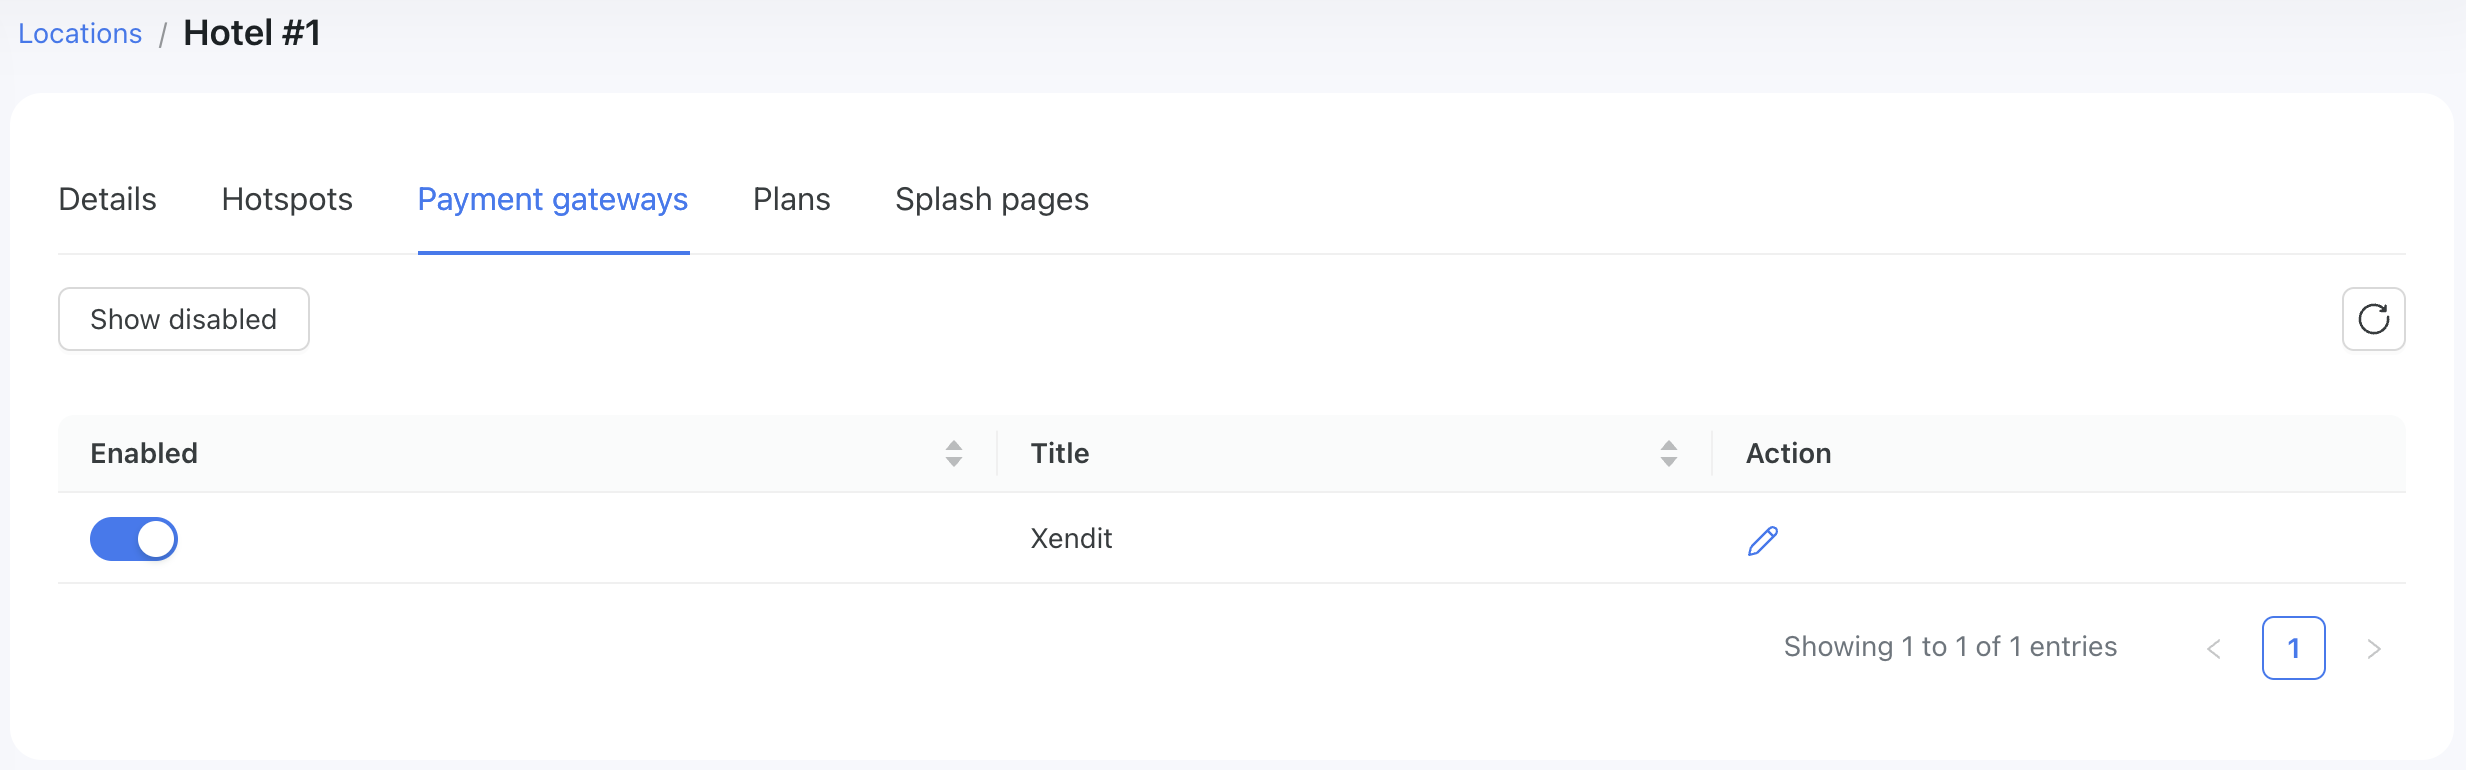
If it's disabled, your clients will not have the option to pay with Xendit.
Networking: Walled Garden
Another crucial step is to configure the allow list of hosts on your hotspot. For instance, if you've connected a Mikrotik hotspot using this manual, you now need to add a list of allowed hosts related to Xendit. This allows your customers to be redirected to the 3D authentication page during the payment process. You can find more about Mikrotik Walled Garden here.
To do this, you should access your router (in my case, Mikrotik), open the Terminal, and run this command with the list of hosts you wish to allow:
/ip hotspot walled-garden
add dst-host=*.digitaloceanspaces.com
add dst-host=*.powerlynx.app
add dst-host=www.googletagmanager.com
add dst-host=googletagmanager.com
add dst-host=www.datadoghq-browser-agent.com
add dst-host=datadoghq-browser-agent.com
add dst-host=static.cloudflareinsights.com
add dst-host=snowplow-collector.iluma.ai
add dst-host=fonts.gstatic.com
add dst-host=fonts.googleapis.com
add dst-host=cloudflareinsights.com
add dst-host=cdnjs.cloudflare.com
add dst-host=cdn.growthbook.io
add dst-host=*.xendit.co
add dst-host=*.fastly.net
add dst-host=*.elasticbeanstalk.com
add dst-host=*.cloudfront.net
add dst-host=*.cdn.cloudflare.net
add dst-host=*.cardinalcommerce.com
add dst-host=*.amazonaws.com
/ip hotspot walled-garden
add dst-host=*.digitaloceanspaces.com
add dst-host=*.powerlynx.app
add dst-host=www.googletagmanager.com
add dst-host=googletagmanager.com
add dst-host=www.datadoghq-browser-agent.com
add dst-host=datadoghq-browser-agent.com
add dst-host=static.cloudflareinsights.com
add dst-host=snowplow-collector.iluma.ai
add dst-host=fonts.gstatic.com
add dst-host=fonts.googleapis.com
add dst-host=cloudflareinsights.com
add dst-host=cdnjs.cloudflare.com
add dst-host=cdn.growthbook.io
add dst-host=*.xendit.co
add dst-host=*.fastly.net
add dst-host=*.elasticbeanstalk.com
add dst-host=*.cloudfront.net
add dst-host=*.cdn.cloudflare.net
add dst-host=*.cardinalcommerce.com
add dst-host=*.amazonaws.comIt might be useful to visit our forum, especially this topic, to discuss all questions related to the walled garden.
Buying a voucher with Xendit
Customers can now buy a voucher on a splash page using Xendit.

After selecting "Xendit," the customer will be redirected to the Xendit page to complete the payment:


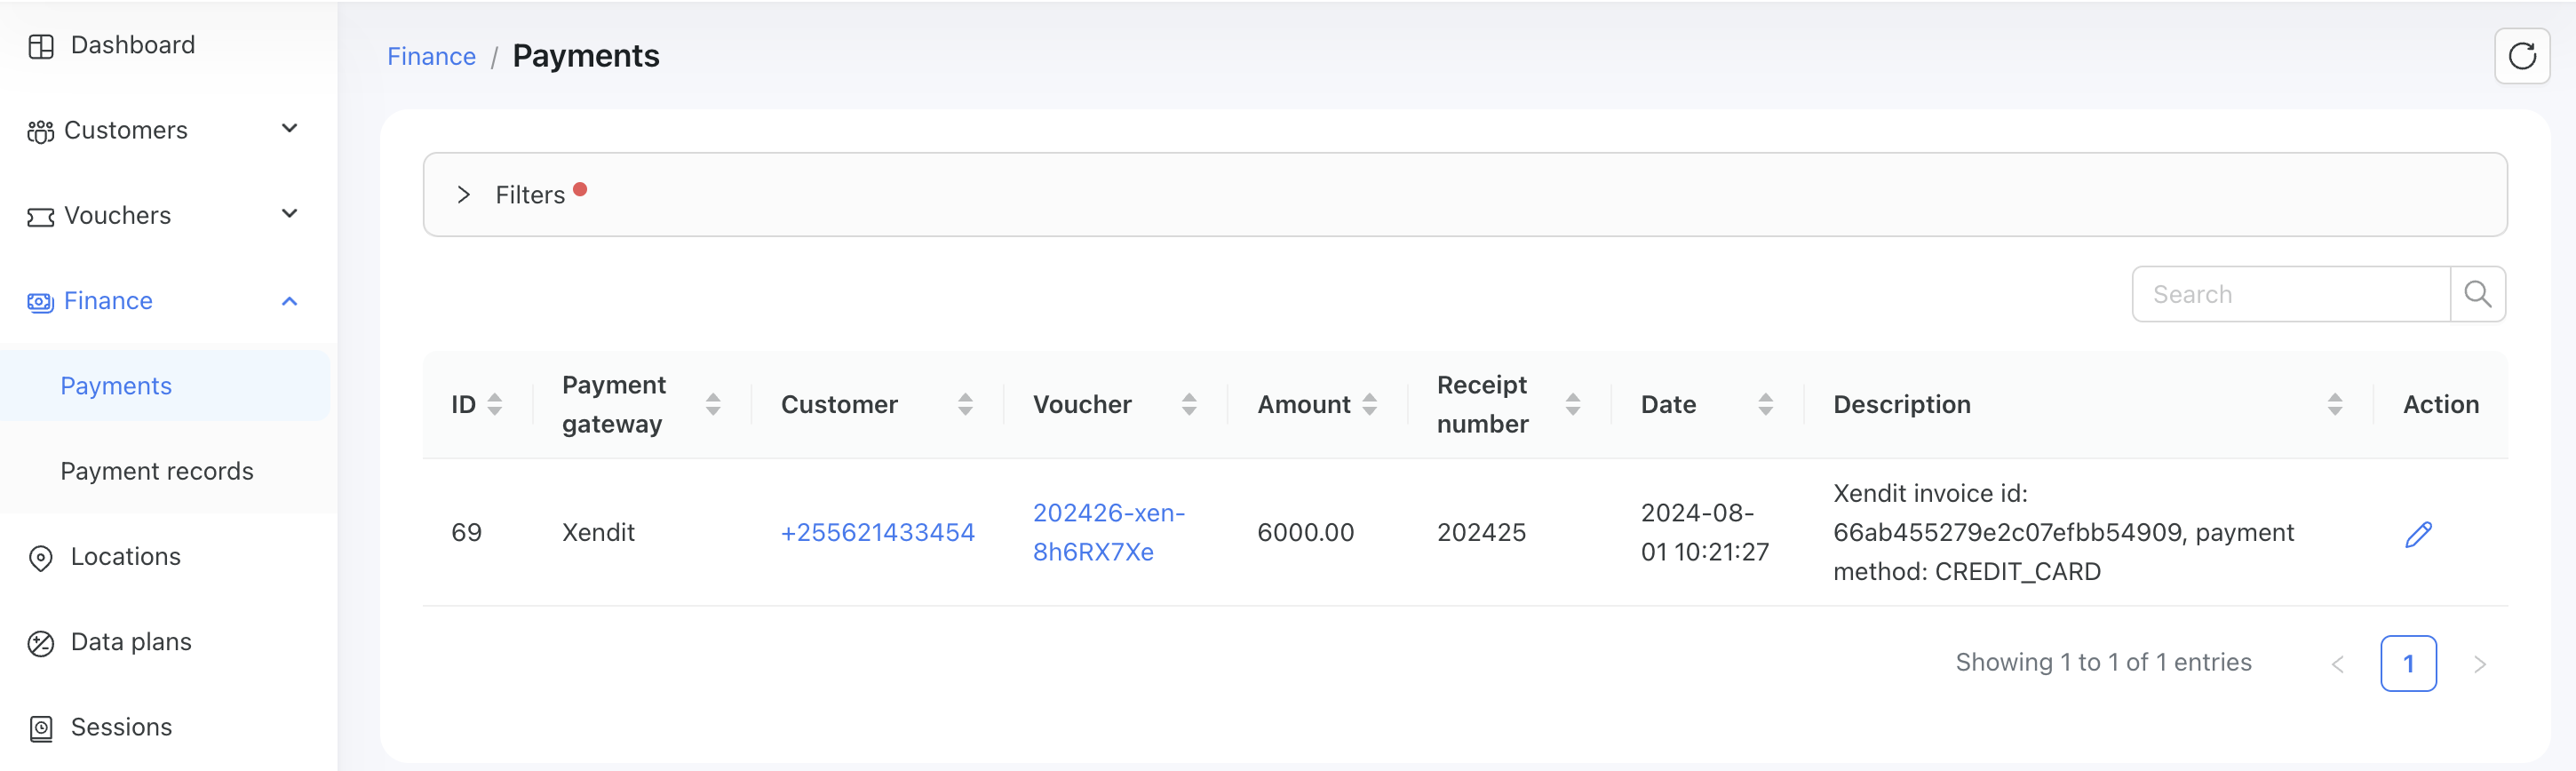
Payment captured by Powerlynx are stored under Finance/Payments: