Connecting the Ruckus Hotspot to Powerlynx
In this manual, we will guide you through the process of adding a Ruckus router as a hotspot in Powerlynx. In our example, we use a Ruckus R550 access point. Customers will connect to the Wi-Fi provided by the router.
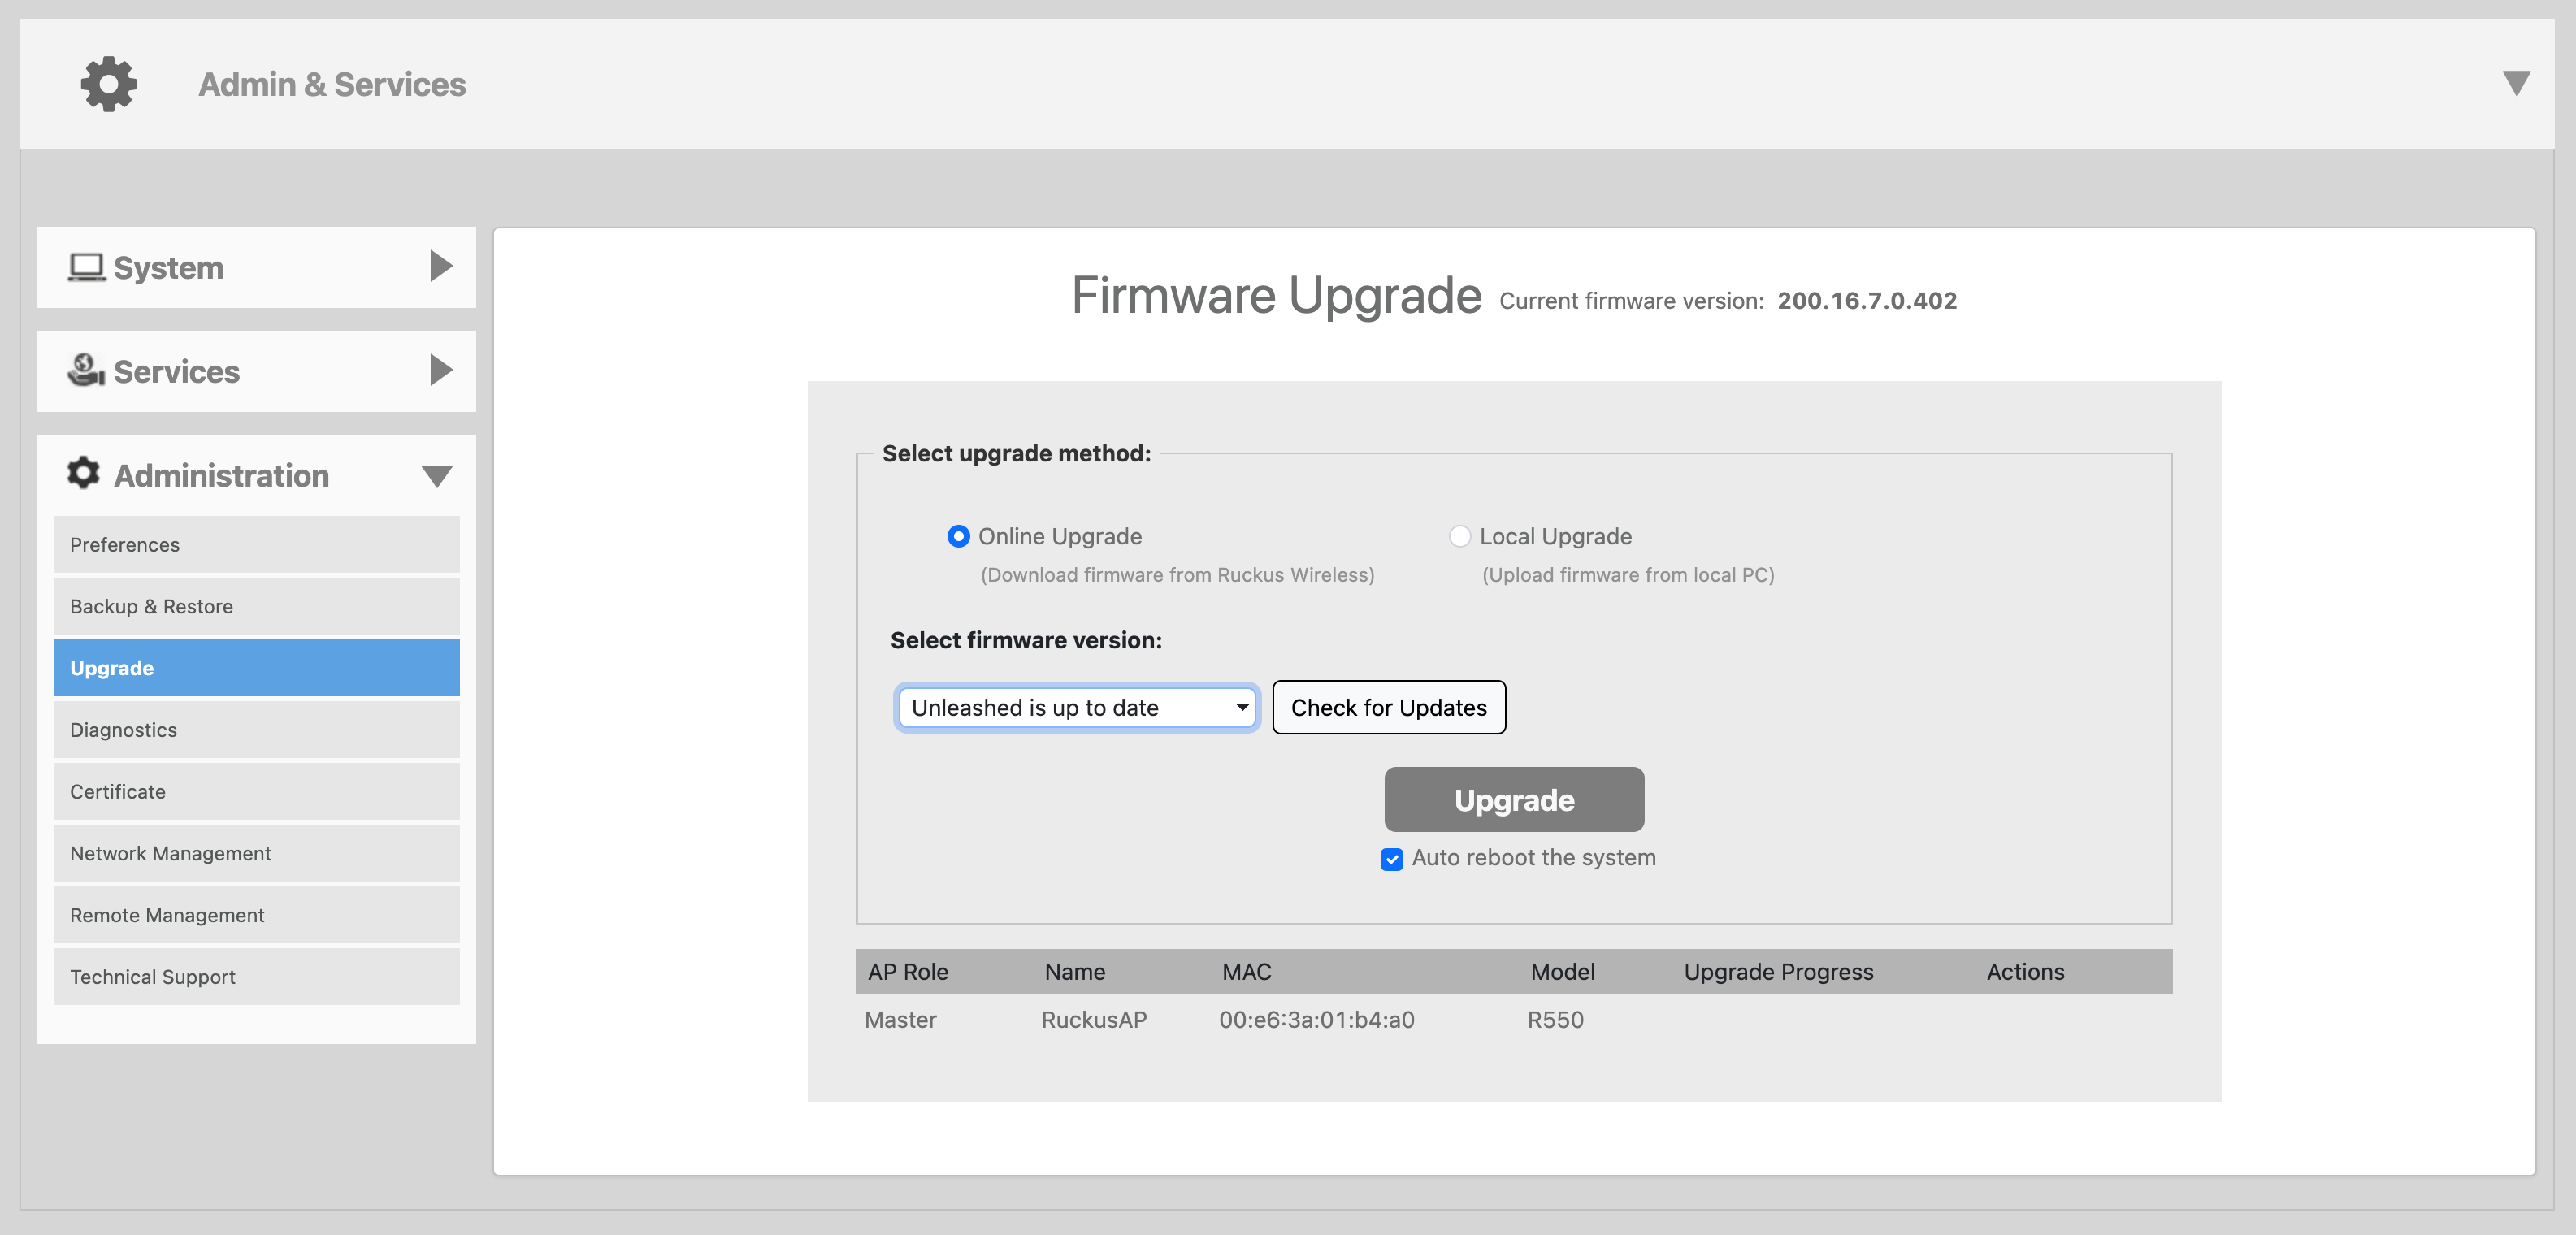
Updating firmware
Make sure your device is running the latest available firmware. Navigate to the Admin & Services / Administration / Upgrade page and click on the Check for Updates button.
Configuring your device
Adding a RADIUS server
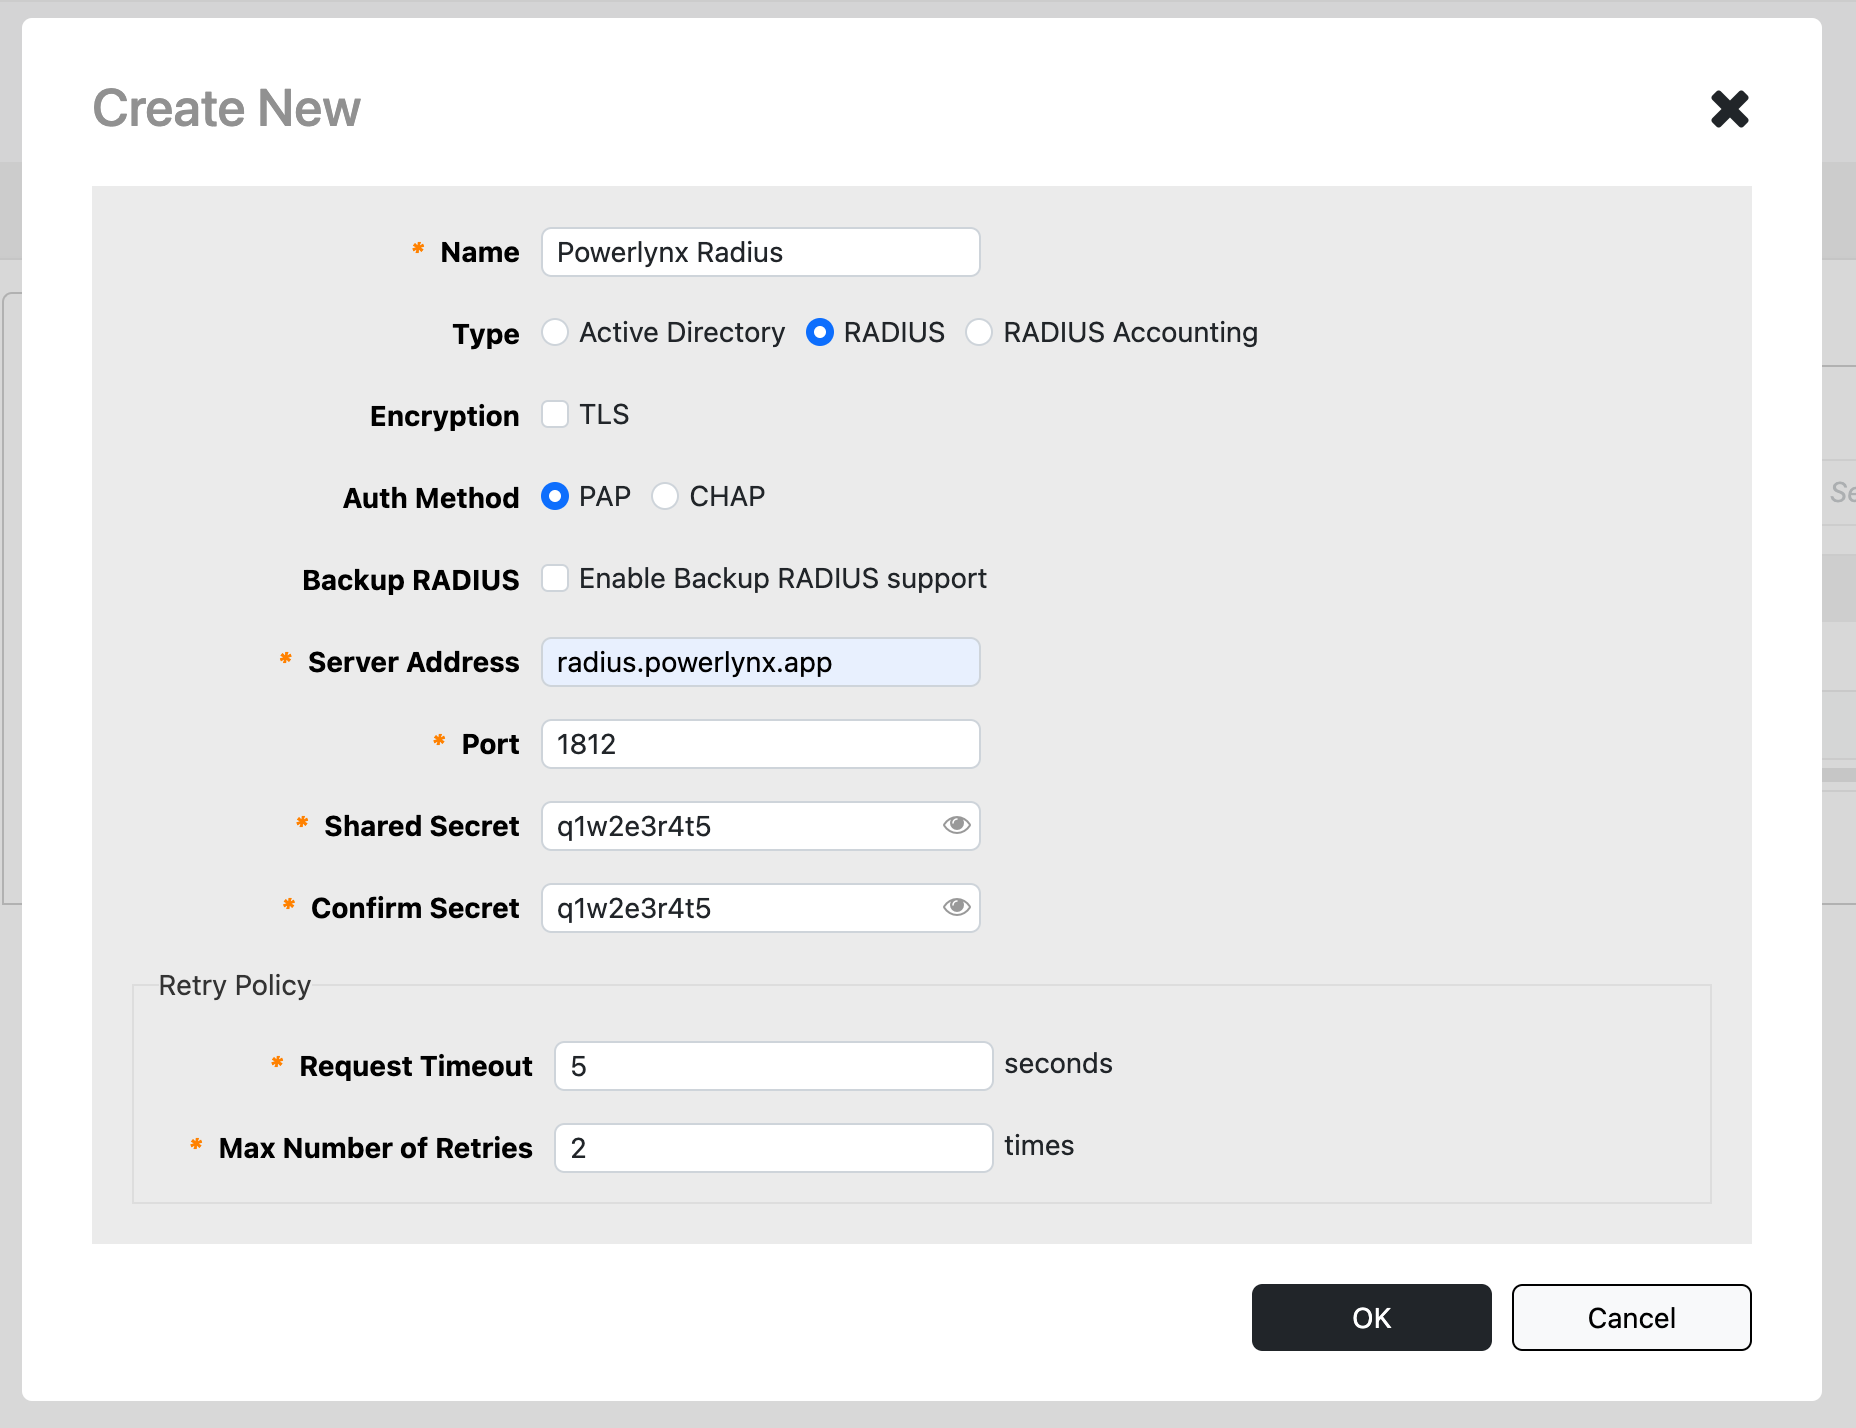
Navigate to the Admin & Services / Services / AAA Servers - Authentication Servers page and click on the Create button.
Fill out the form as follows:
- Name - set to
Powerlynx Radius - Type - choose
RADIUS - Auth Method - choose
PAP - Server Address - set to
radius.powerlynx.app - Port - set to
1812 - Shared Secret - must match the value in both Powerlynx Hotspot and here
- Confirm Secret - enter the same value as in Shared Secret
- Request Timeout - set to
5 - Max Number of Retries - set to
2
Then, click the OK button.
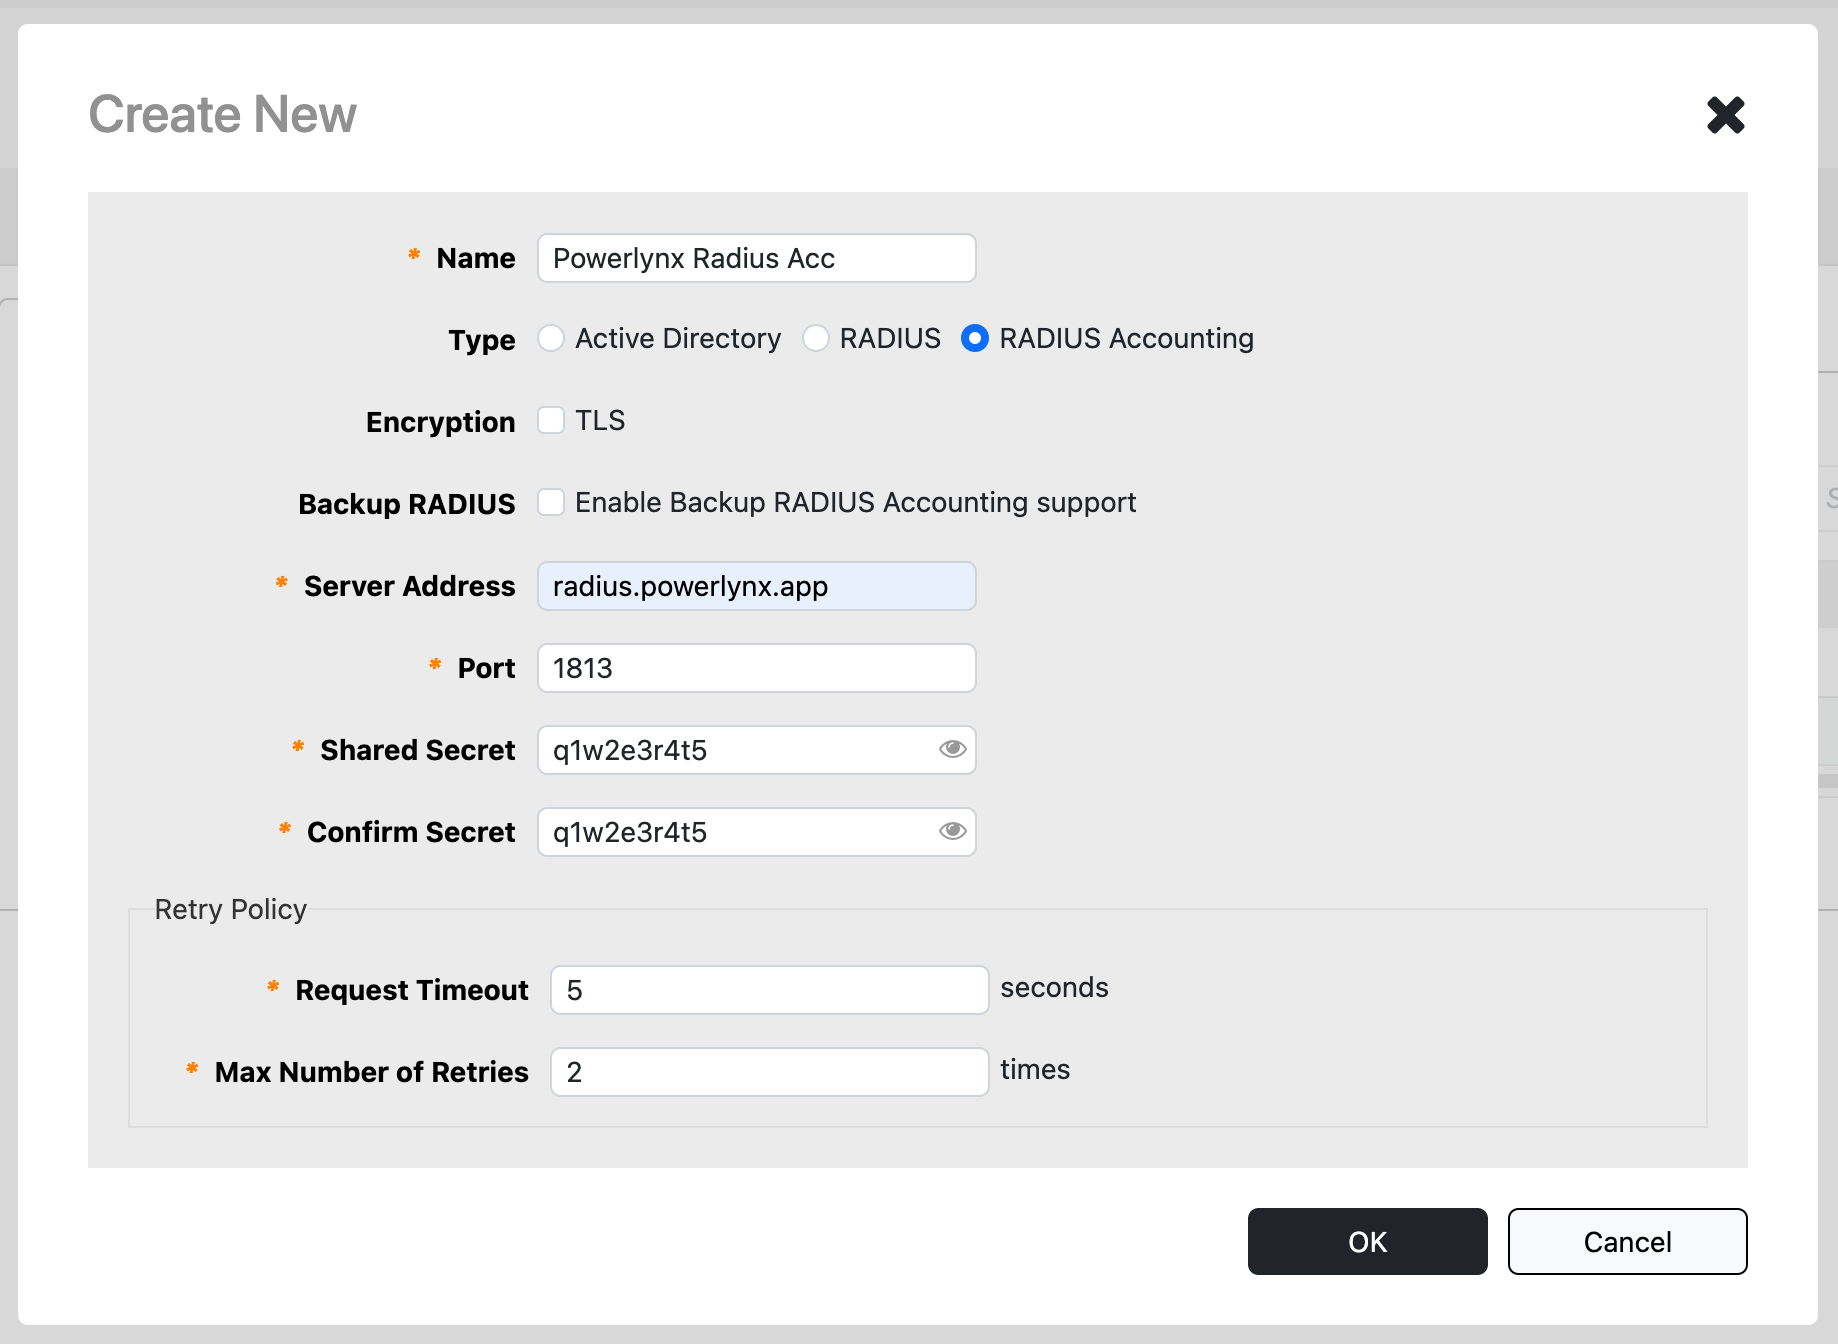
On the same page, click the Create button again.
Fill out the form as follows:
- Name - set to
Powerlynx Radius Acc - Type - choose
RADIUS Accounting - Server Address - set to
radius.powerlynx.app - Port - set to
1813 - Shared Secret - must match the value in both Powerlynx Hotspot and here
- Confirm Secret - enter the same value as in Shared Secret
- Request Timeout - set to
5 - Max Number of Retries - set to
2
Then, click the OK button.
Creating a hotspot
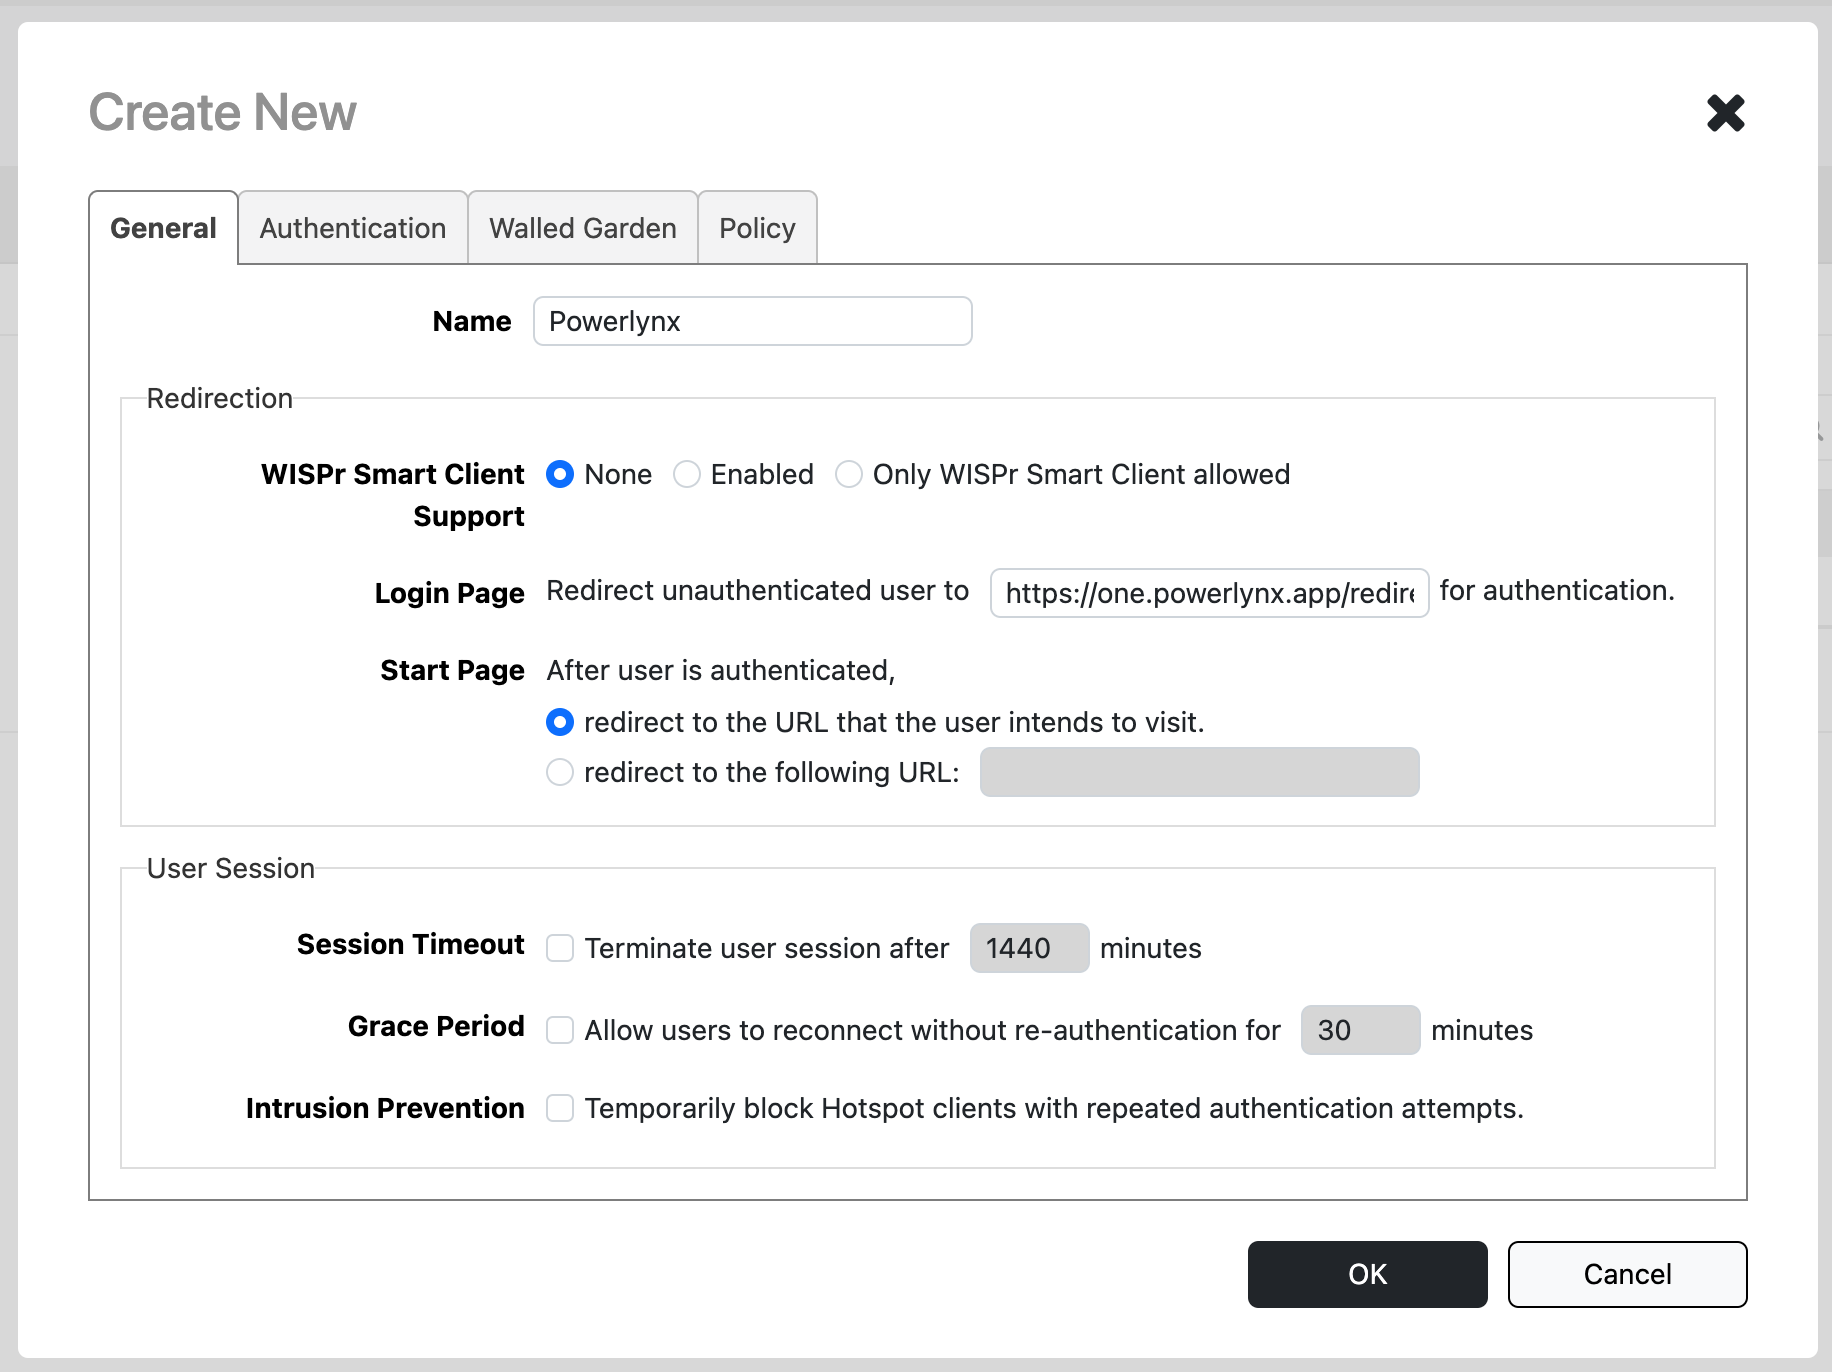
Navigate to the Admin & Services / Services / Hotspot Services page and click the Create button. On the General tab fill out the form as follows:
- Name - set to
Powerlynx - WISPr Smart Client - choose
None - Login Page - set to
https://{your_subdomain}.powerlynx.app/redirect-flow - Start Page - choose
redirect to the URL that the user intends to visit
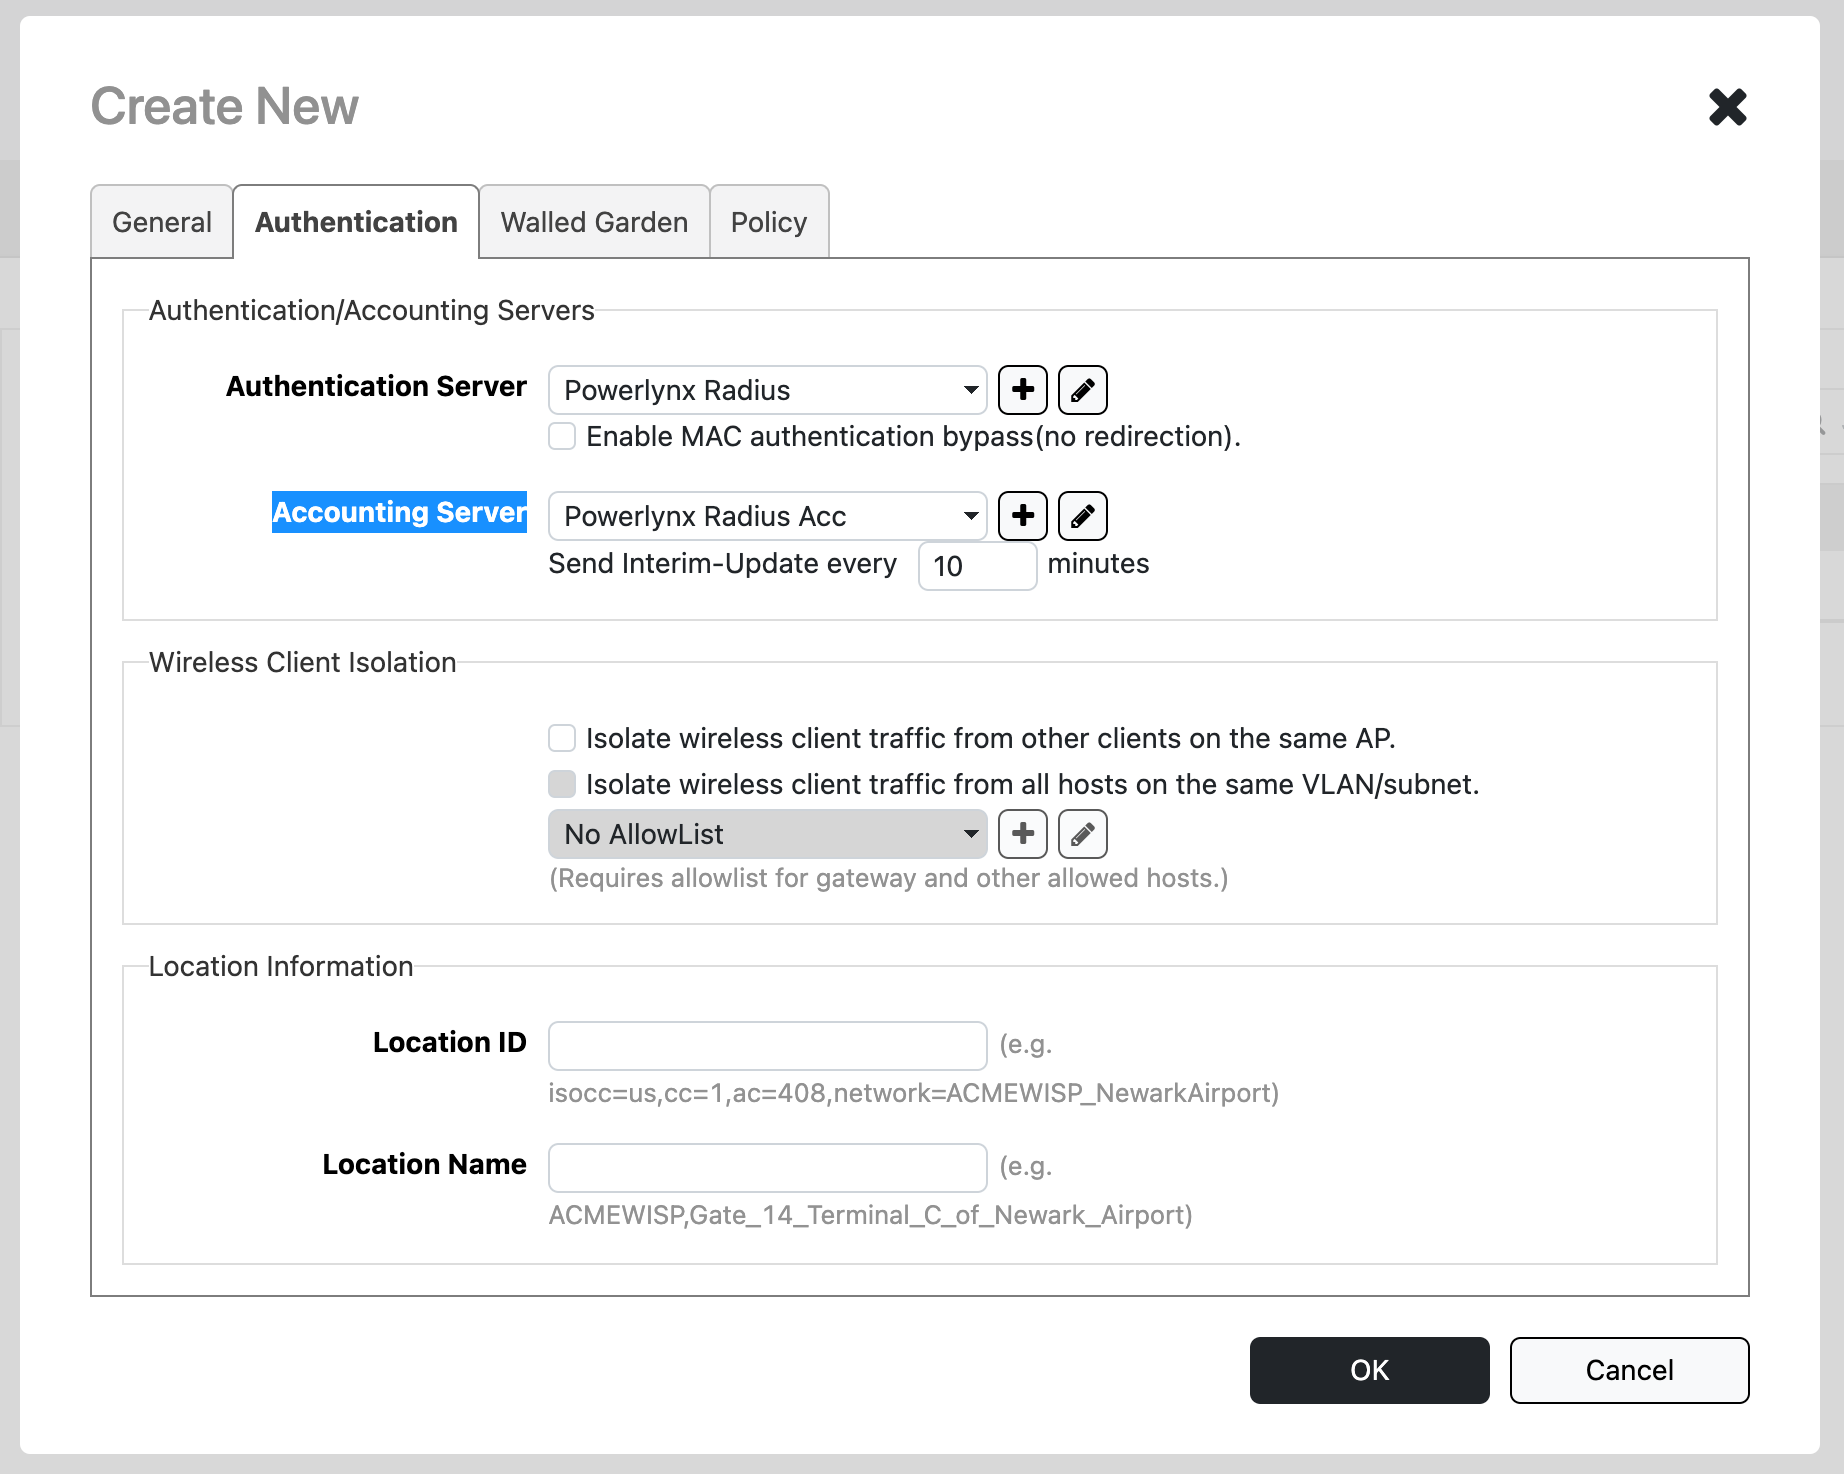
On the Authentication tab, fill out the form as follows:
- Authentication Server - choose the previously created RADIUS server called
Powerlynx Radius - Accounting Server - choose the previously created RADIUS accounting server called
Powerlynx Radius Acc
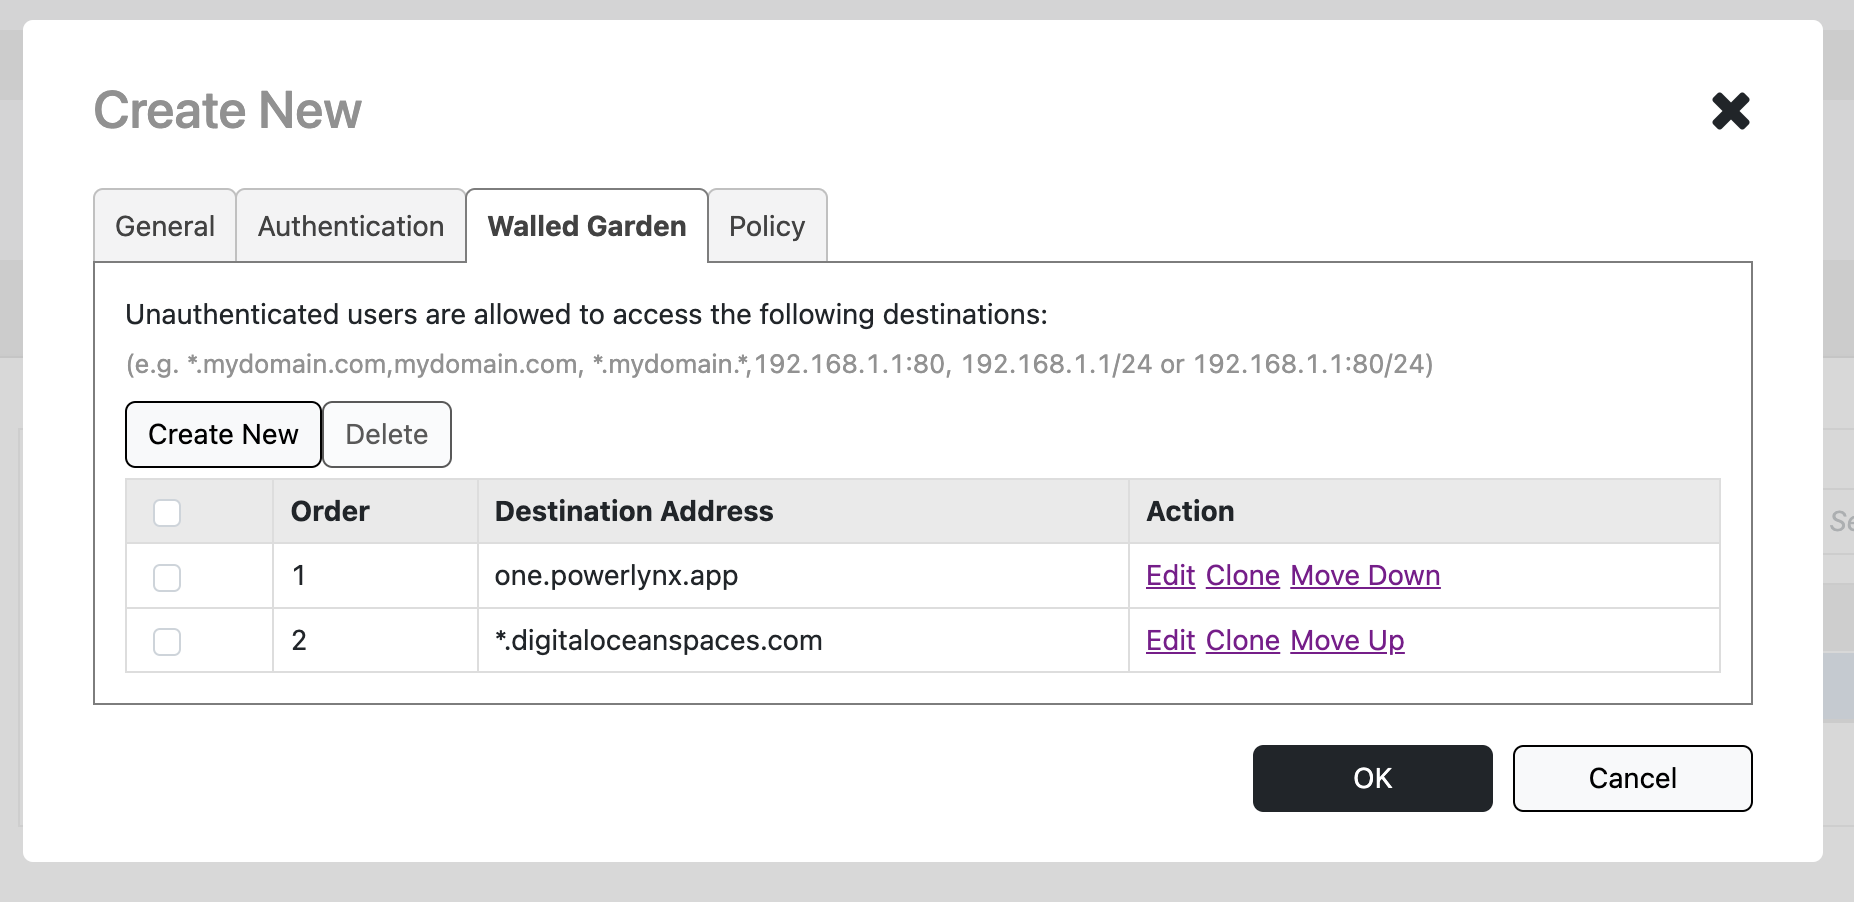
On the Walled Garden tab, add the following hosts:
{your_subdomain}.powerlynx.app
*.digitaloceanspaces.com
{your_subdomain}.powerlynx.app
*.digitaloceanspaces.comThe whitelist records depend on the payment gateway you plan to use, as each gateway has its own hosts that need to be allowed in this list. You can find more information here.
Click the OK button to save the hotspot.
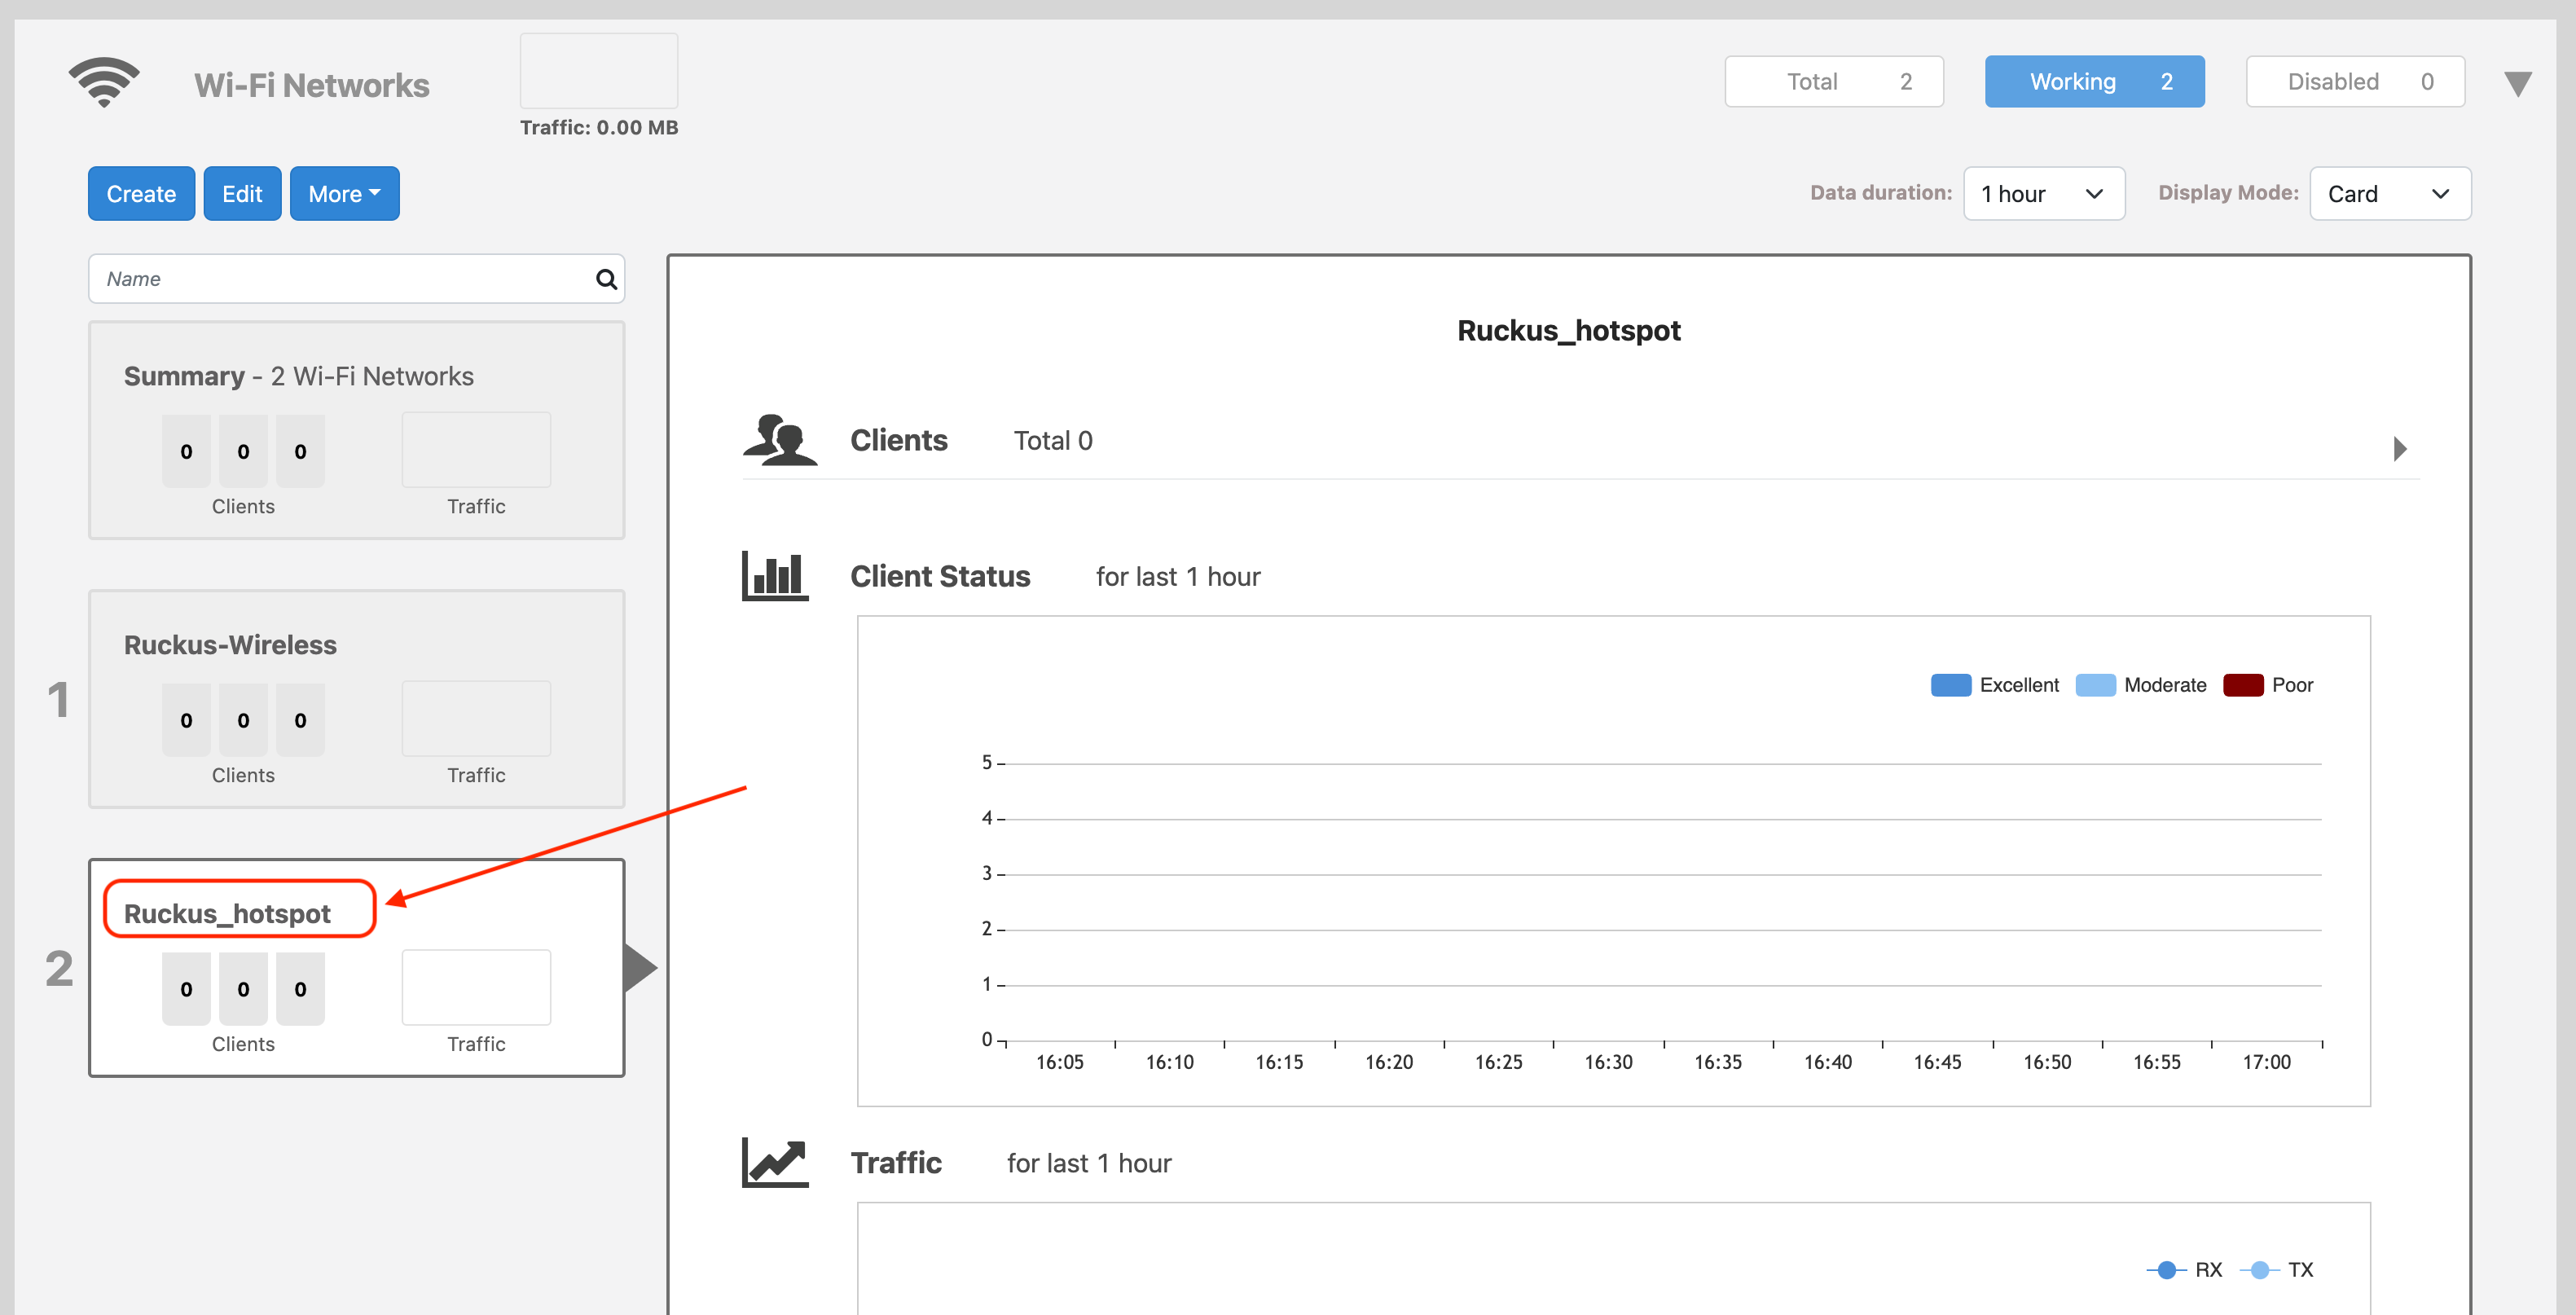
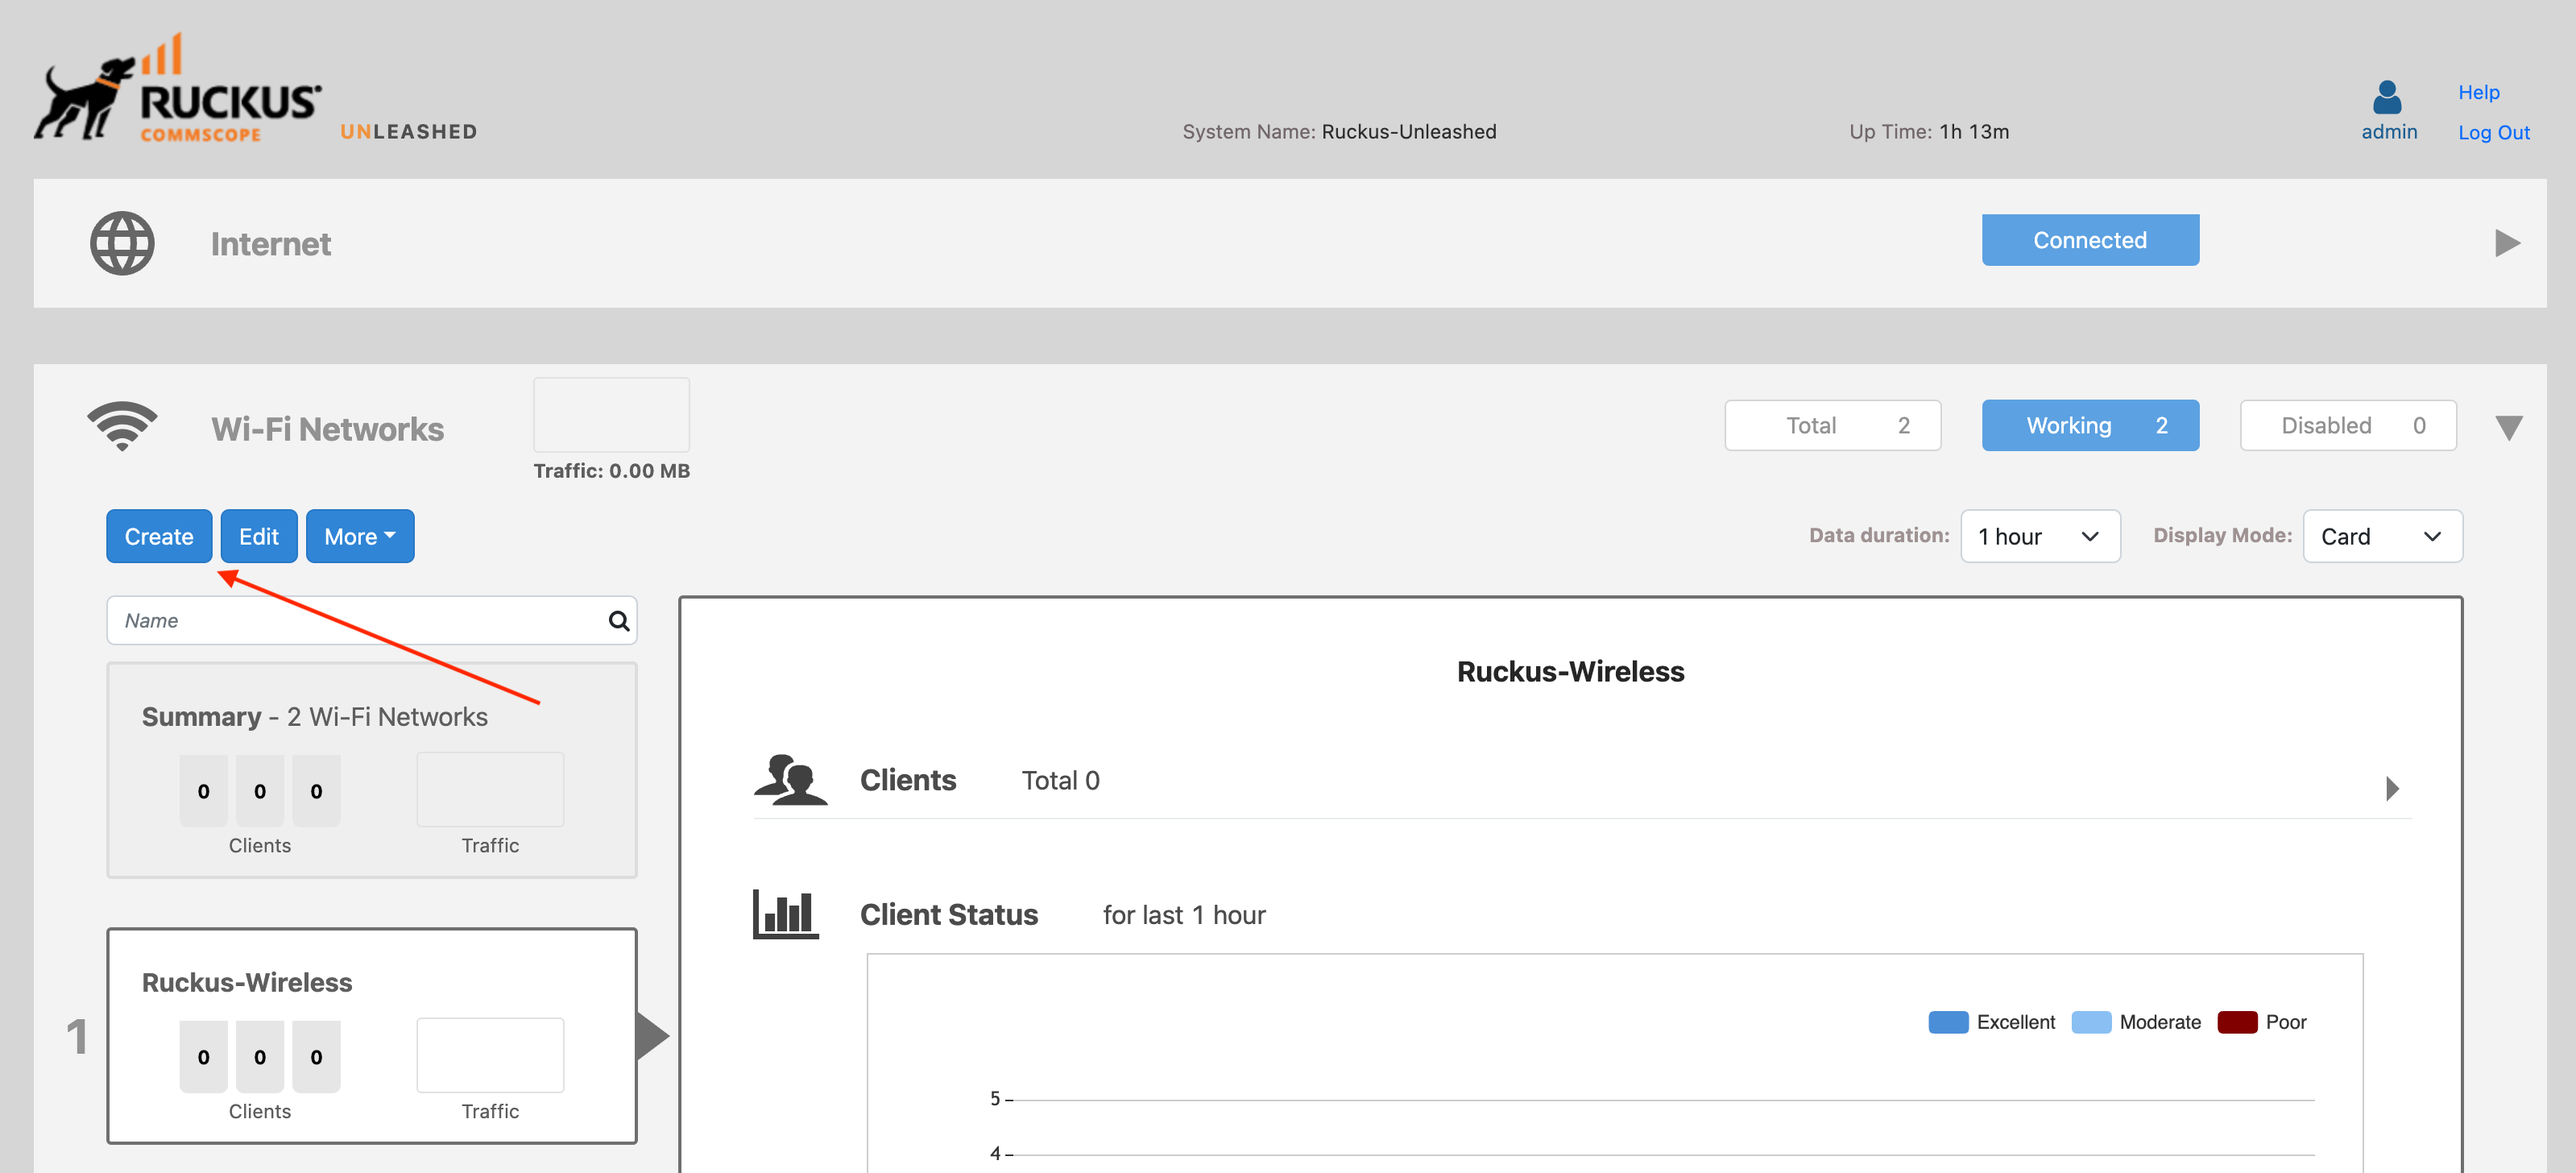
Creating a Wi-Fi network
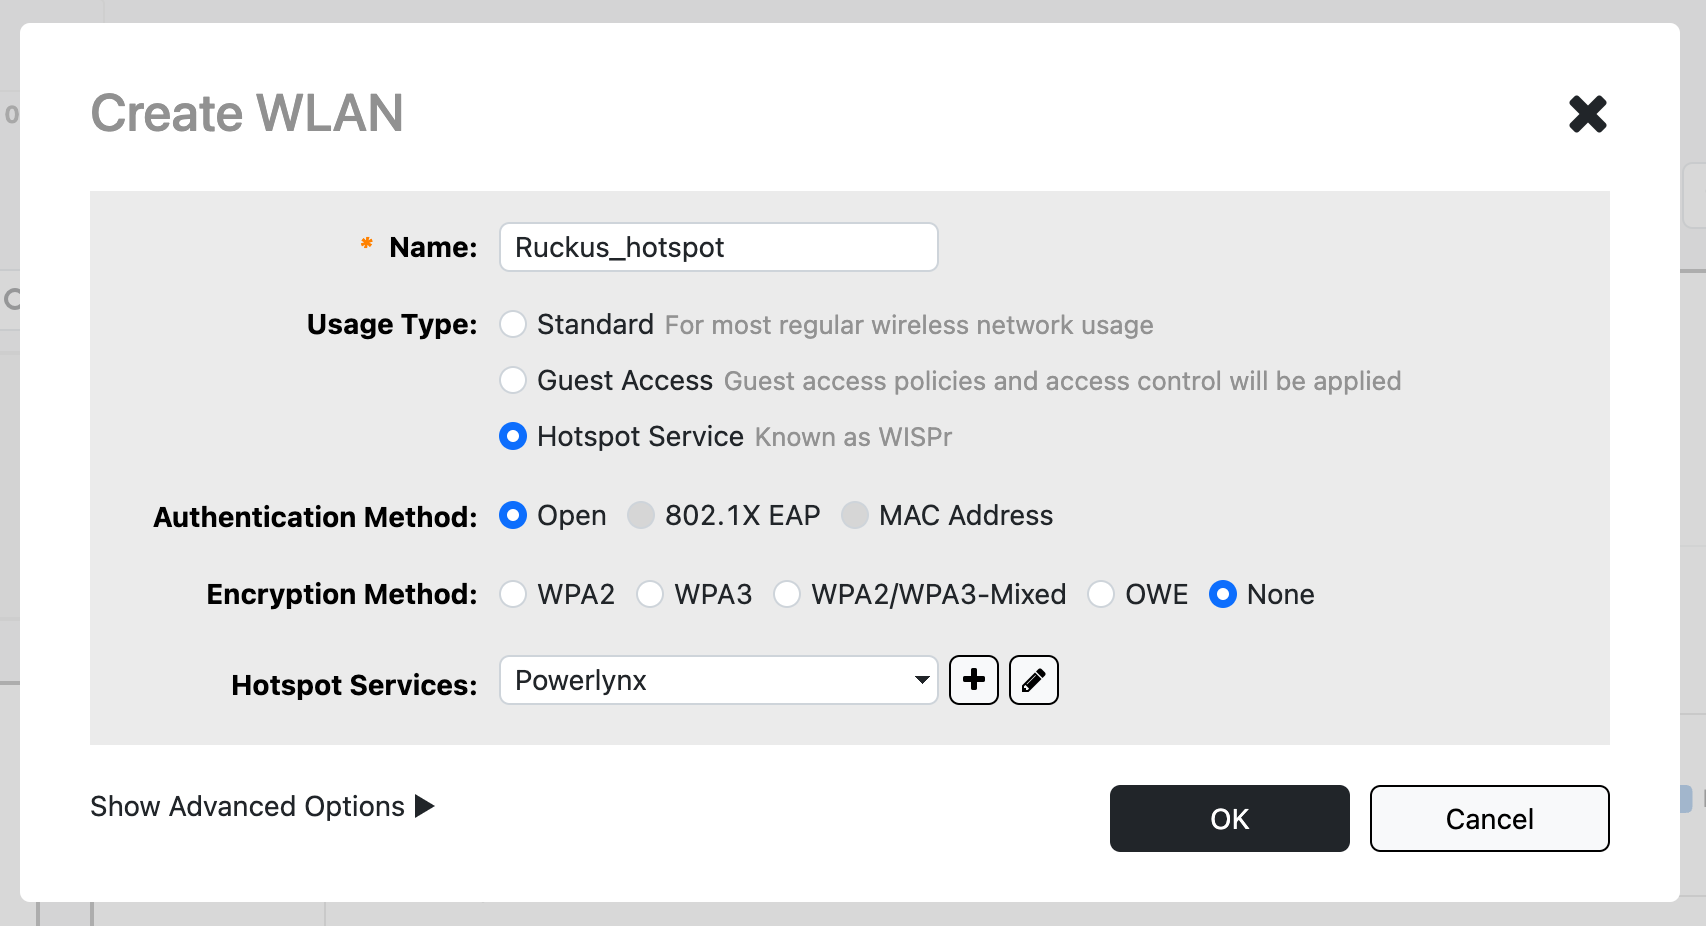
Navigate to the Wi-Fi Networks page and click the Create button. Fill out the form as follows:
- Name - type your desired Wi-Fi network name
- Usage Type -- choose the
Hotspot Serviceoption - Hotspot Services - select the previously created hotspot called
Powerlynx
Click the OK button to save the WLAN.
Configuring Powerlynx
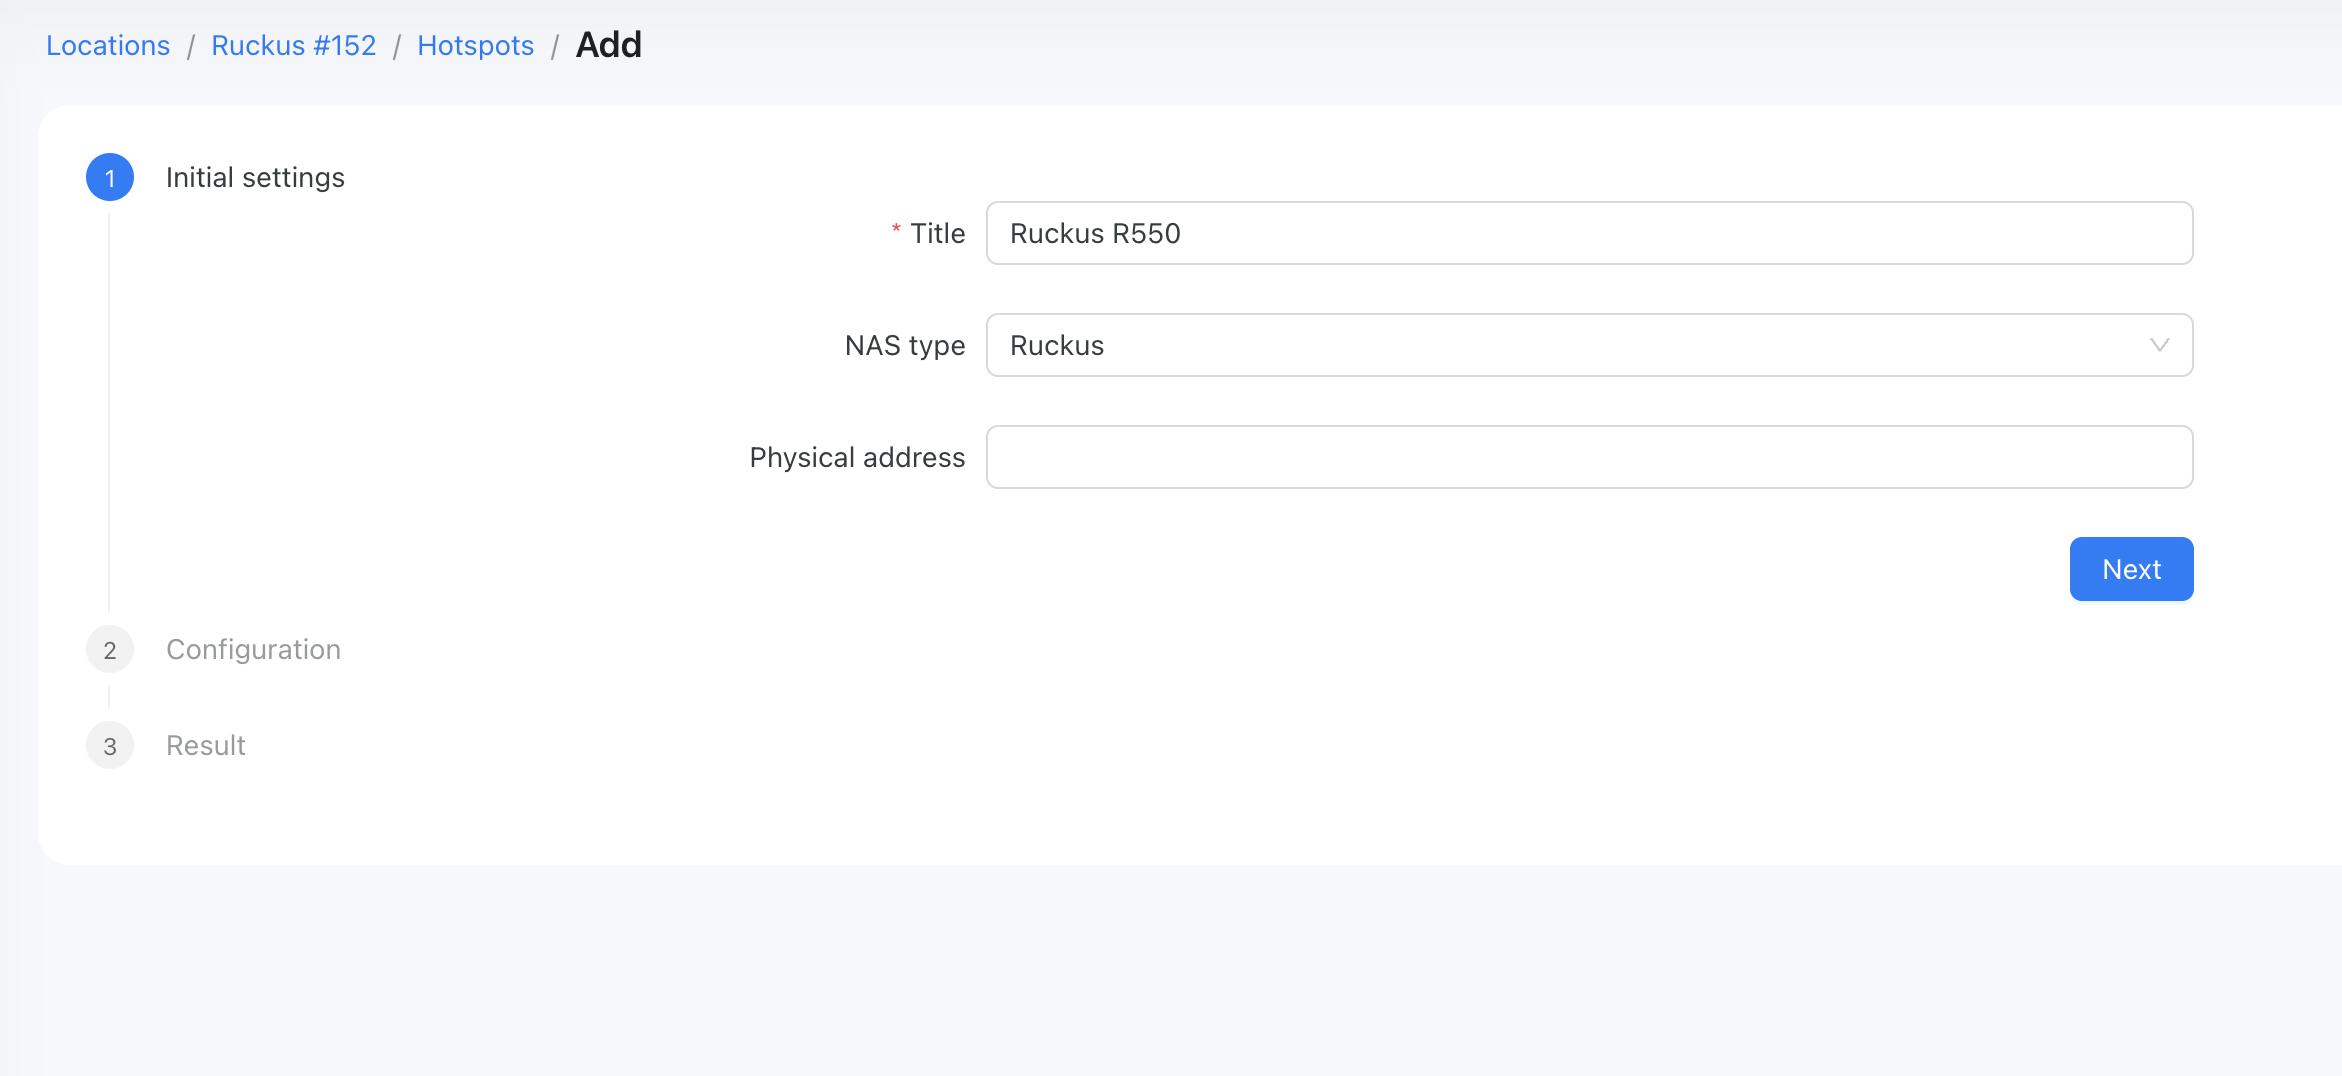
Adding a Hotspot in Powerlynx
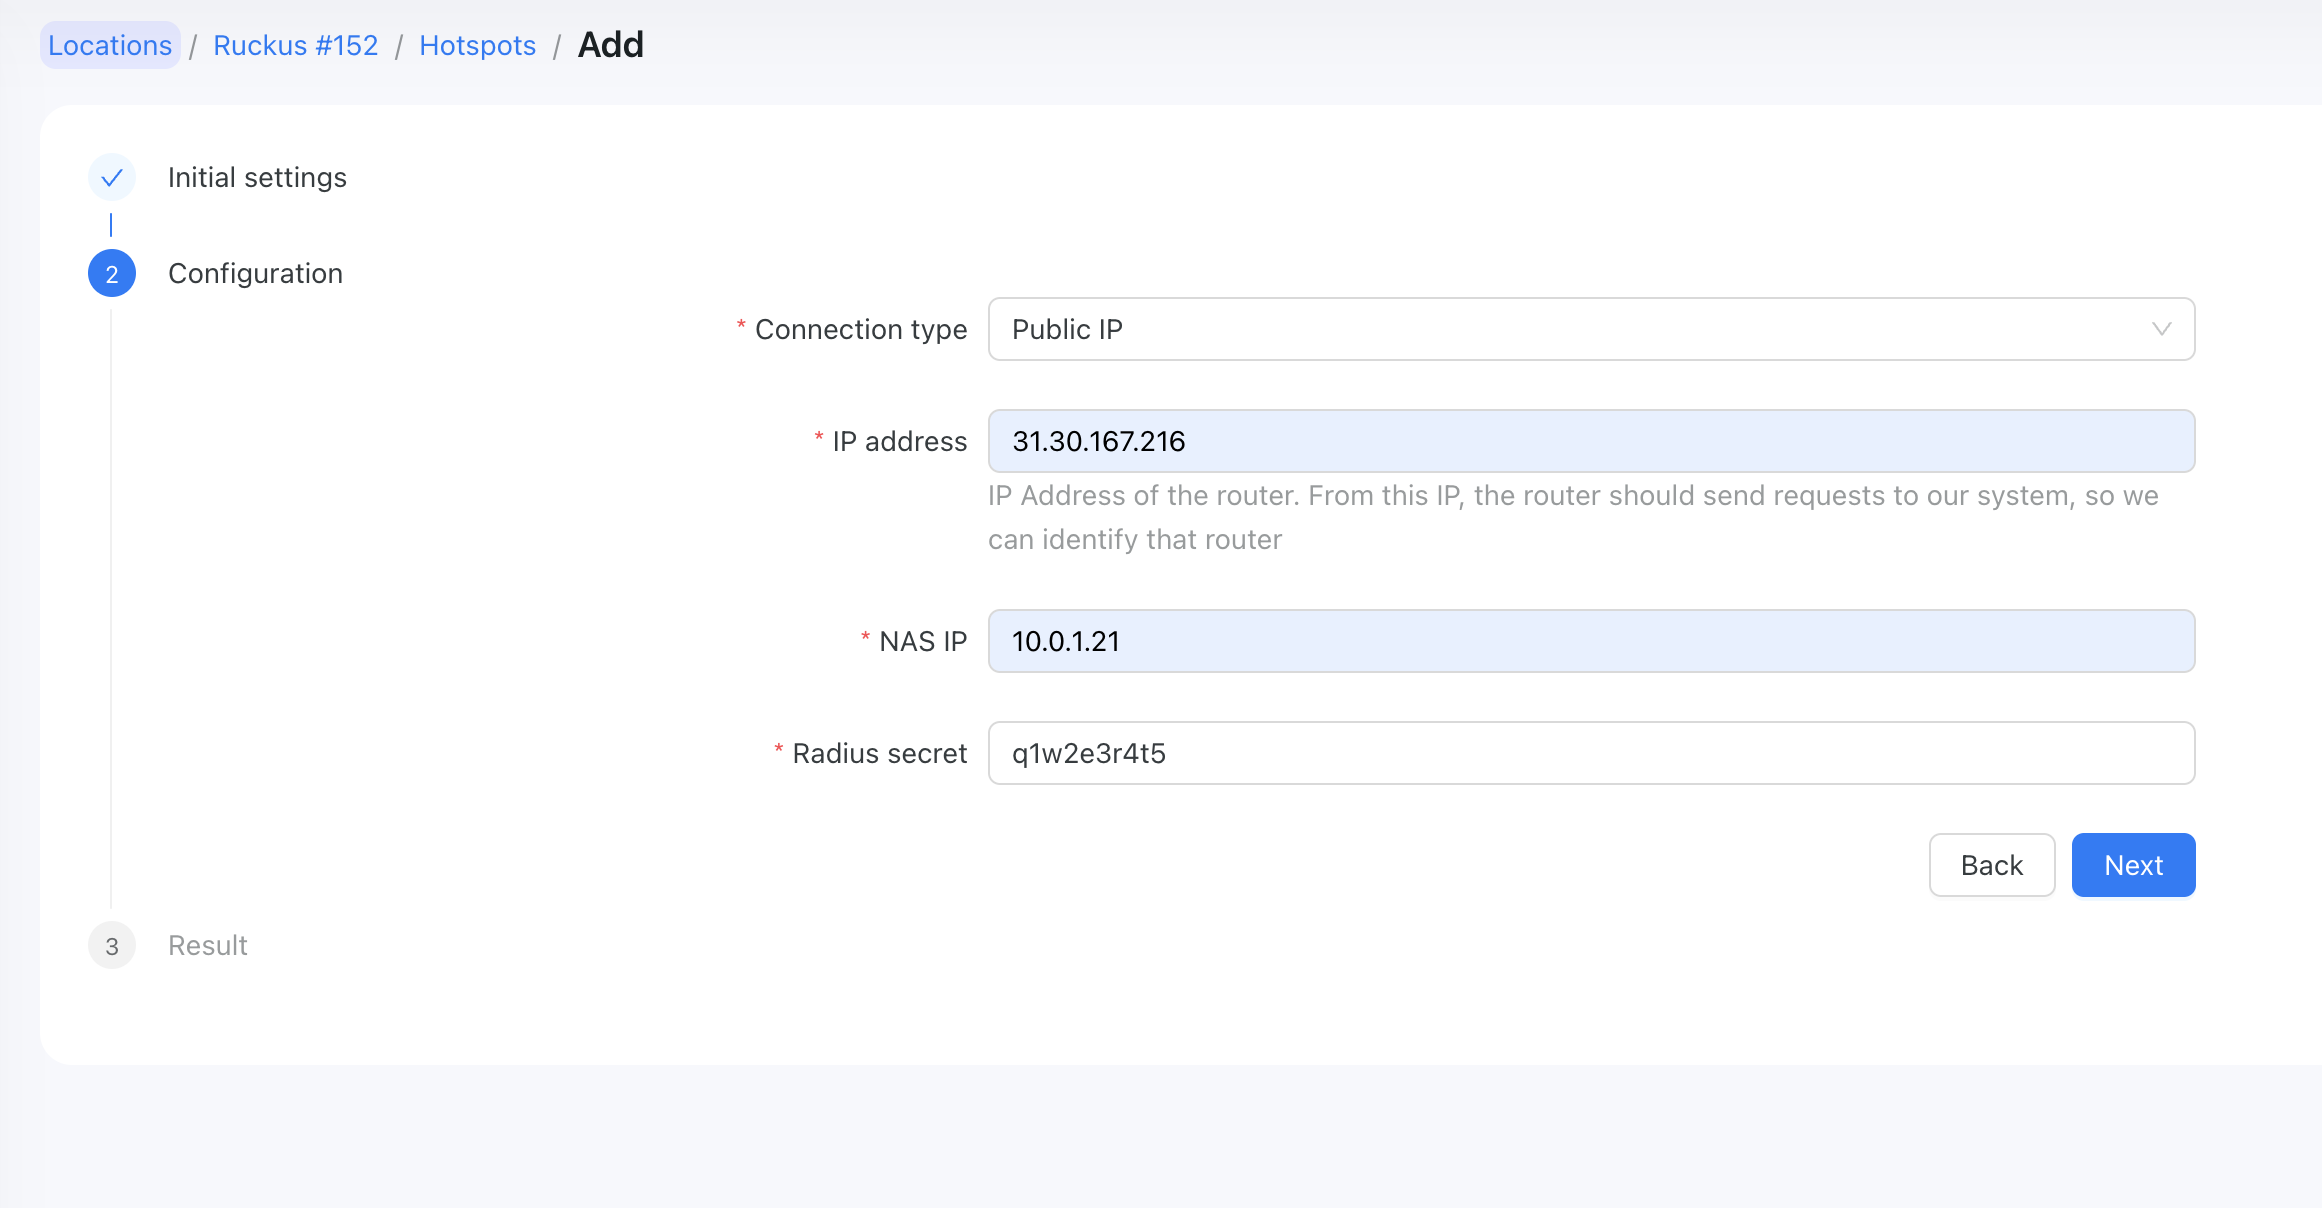
On the Powerlynx portal, navigate to the desired location, open the "Hotspots" tab, and click the "Add" button to fill out the form.
- Title - enter a title for your router
- NAS type - select
Ruckusas the NAS type - Connection type - the only available connection type for Ruckus devices is
Public IP - IP address - enter the IP Address of the router. This is the IP from which the router should send requests to our system, allowing us to identify it.
- NAS IP - specify the real IP source address for RADIUS packets. It is recommended that the RADIUS settings of the Mikrotik router have Src. address = NAS IP in Splynx.
- Radius secret - enter the RADIUS secret of your RADIUS server on the router
- Physical address - enter the address of your router (optional)
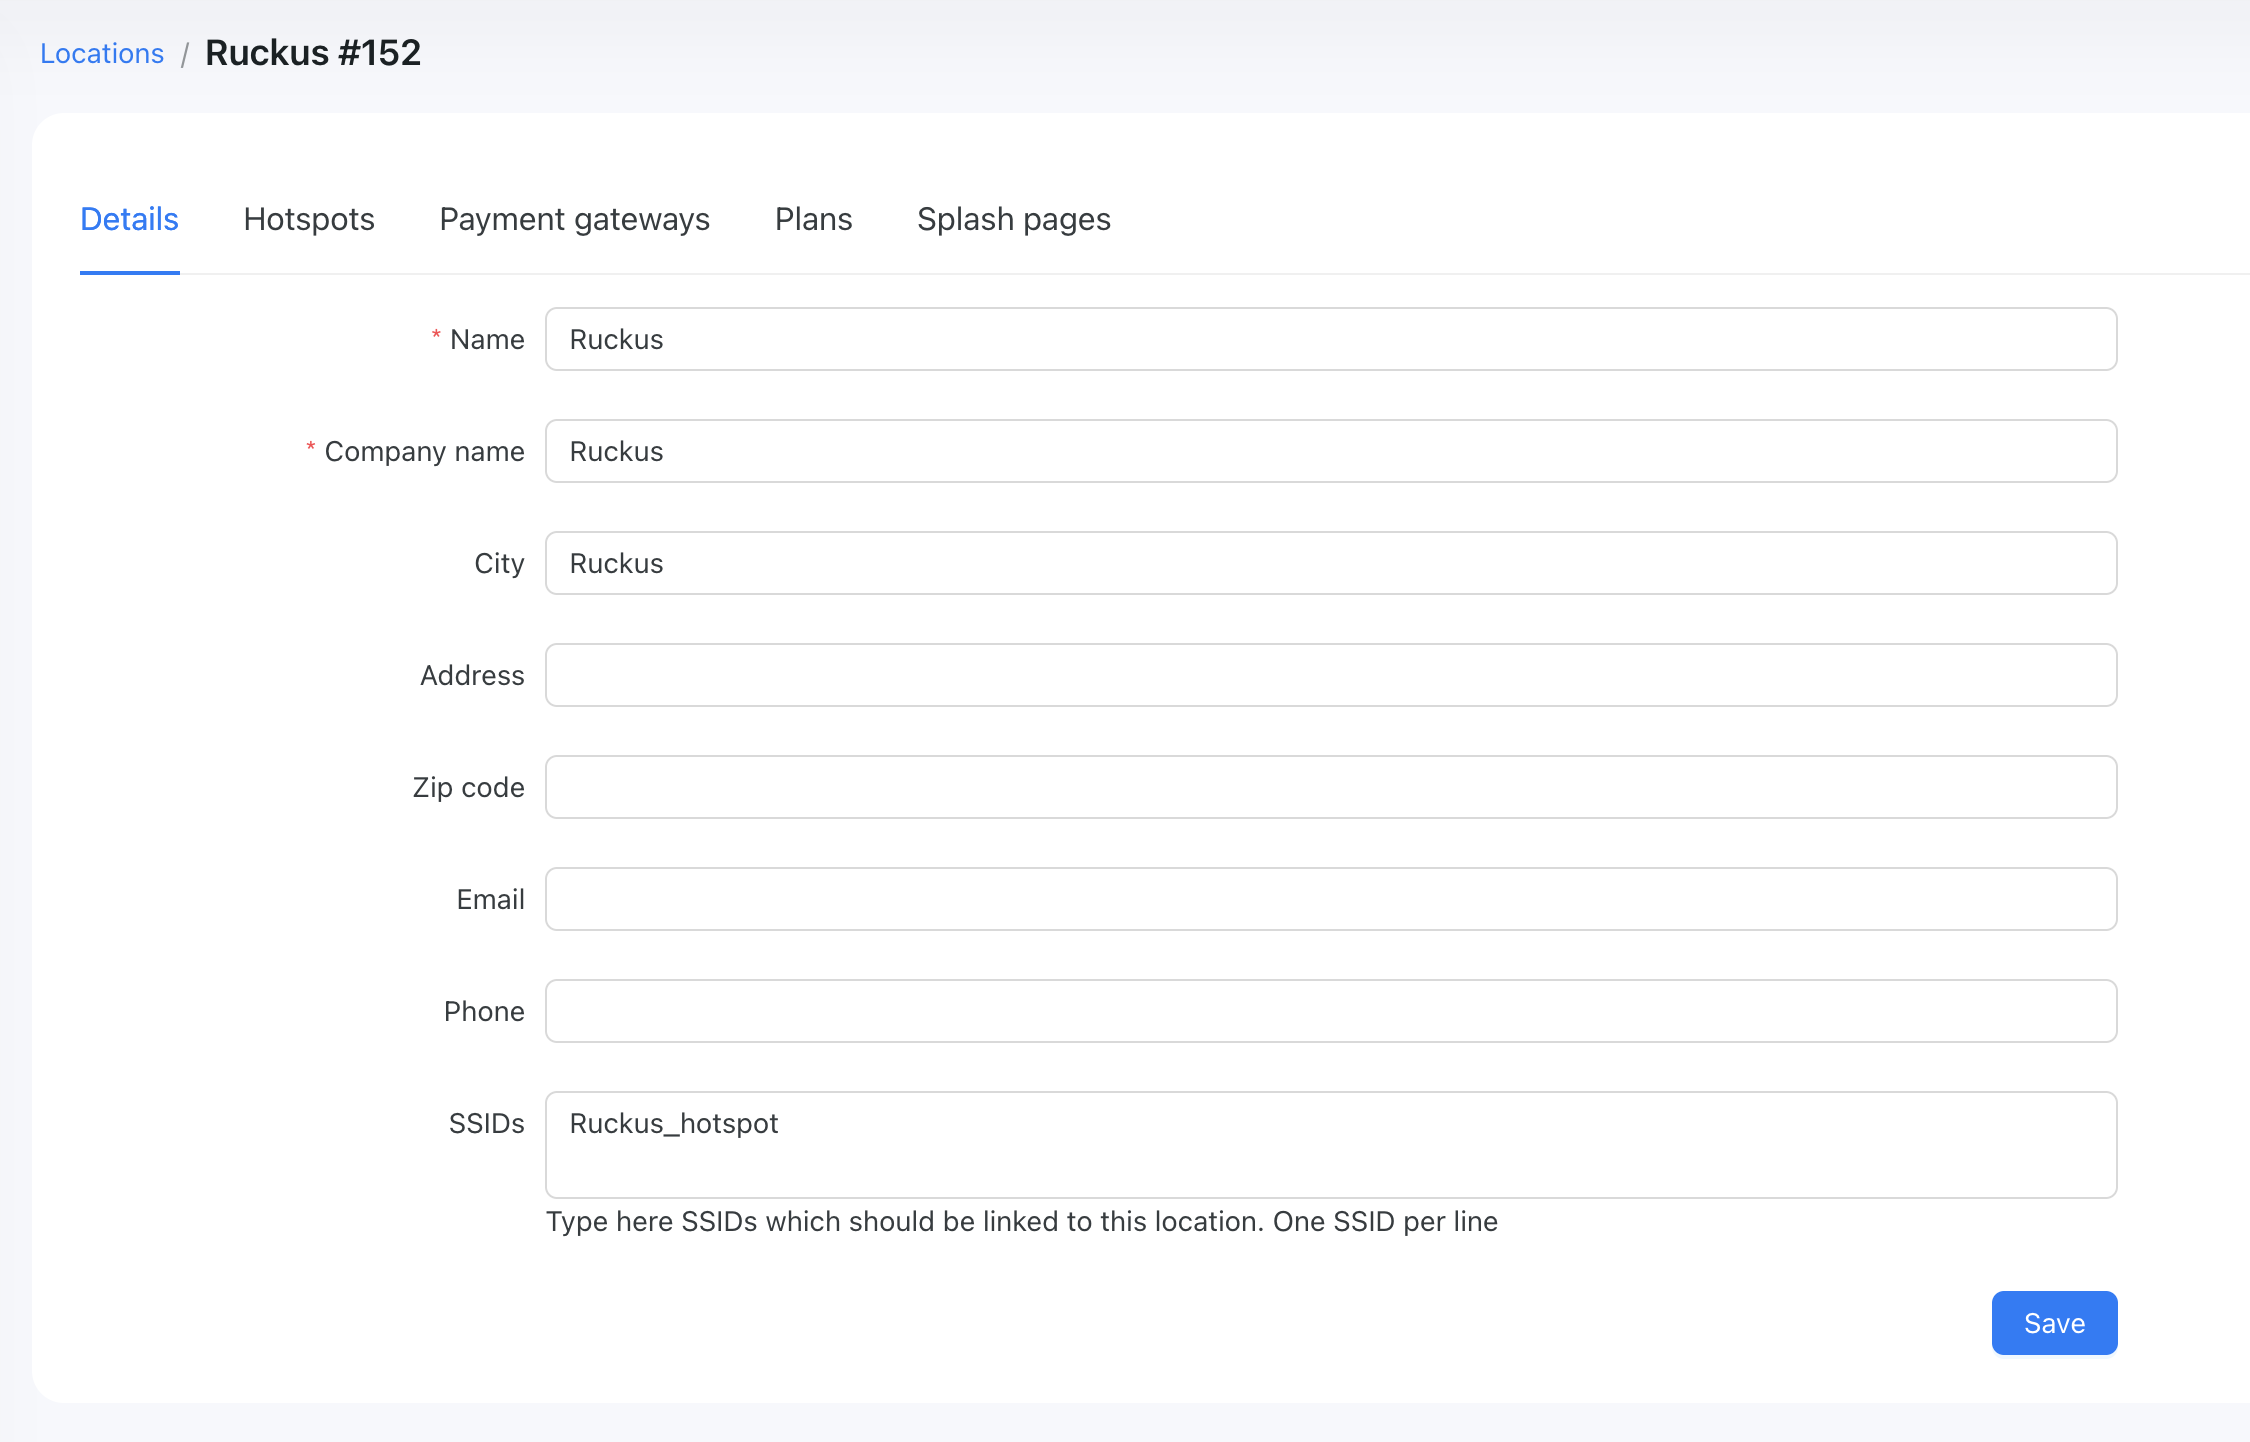
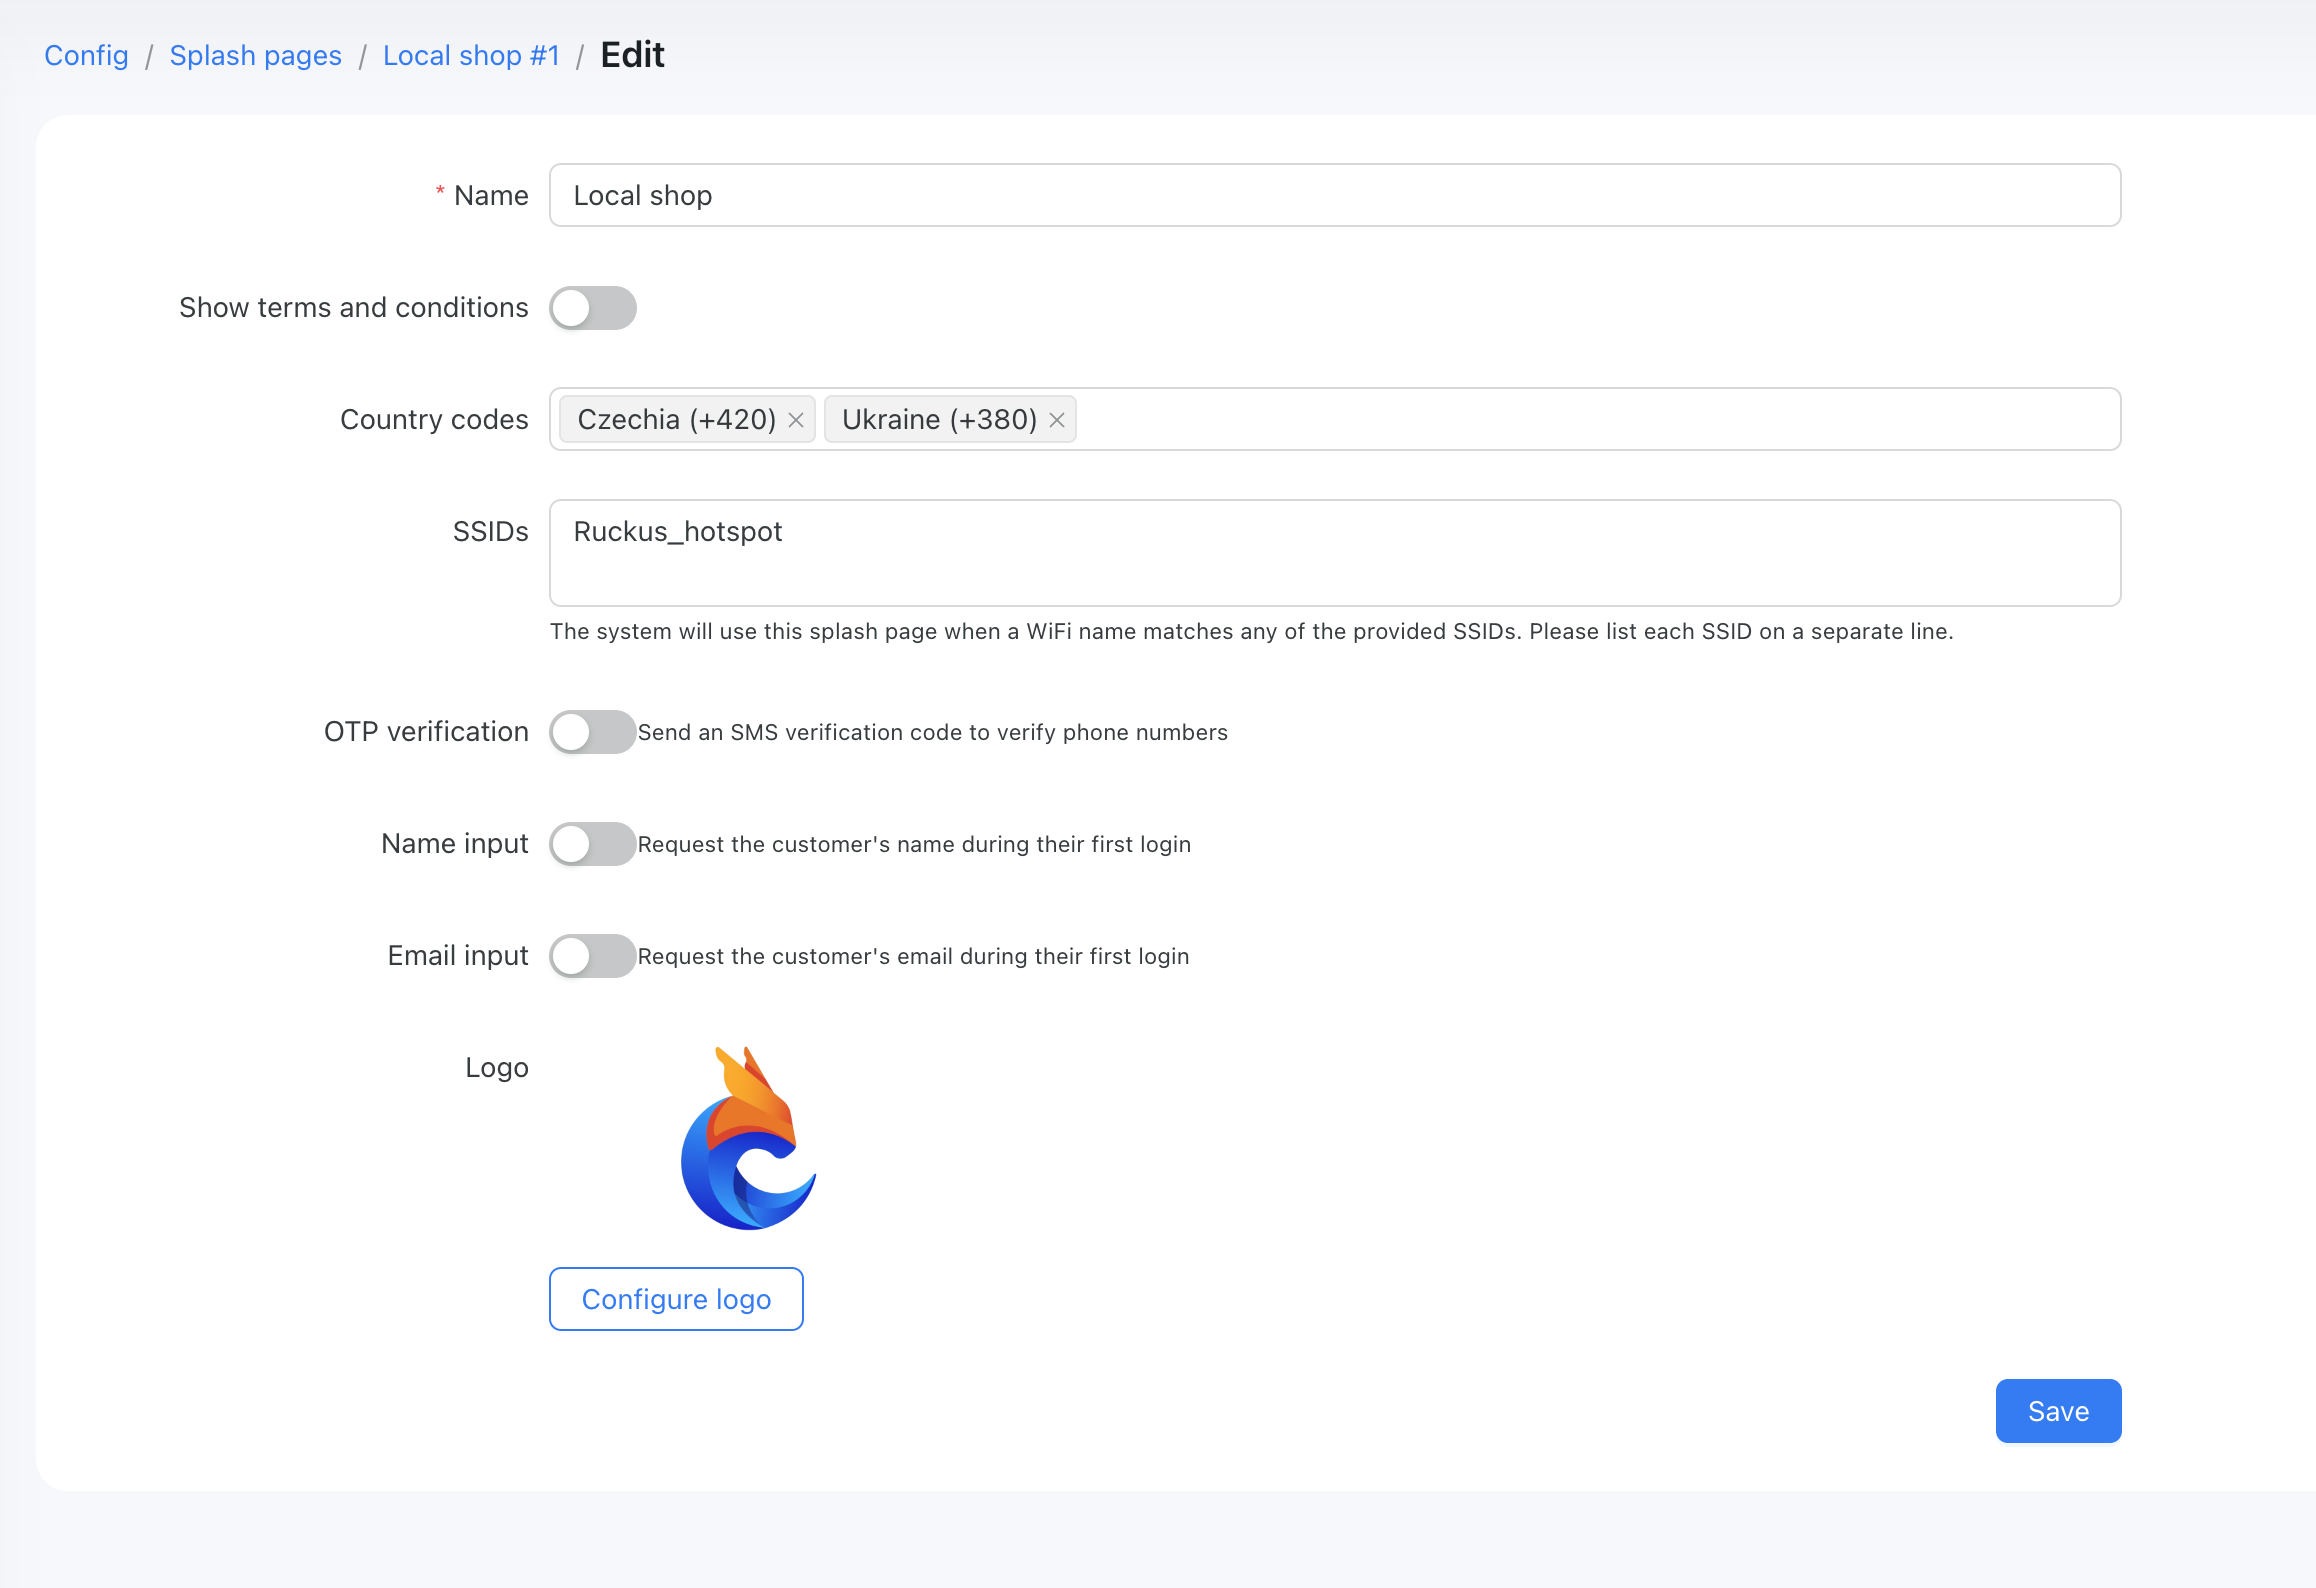
Setting the correct SSID
Add the WLAN name from the Ruckus device into the SSID field under your location and in the splash page section of the Powerlynx portal.