Connect Cambium hotspot with Powerlynx
In this manual, we will guide you on how to add a Cambium router as a hotspot in Powerlynx. In our example, we are using a Cambium router with wireless interfaces. Customers will connect to the Wi-Fi provided by the router.
Navigate to the desired location, open the "Hotspots" tab, and click on the "Add" button:
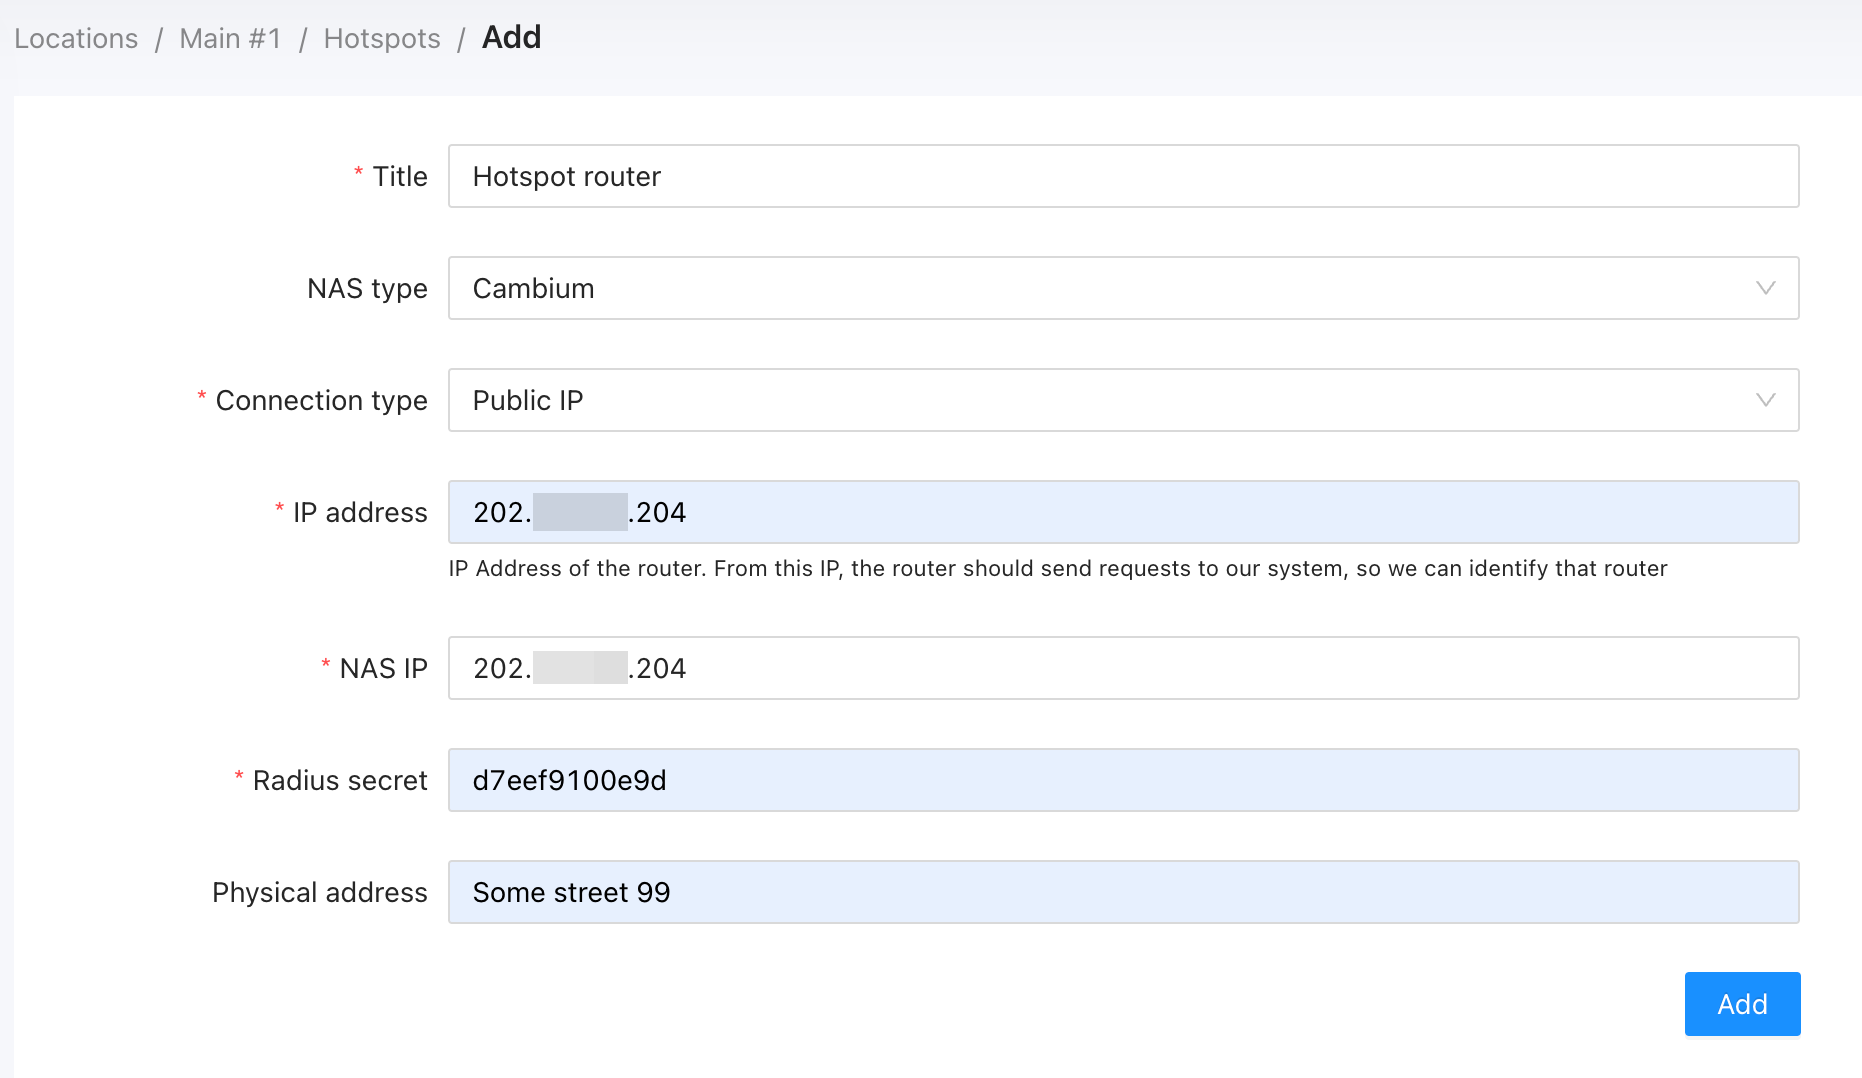
Title - title for your router;
NAS type - select Cambium as a NAS type;
Connection type - The only available connection type for Cambium devices is "Public IP";
IP address - IP Address of the router. From this IP, the router should send requests to our system, so we can identify that router;
NAS IP - the real IP source address for radius packets. It is recommended that in the Radius settings of the Mikrotik router Src. address = NAS IP in Splynx.
Radius secret - RADIUS secret of your RADIUS server on the router;
Physical address - address of your router (optional).
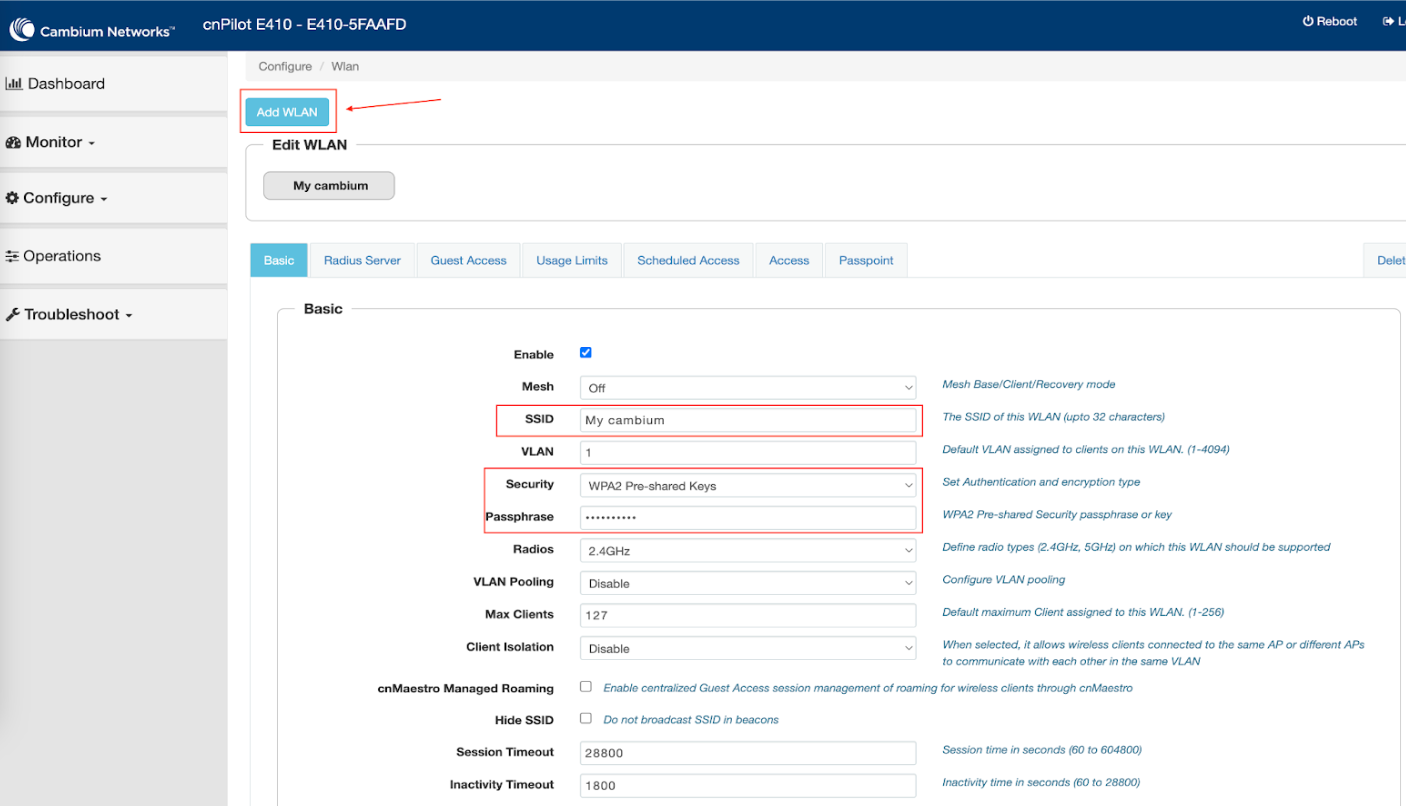
After adding Hotspot to Powerlynx, configure your Cambium device as follows:
- Navigate to
Configure/WLAN. - Click on
Add WLAN. - Fill out the form based on your requirements and click the Save button.
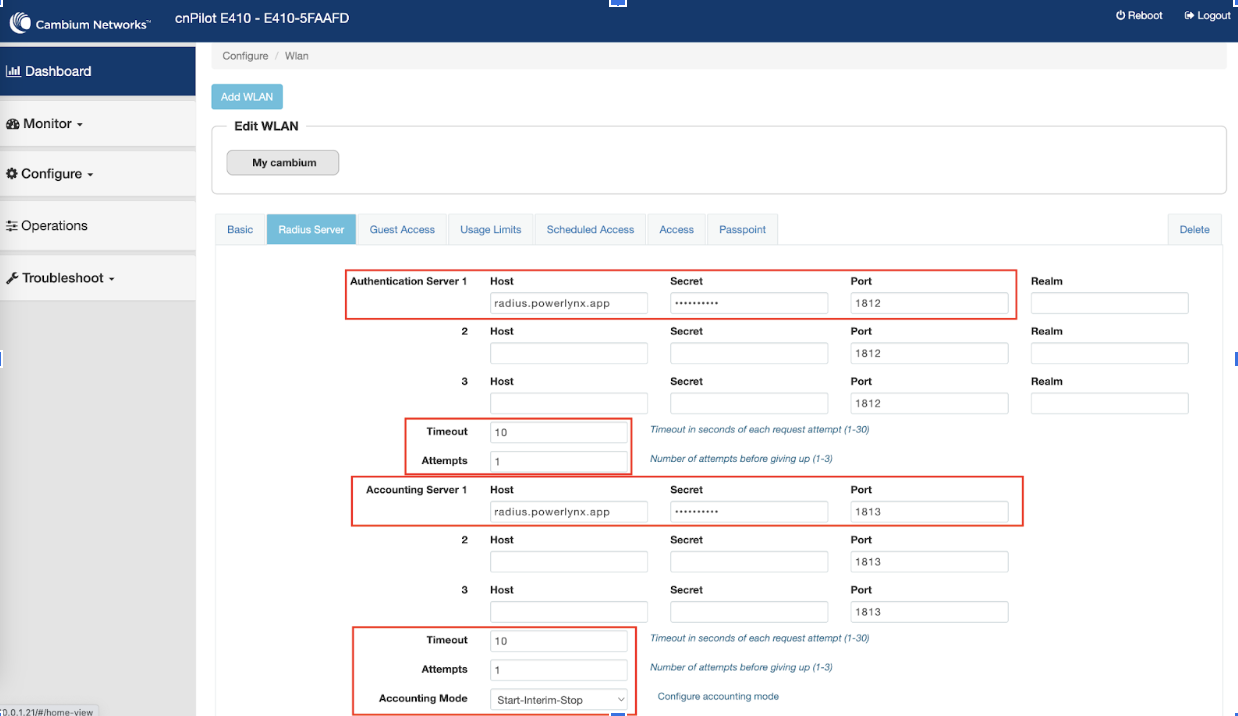
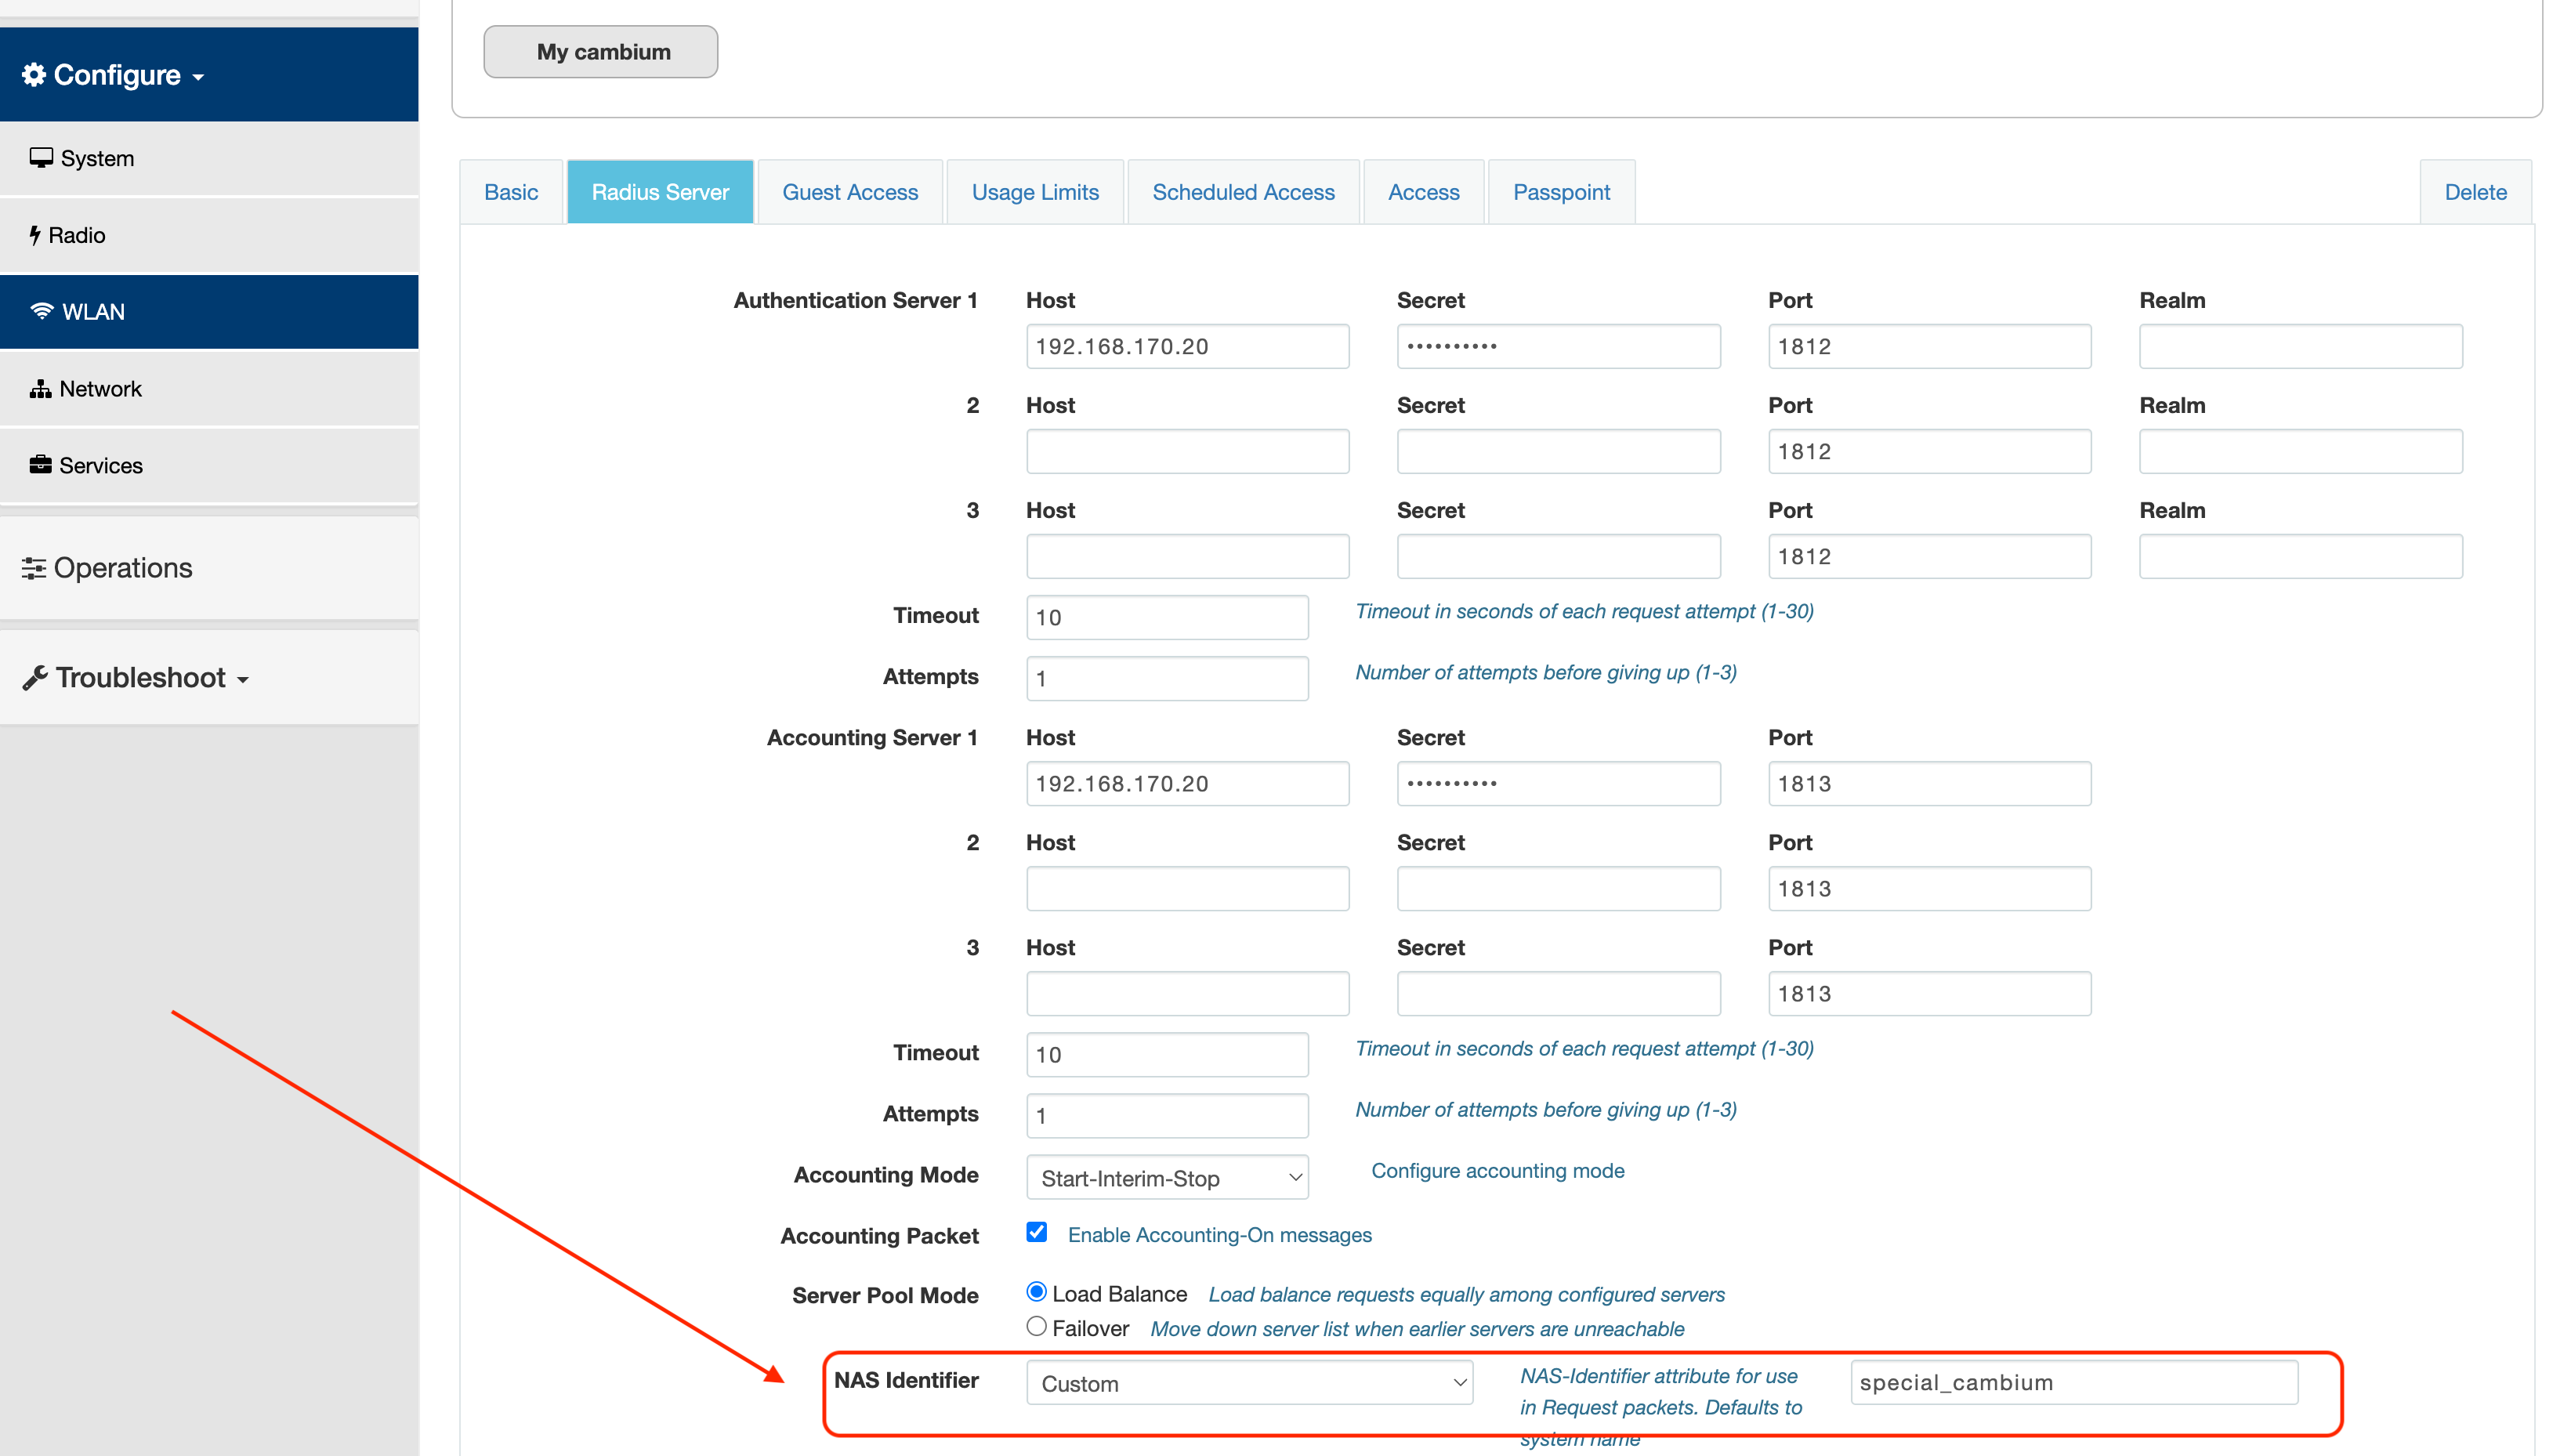
- Go to the Radius Server tab, fill the form and save:
Authentication Server 1:
Host - radius.powerlynx.app

Secret - Hotpost secret from the Hotspot in Powerlynx

Port - 1812

Timeout - 10

Attempts - 1
Accounting Server 1:
Host - radius.powerlynx.app
Secret - Hotpost secret from the Hotspot in Powerlynx
Port - 1813
Timeout - 10
Attempts - 1
Account Mode - Start-Interim-Stop
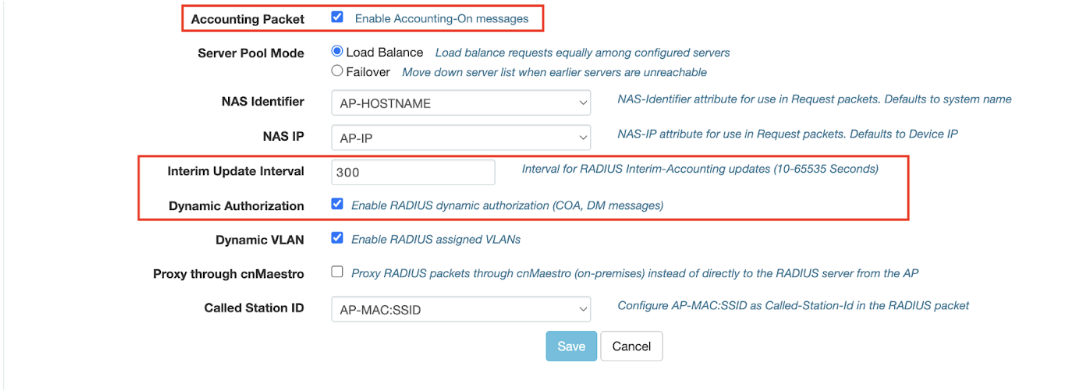
Accounting Packet - On (Enable Accounting-On messages)
Server Pool Mode - Load Balance
NAS Identifier - AP-HOSTNAME
NAS IP - AP-IP
Interim Update Interval - 300
Dynamic Authorization - On
Dynamic VLAN - On
Proxy through cnMaestro - Off
Called Station ID - AP-MAC:SSID
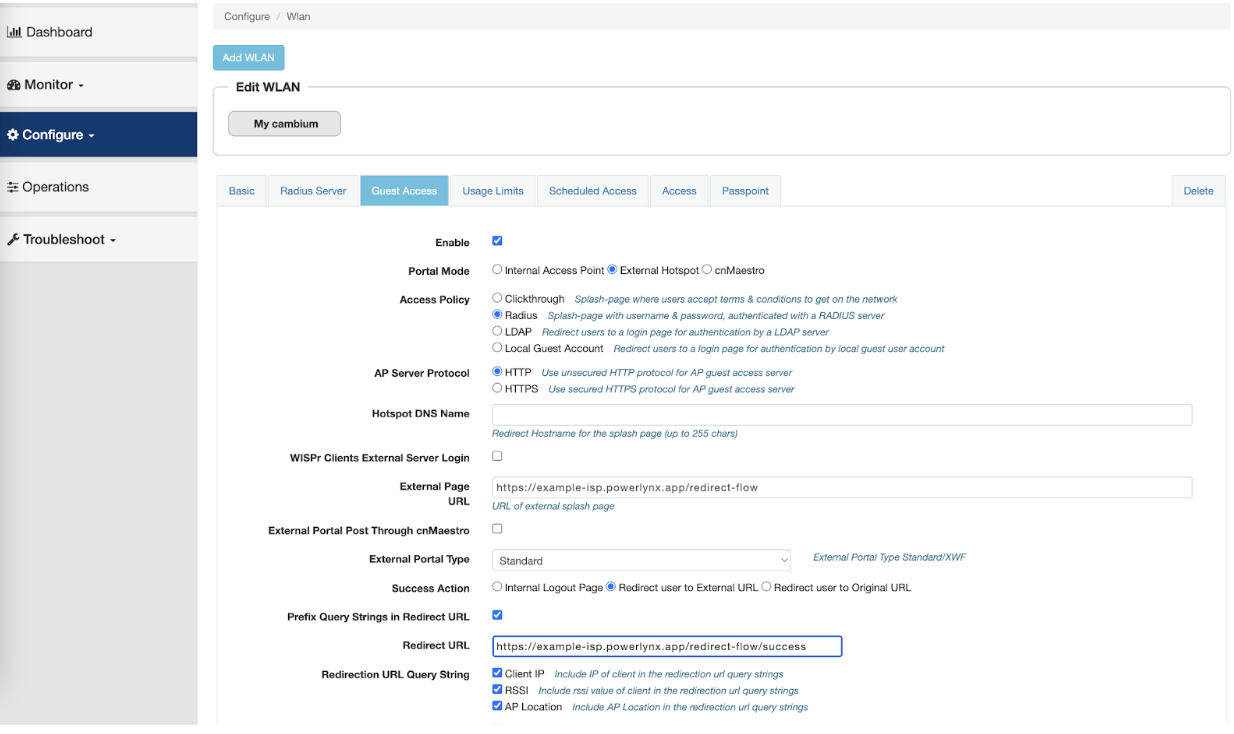
- Go to the Guest Access tab, fill the form and save:
Enable - On
Portal Mode - External Hotspot
Access Policy - Radius
AP Server Protocol - HTTP
External Page URL - https://{YOUR_DOMAIN}/redirect-flow
External Portal Post Through cnMaestro - Off
External Portal Type - Standart
Success Action - Redirect user to External URL
Prefix Query Strings in Redirect URL - On
Redirect URL - https://{YOUR_DOMAIN}/redirect-flow/success
Redirection URL Query String - Client IP, RSSI, AP Location
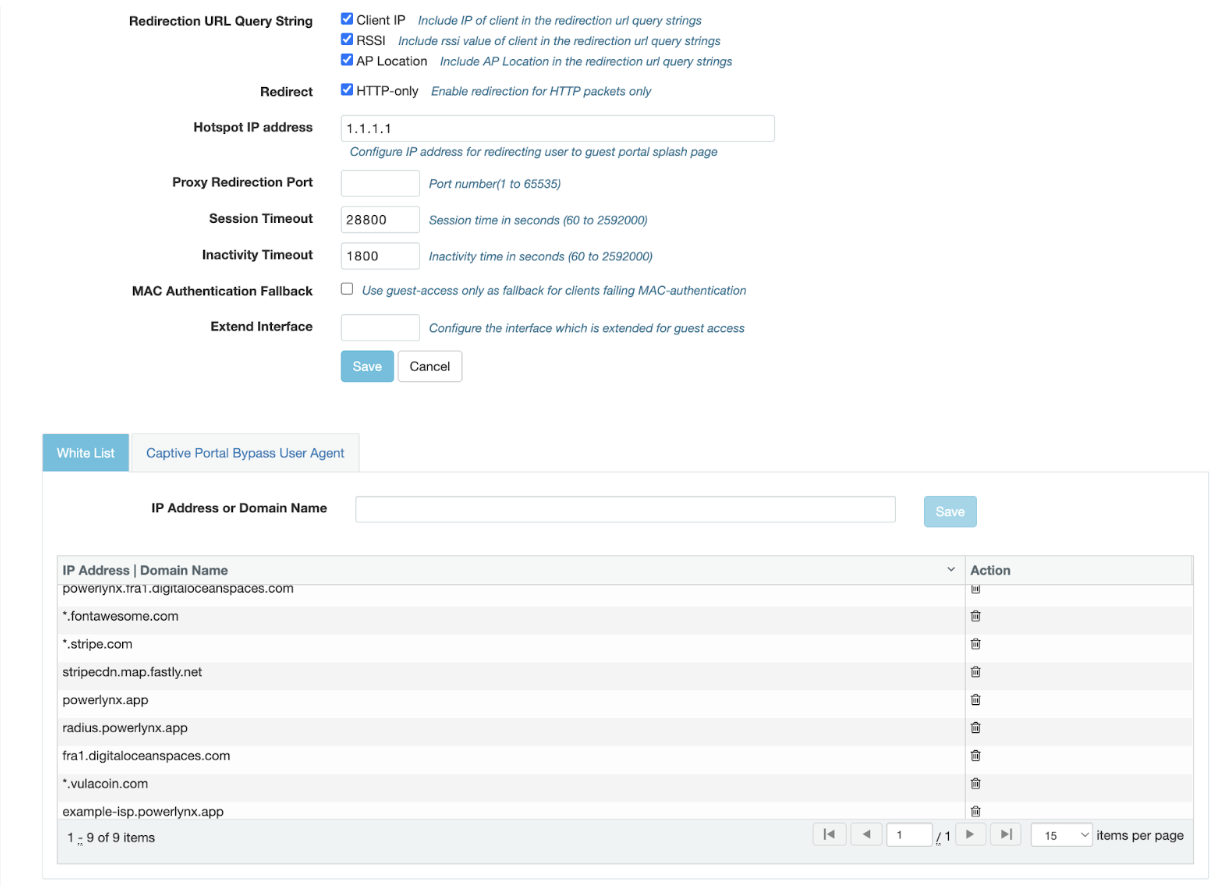
Redirect HTTP-only - On
- On bottom of the same page select White List tab and add all these records:
*.digitaloceanspaces.com
*.fontawesome.com
*.powerlynx.app
*.digitaloceanspaces.com
*.fontawesome.com
*.powerlynx.appThe white list records depends on what payment gateway you are going to use. Each payment gateway has its own hosts to allow in this list.
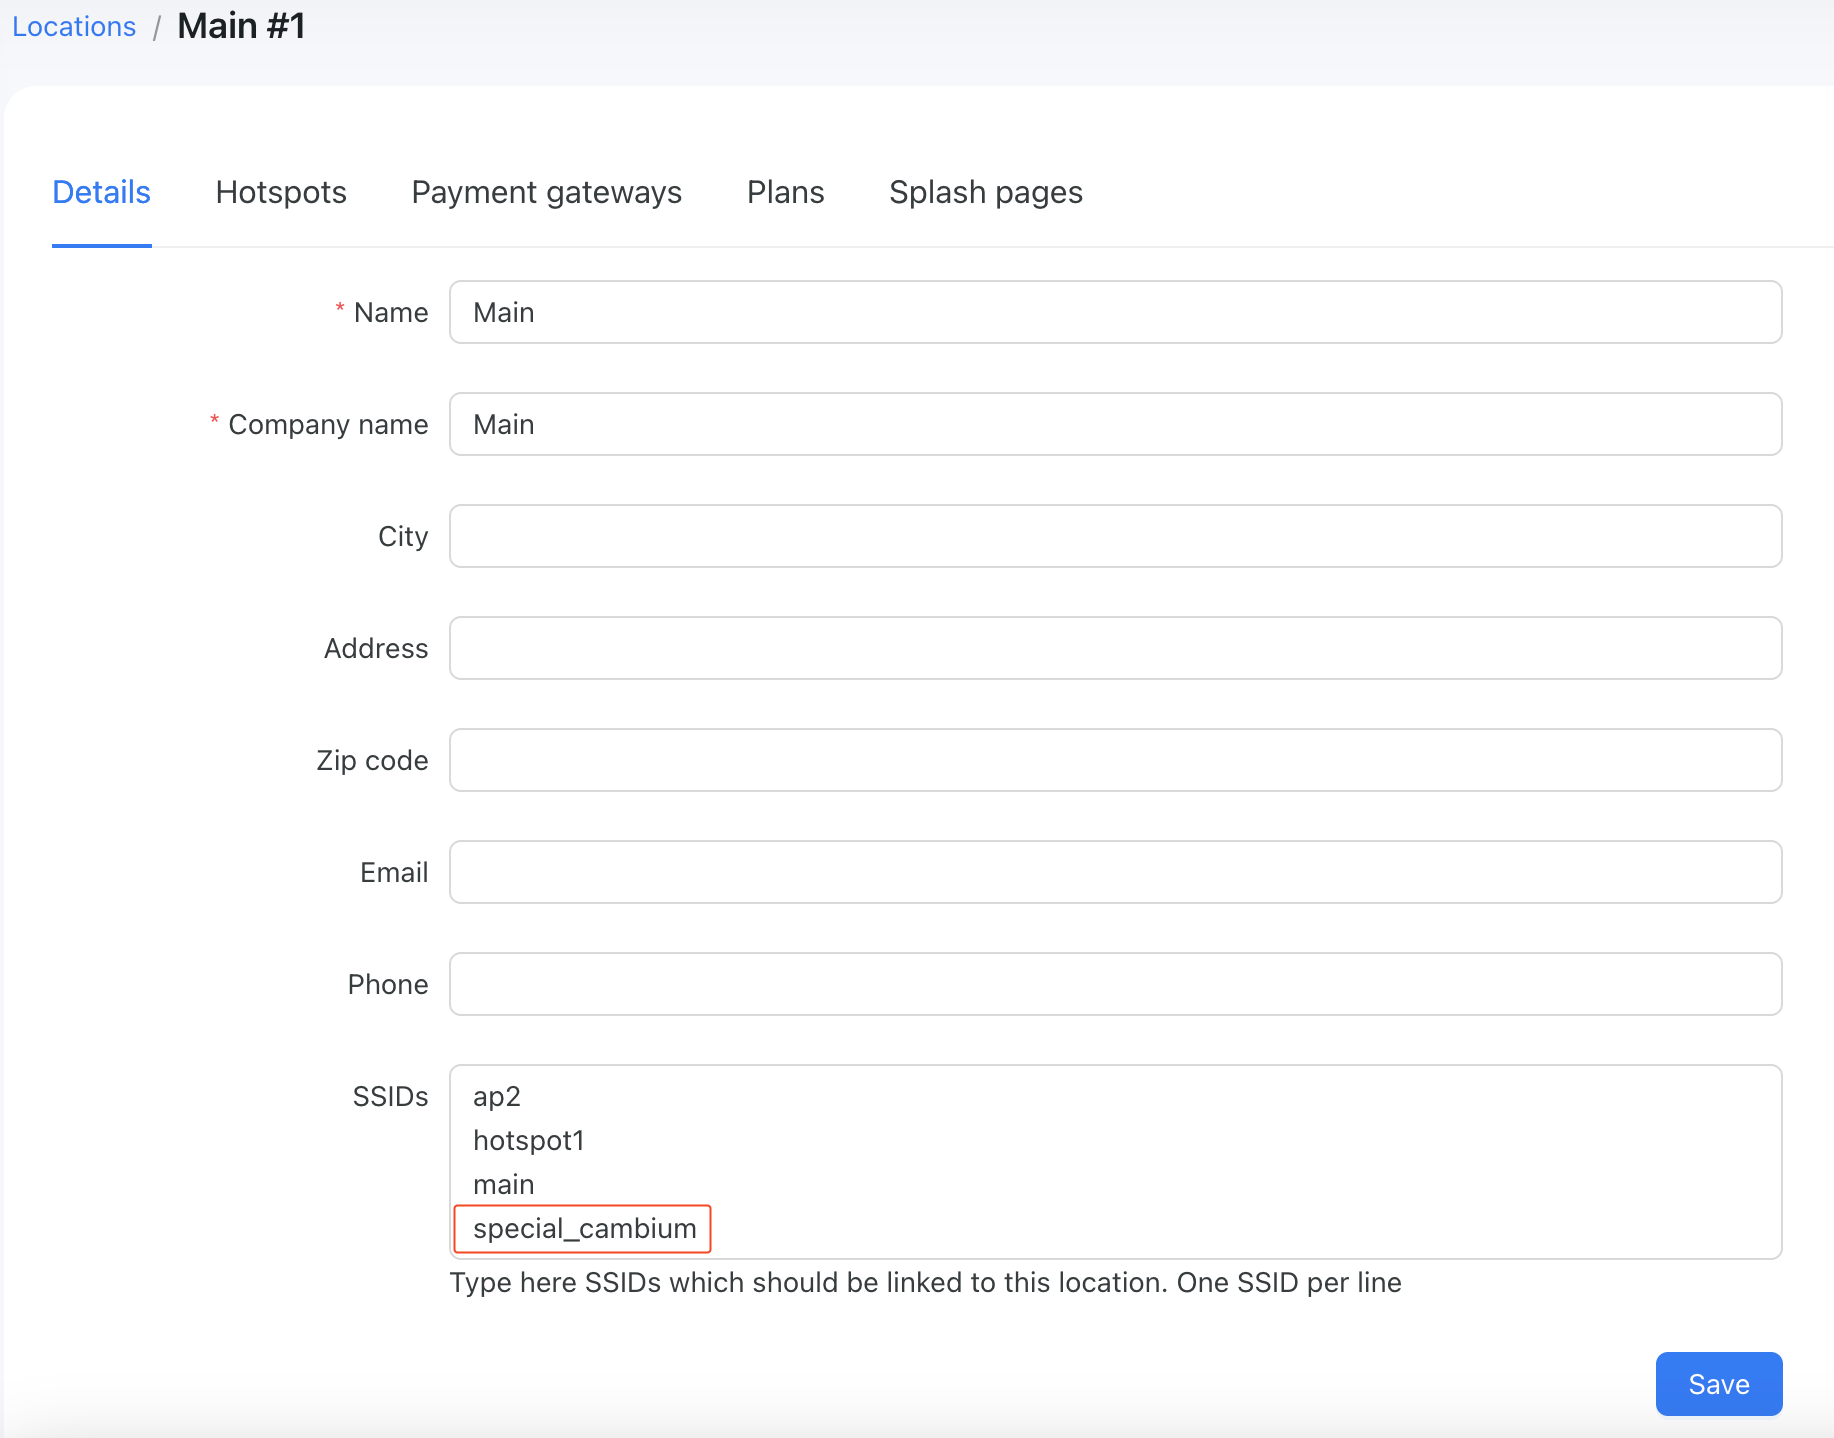
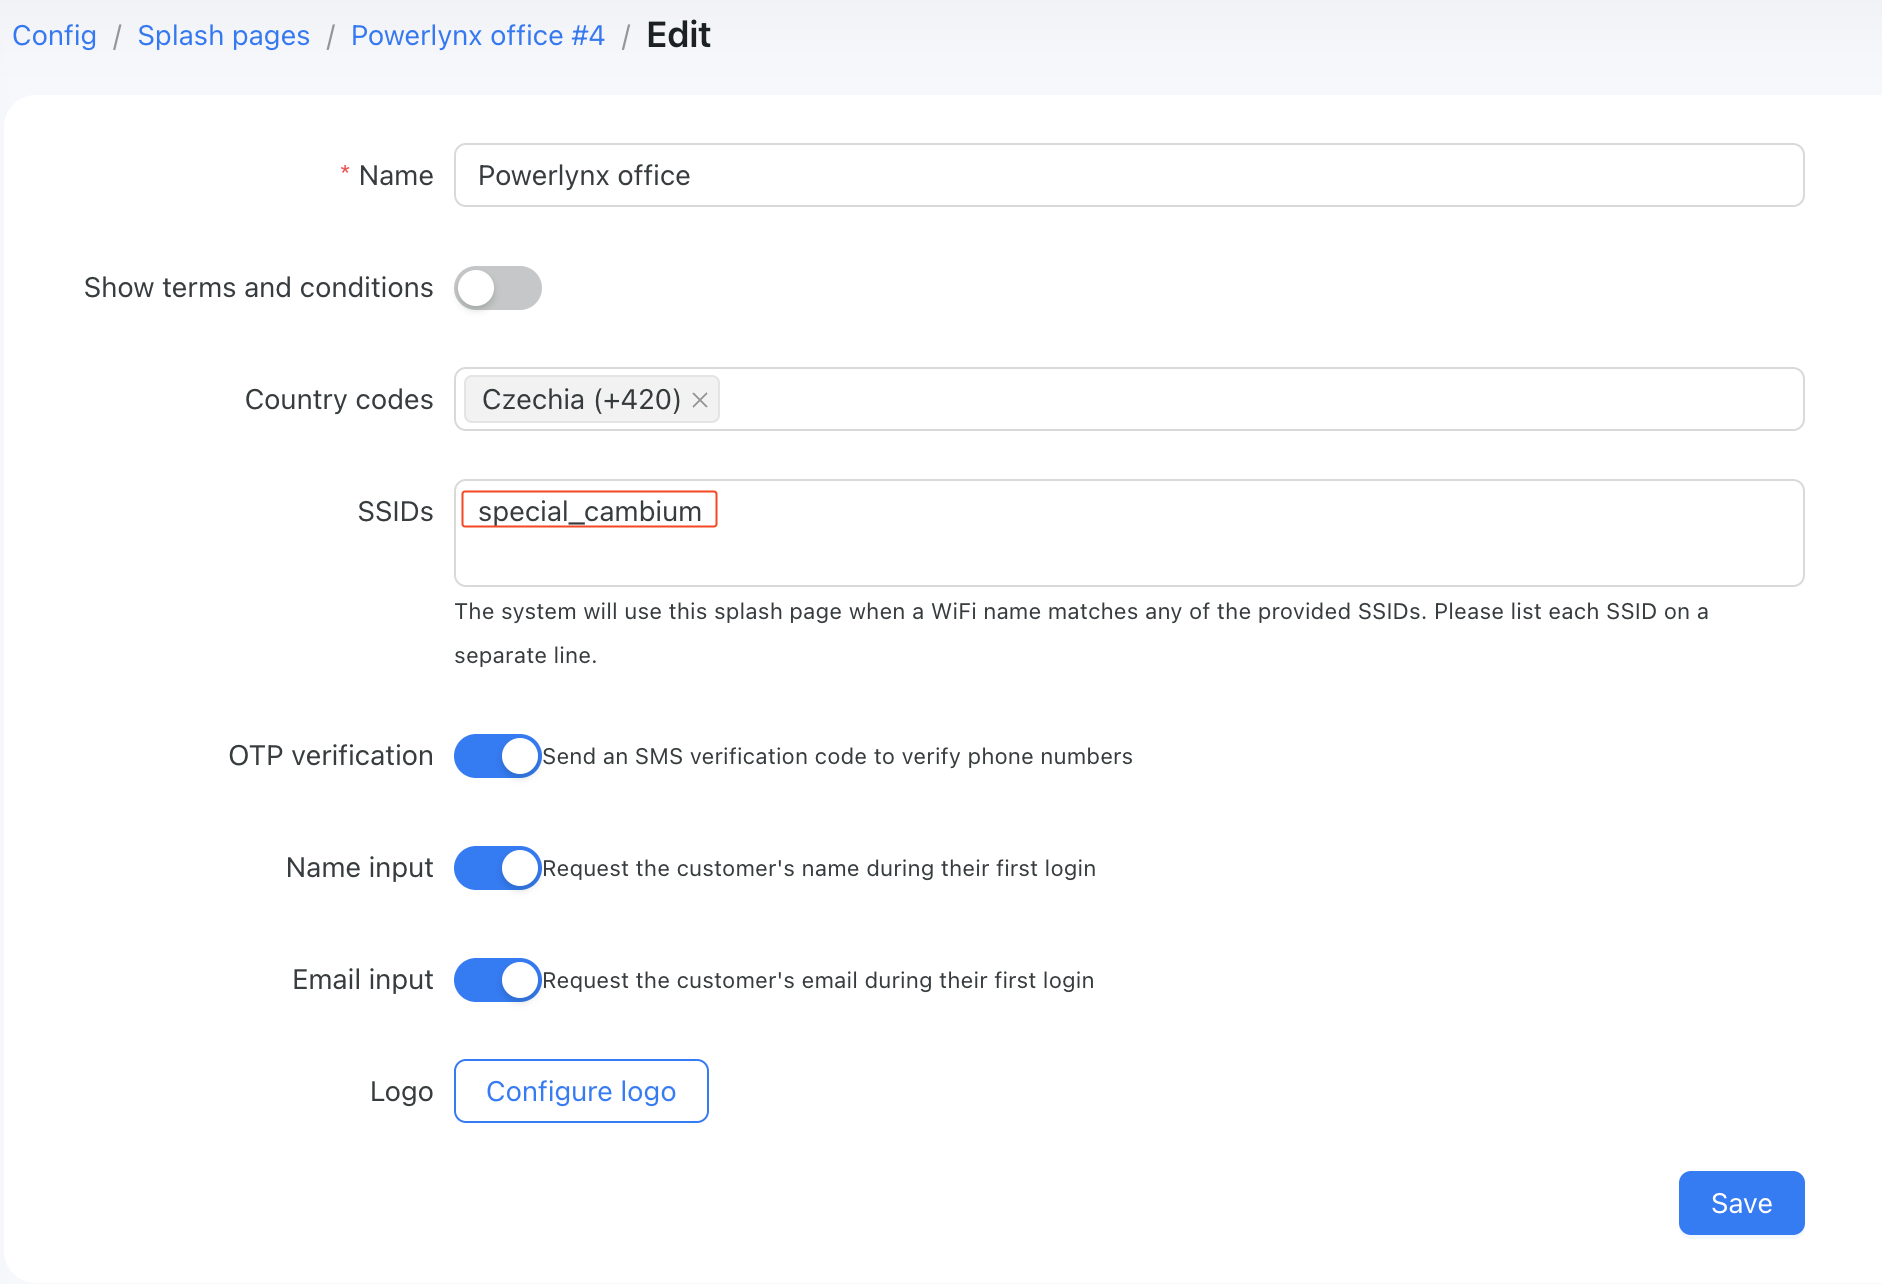
- Powerlynx SSIDs
Add the NAS Identifier name into the SSID field under your location and under your splash page:
Make sure that on the router, you set NAS Identifier to custom and created some unique identifier name:

It is crucial to add the NAS Identifier in both places mentioned. It's not enough to add the NAS Identifier only under Location details or only under the splash page details: