This section describes Powerlynx tools designed to simplify your everyday use of the platform.
Mass create vouchers tool
This tool is designed to create vouchers for multiple customers in bulk. For example, if you have 200 customers and want to give them each 1-day internet access without making the data plan publicly available on the splash page, you can use this tool to:
- Select the customers
- Choose the data plan
- Generate vouchers for them
When the customers connect, they activate their individual voucher and gain internet access.
How to use:
First, you need to create a target group of customers for whom the vouchers will be generated. Go to Marketing → Target Groups and create a new group.
Navigate to
Config/Tools/Mass create voucherstool:
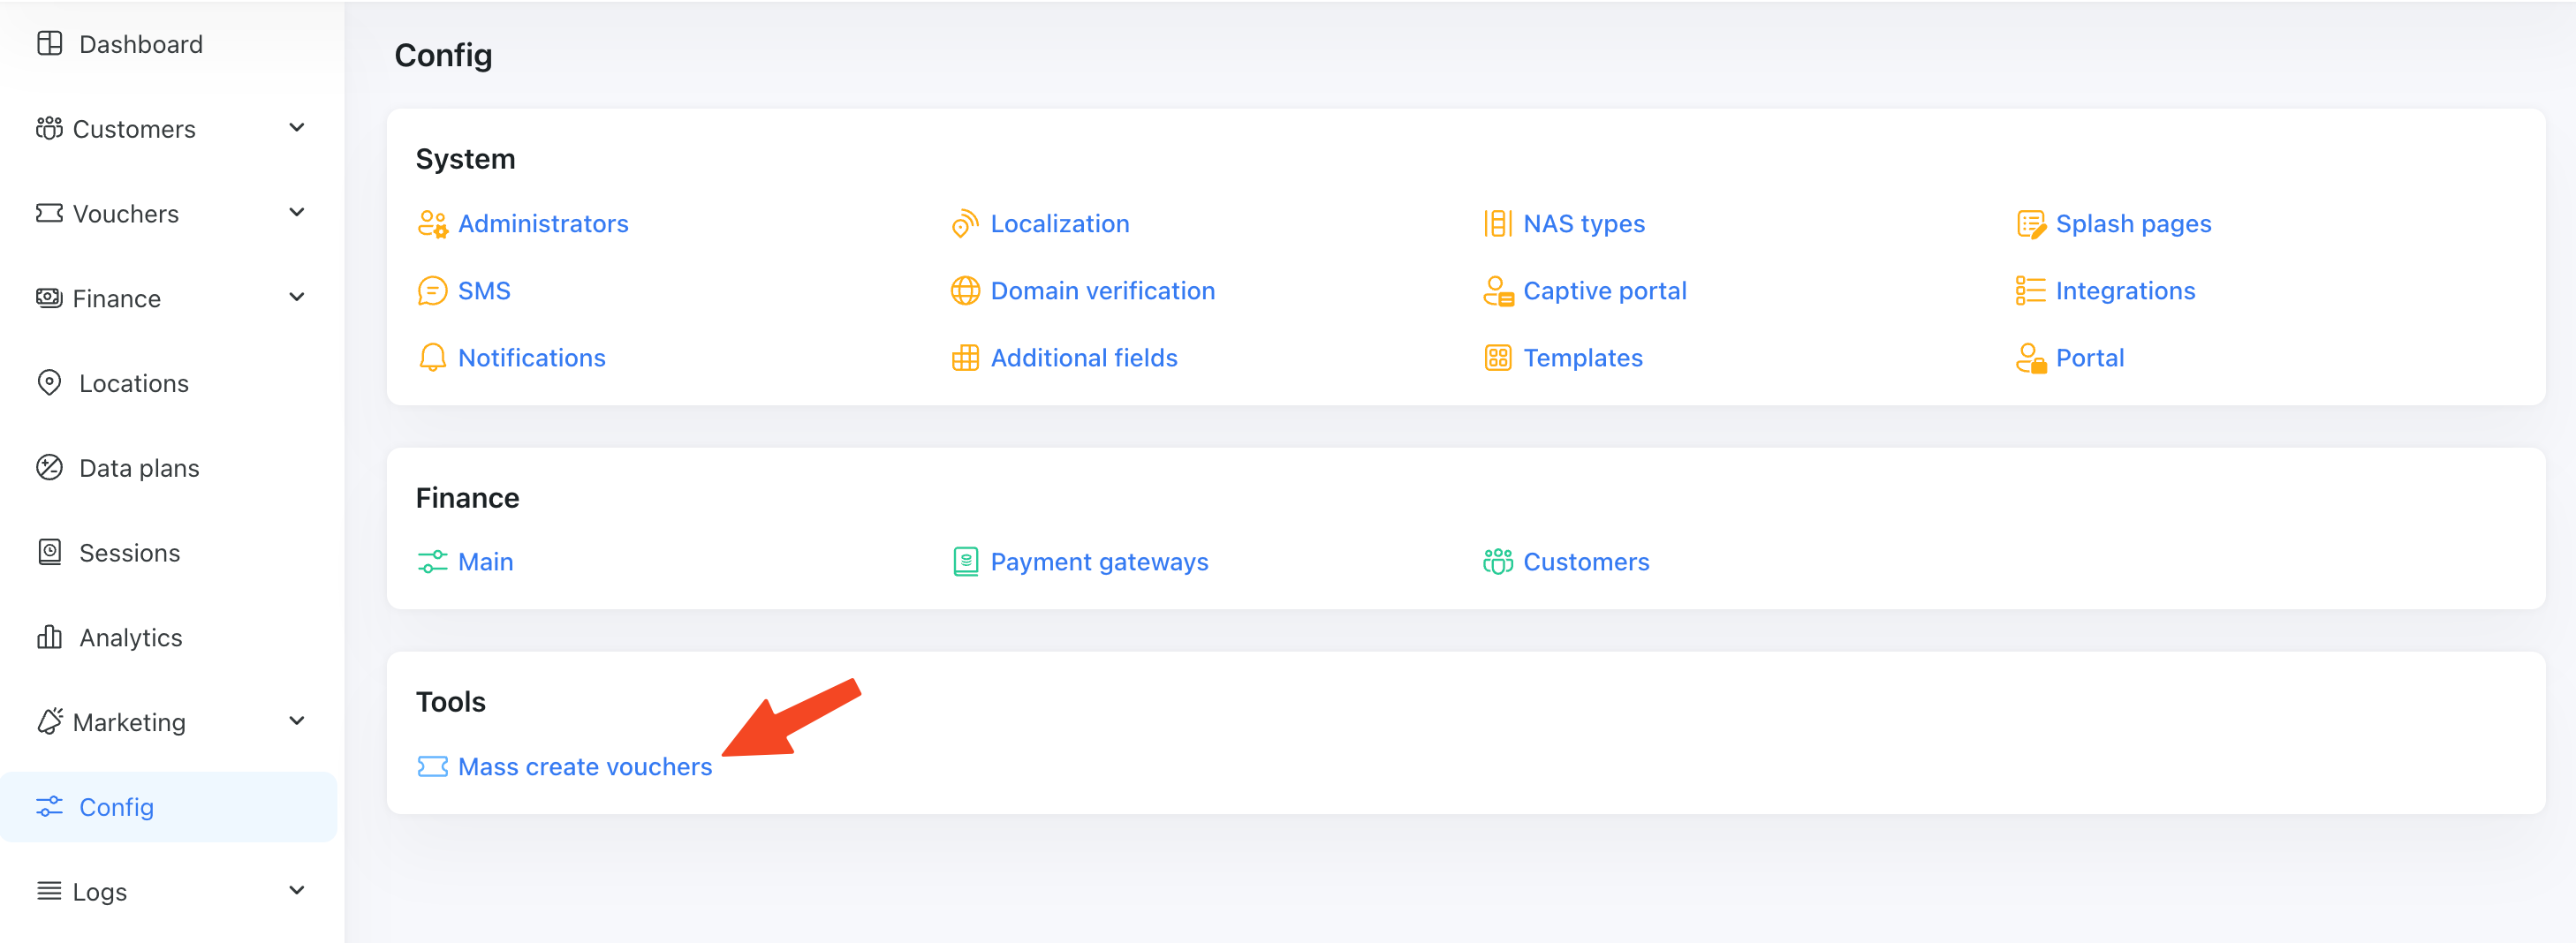
and click the Add button.
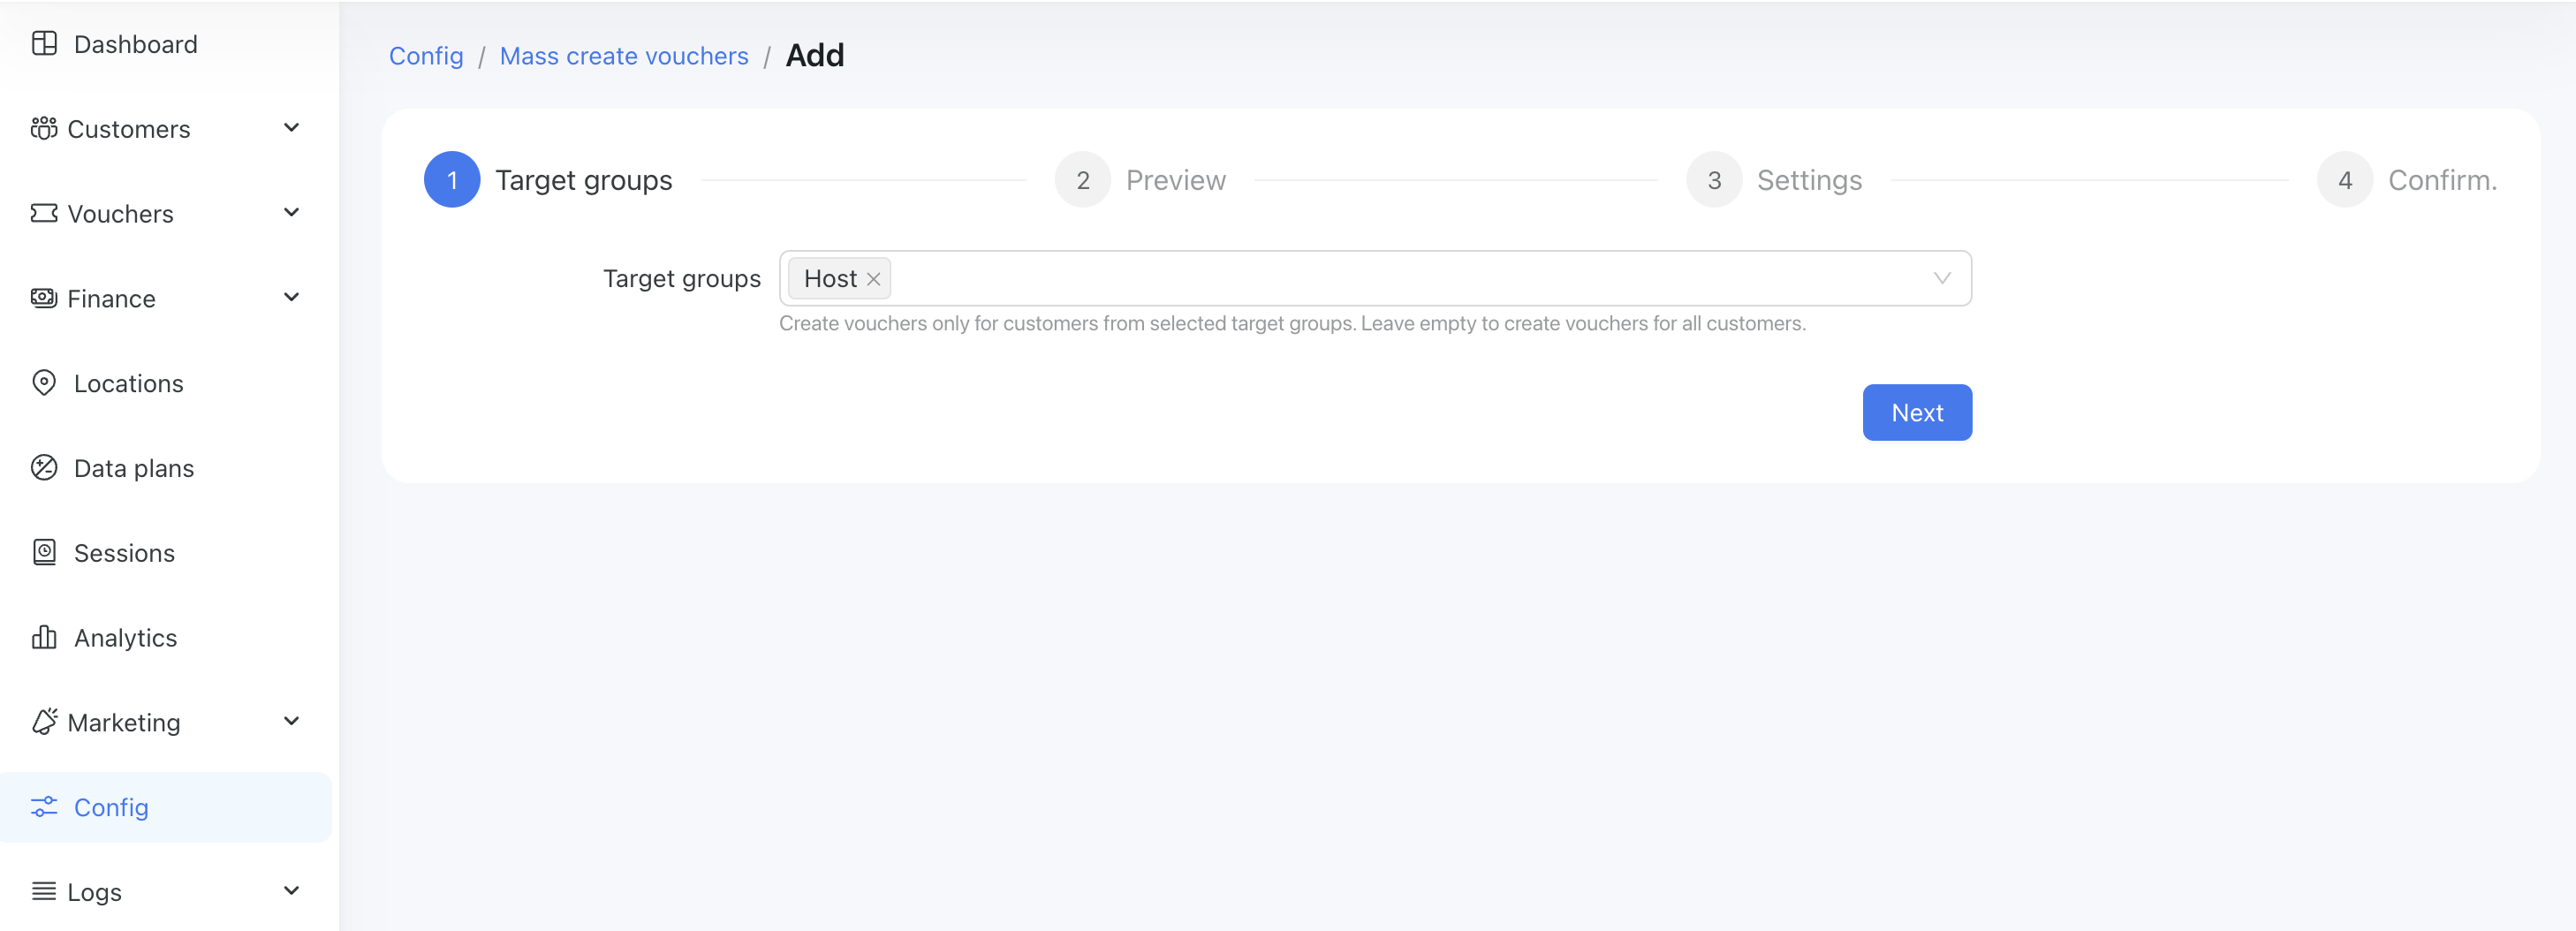
- In Step 1, select your target group containing the filtered customers:
- In Step 2, review the selected customers and deselect any if necessary:

- In Step 3, select the location and desired data plan:
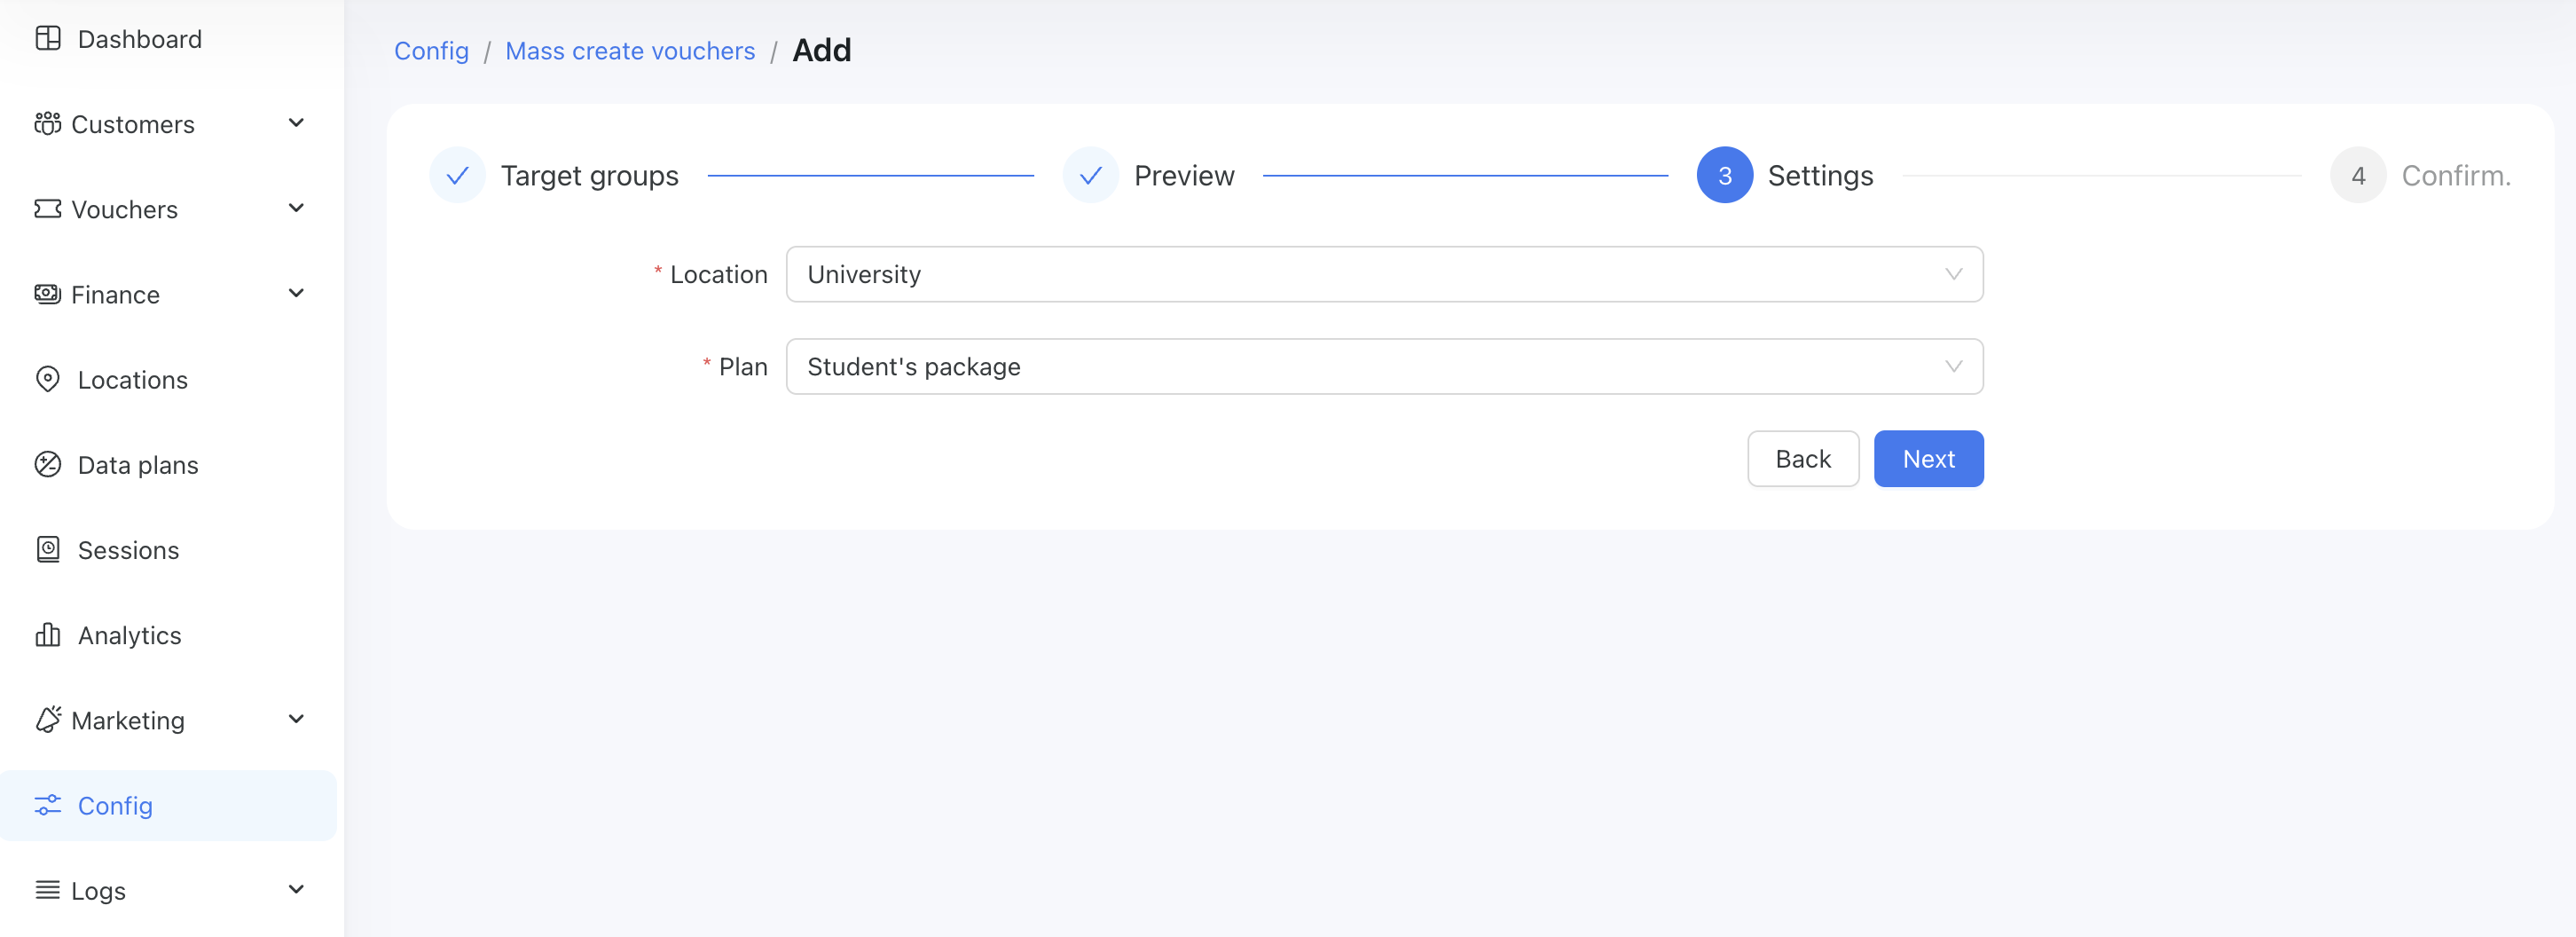
INFO
Please note that these vouchers will be linked to the selected location. If a customer connects from a different location, they won’t be able to use the voucher.
- In Step 4, confirm this action and the process will start:


- Ensure that the voucher has been created successfully. Navigate to the customer for whom you generated the voucher and open their Vouchers tab. Filter vouchers by the status and you should see the voucher listed with a status of New:

When the customer connects, the voucher will be automatically activated.
Smart label assignment
This tool helps you automatically assign labels to newly created customers based on configured filters.
Example: Assign label X to all new customers who are older than 25, registered from Location #1, and have a non-empty email address.
Once labels are assigned to customers, you can easily run per-label reports without manually labeling each customer. Simply select a report, choose a customer label, and you’ll receive a report covering all customers with that label.
How to use:
Make sure you have created at least one customer label
Navigate to
Config/Tools/Smart label assignmenttoolCreate a new record, give it a name, select the label to assign, and set the filters:

- Monitor newly created customers. The label you configured will be automatically assigned to all new customers that match the specified parameters.