SMS Module
The SMS module in Powerlynx it’s a complete messaging toolkit for businesses to reach customers with mass notifications, 1:1 messages, voucher details, and automated flows - while keeping everything traceable and compliant.
INFO
By default, Powerlynx does not support methods to send SMS directly from the product without integrating with third-party SMS gateways.
What you can do
OTP for Authentication
Verifying the phone number of anyone connecting to your Wi-Fi helps prevent abuse. Powerlynx can send a one-time password (OTP) via SMS to confirm the number is owned and reachable by the user. If you skip OTP, Powerlynx only validates the phone number’s format (it does not verify ownership). To enable OTP verification, configure SMS sending in Powerlynx.
Mass SMS Campaigns
Send service announcements, maintenance notices, marketing promos, or regulatory updates to a selected audience segment. Schedule in advance and preview before sending. More info here.
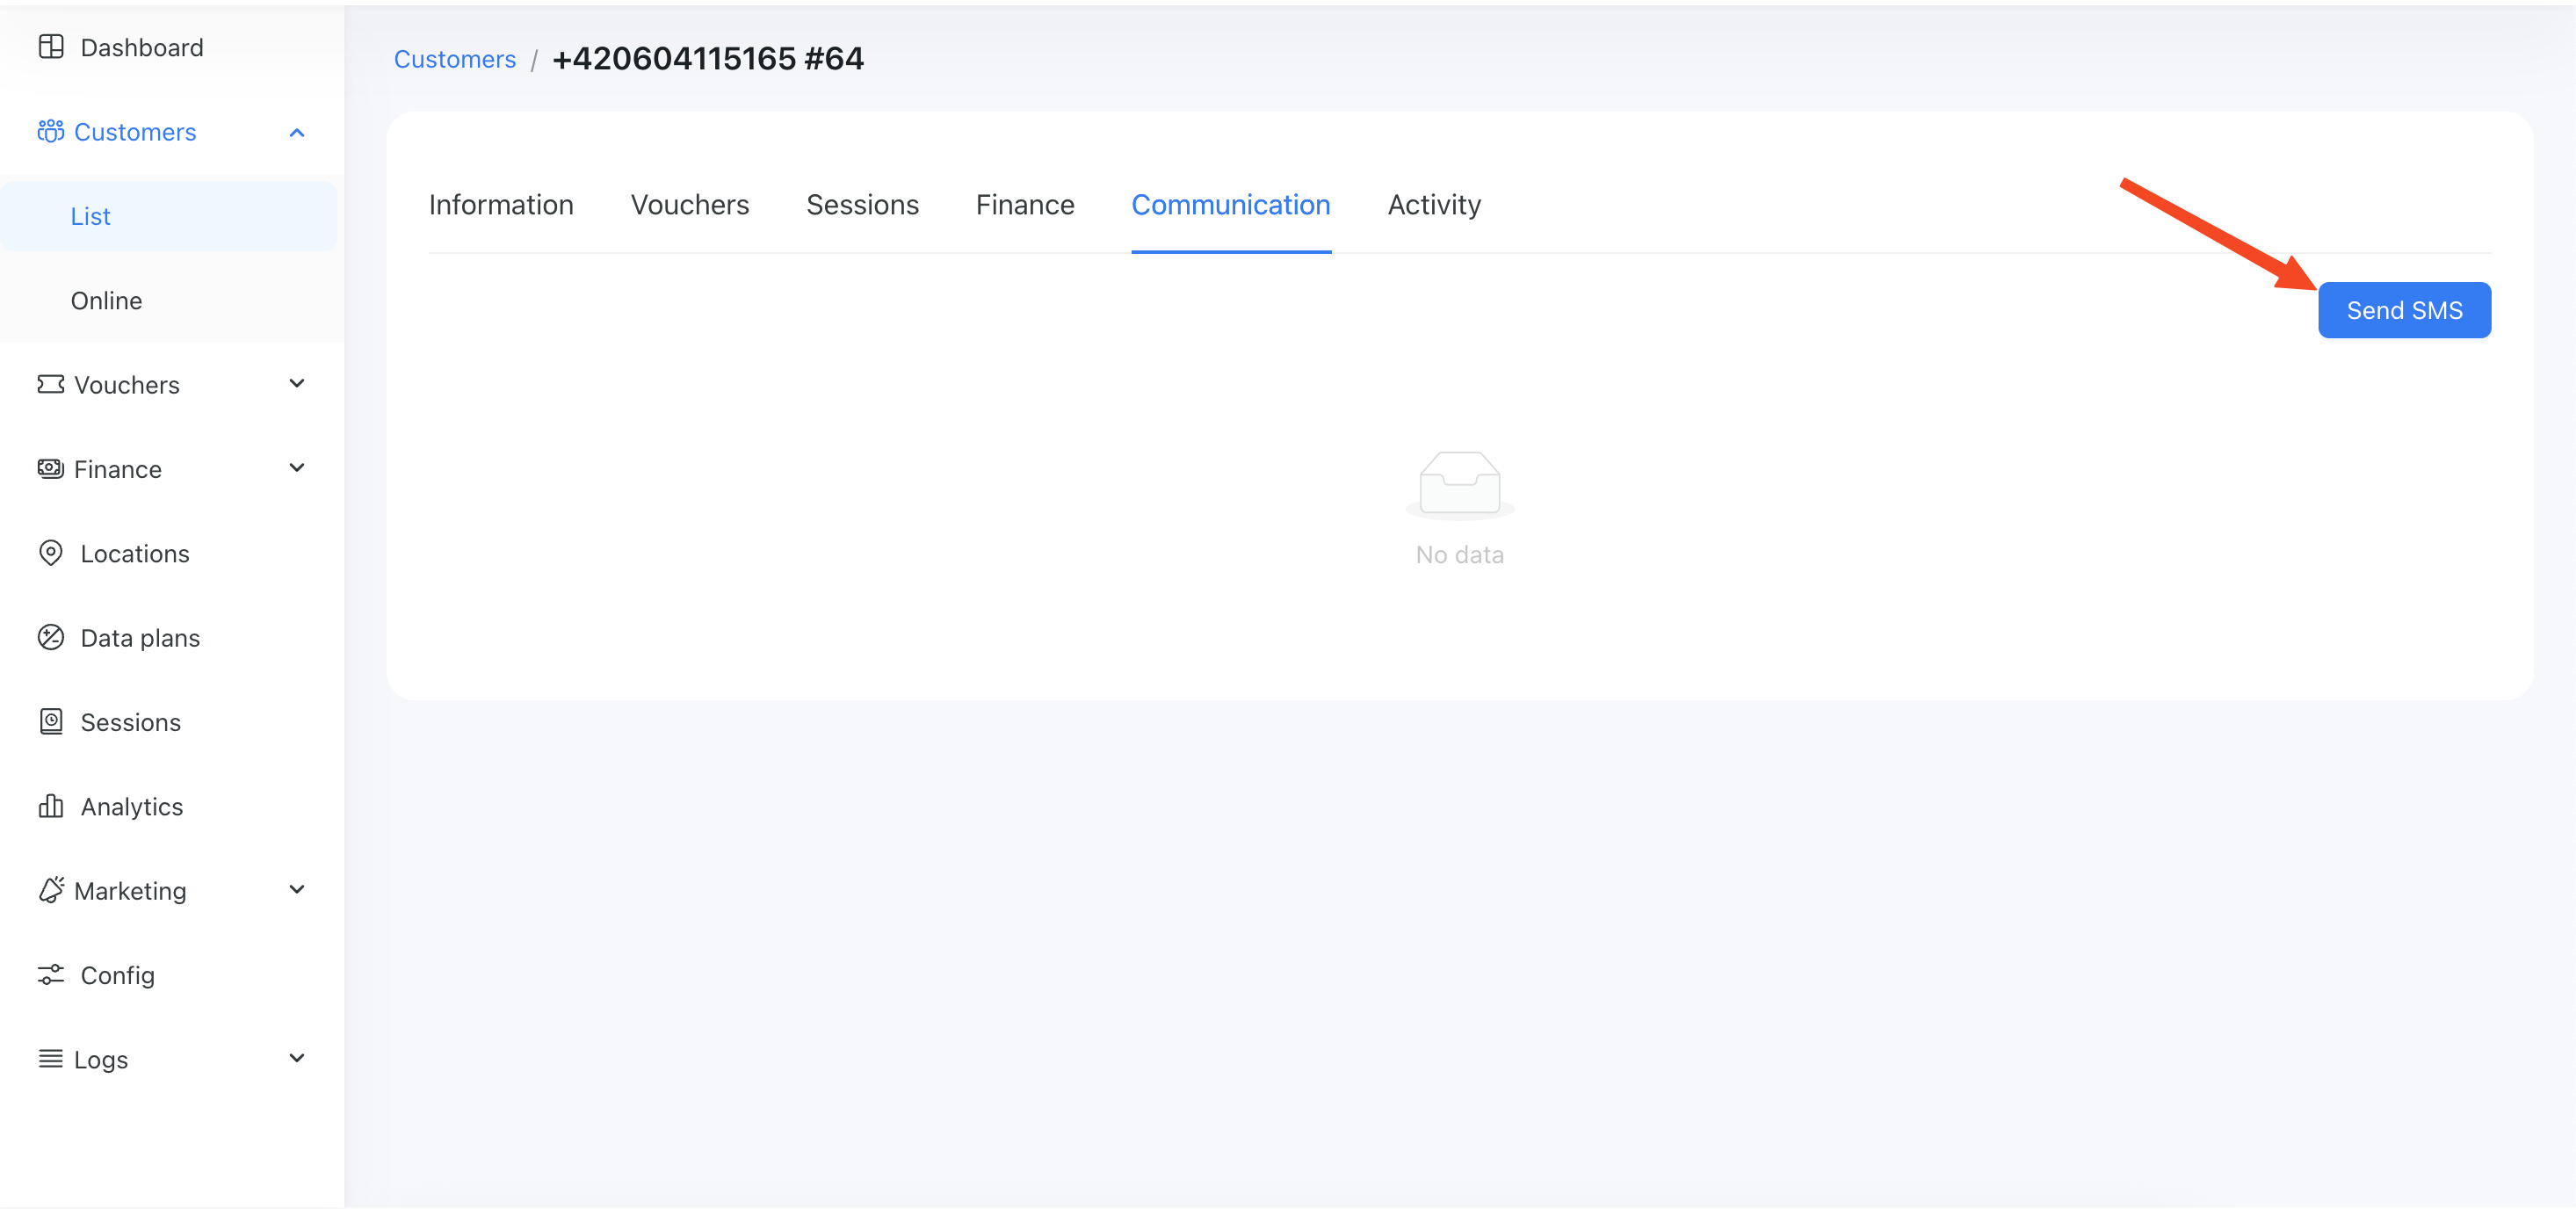
Personal (1:1 SMS)
From a customer profile, send a single tailored message:
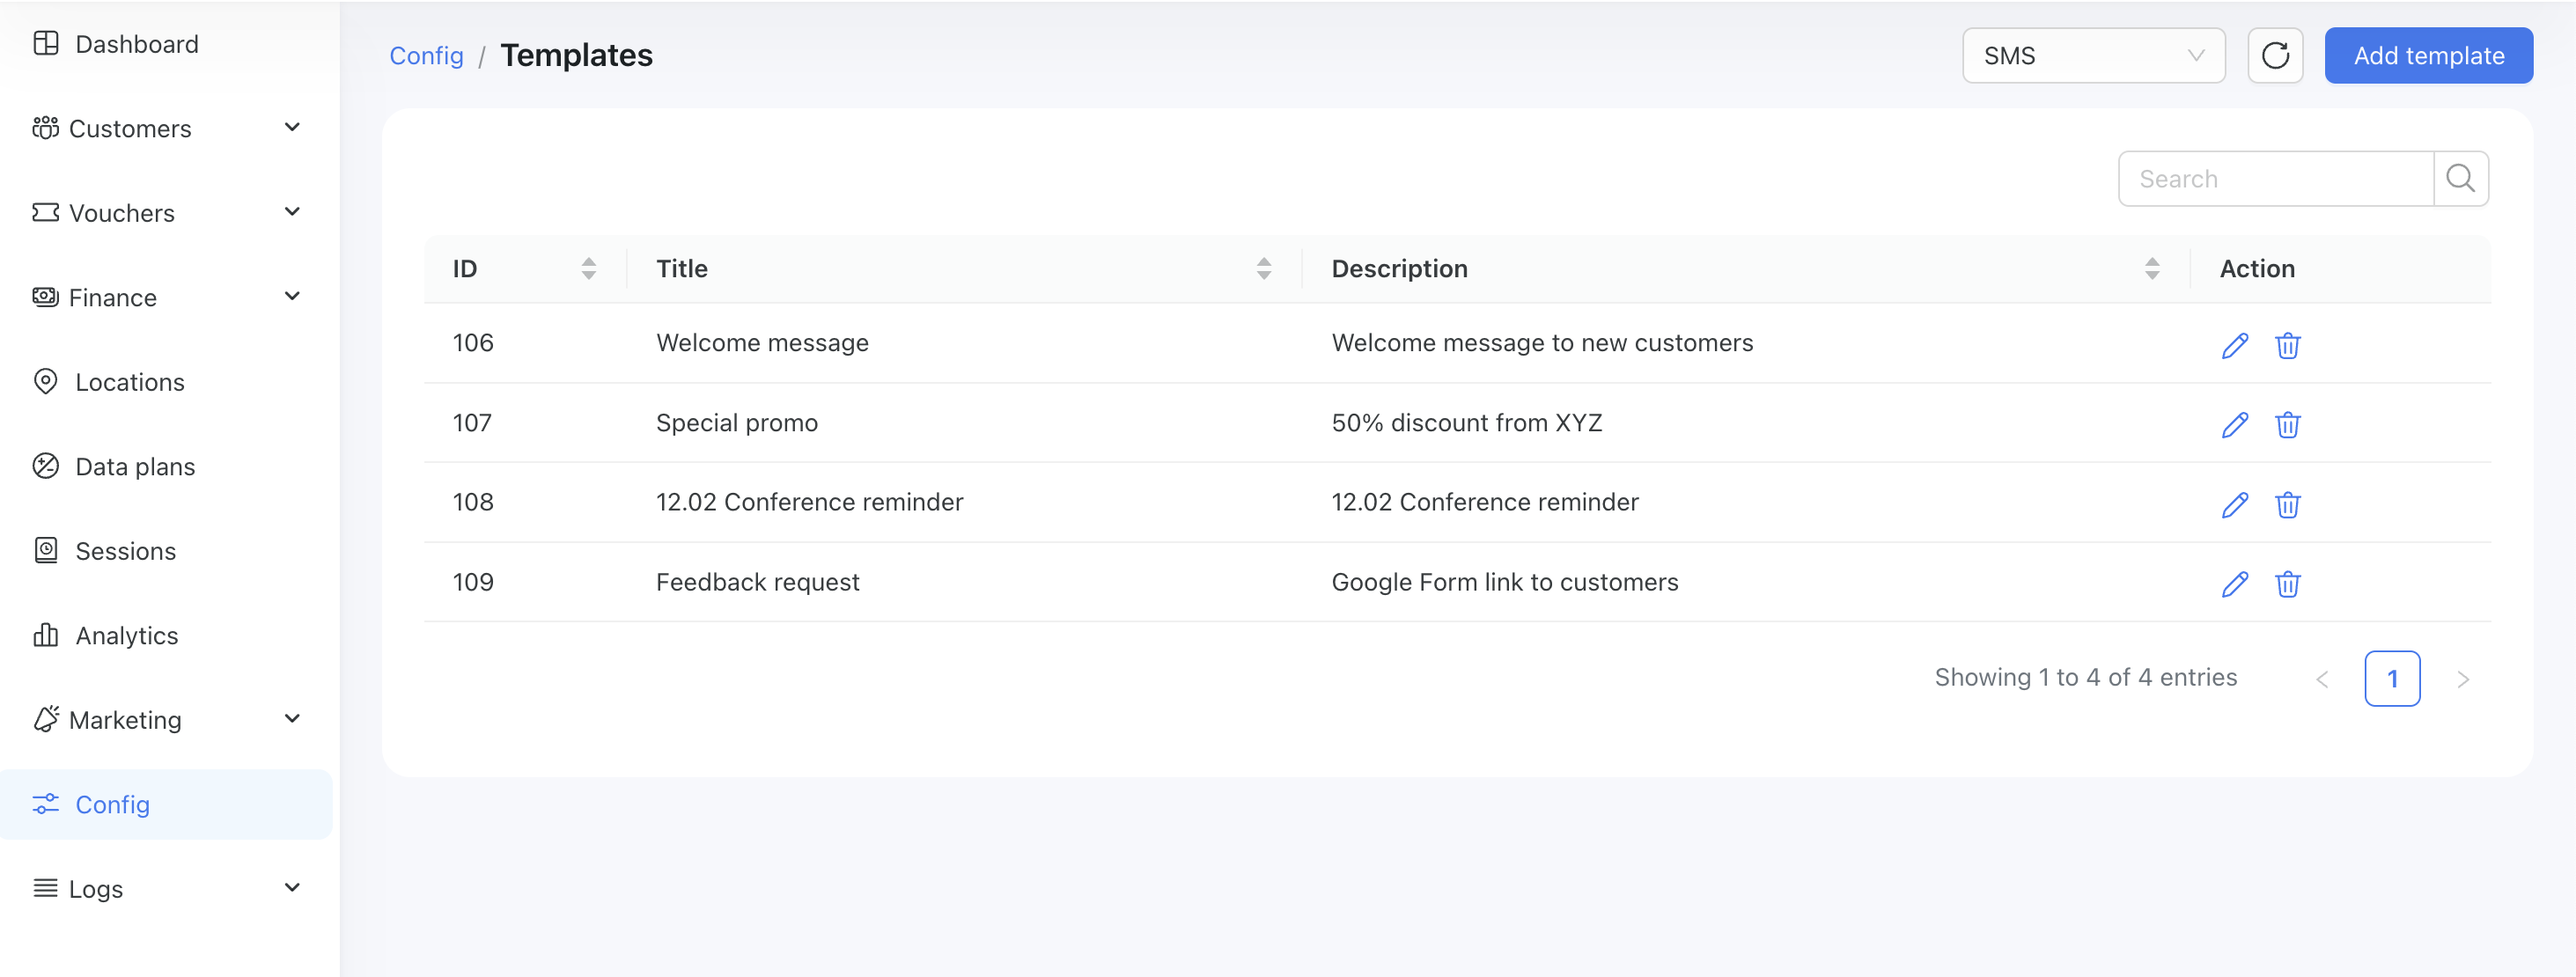
Templates & Personalization
Build reusable templates with variables (e.g., customer name, account ID, voucher code). Keep your tone consistent and save time for recurring communications.
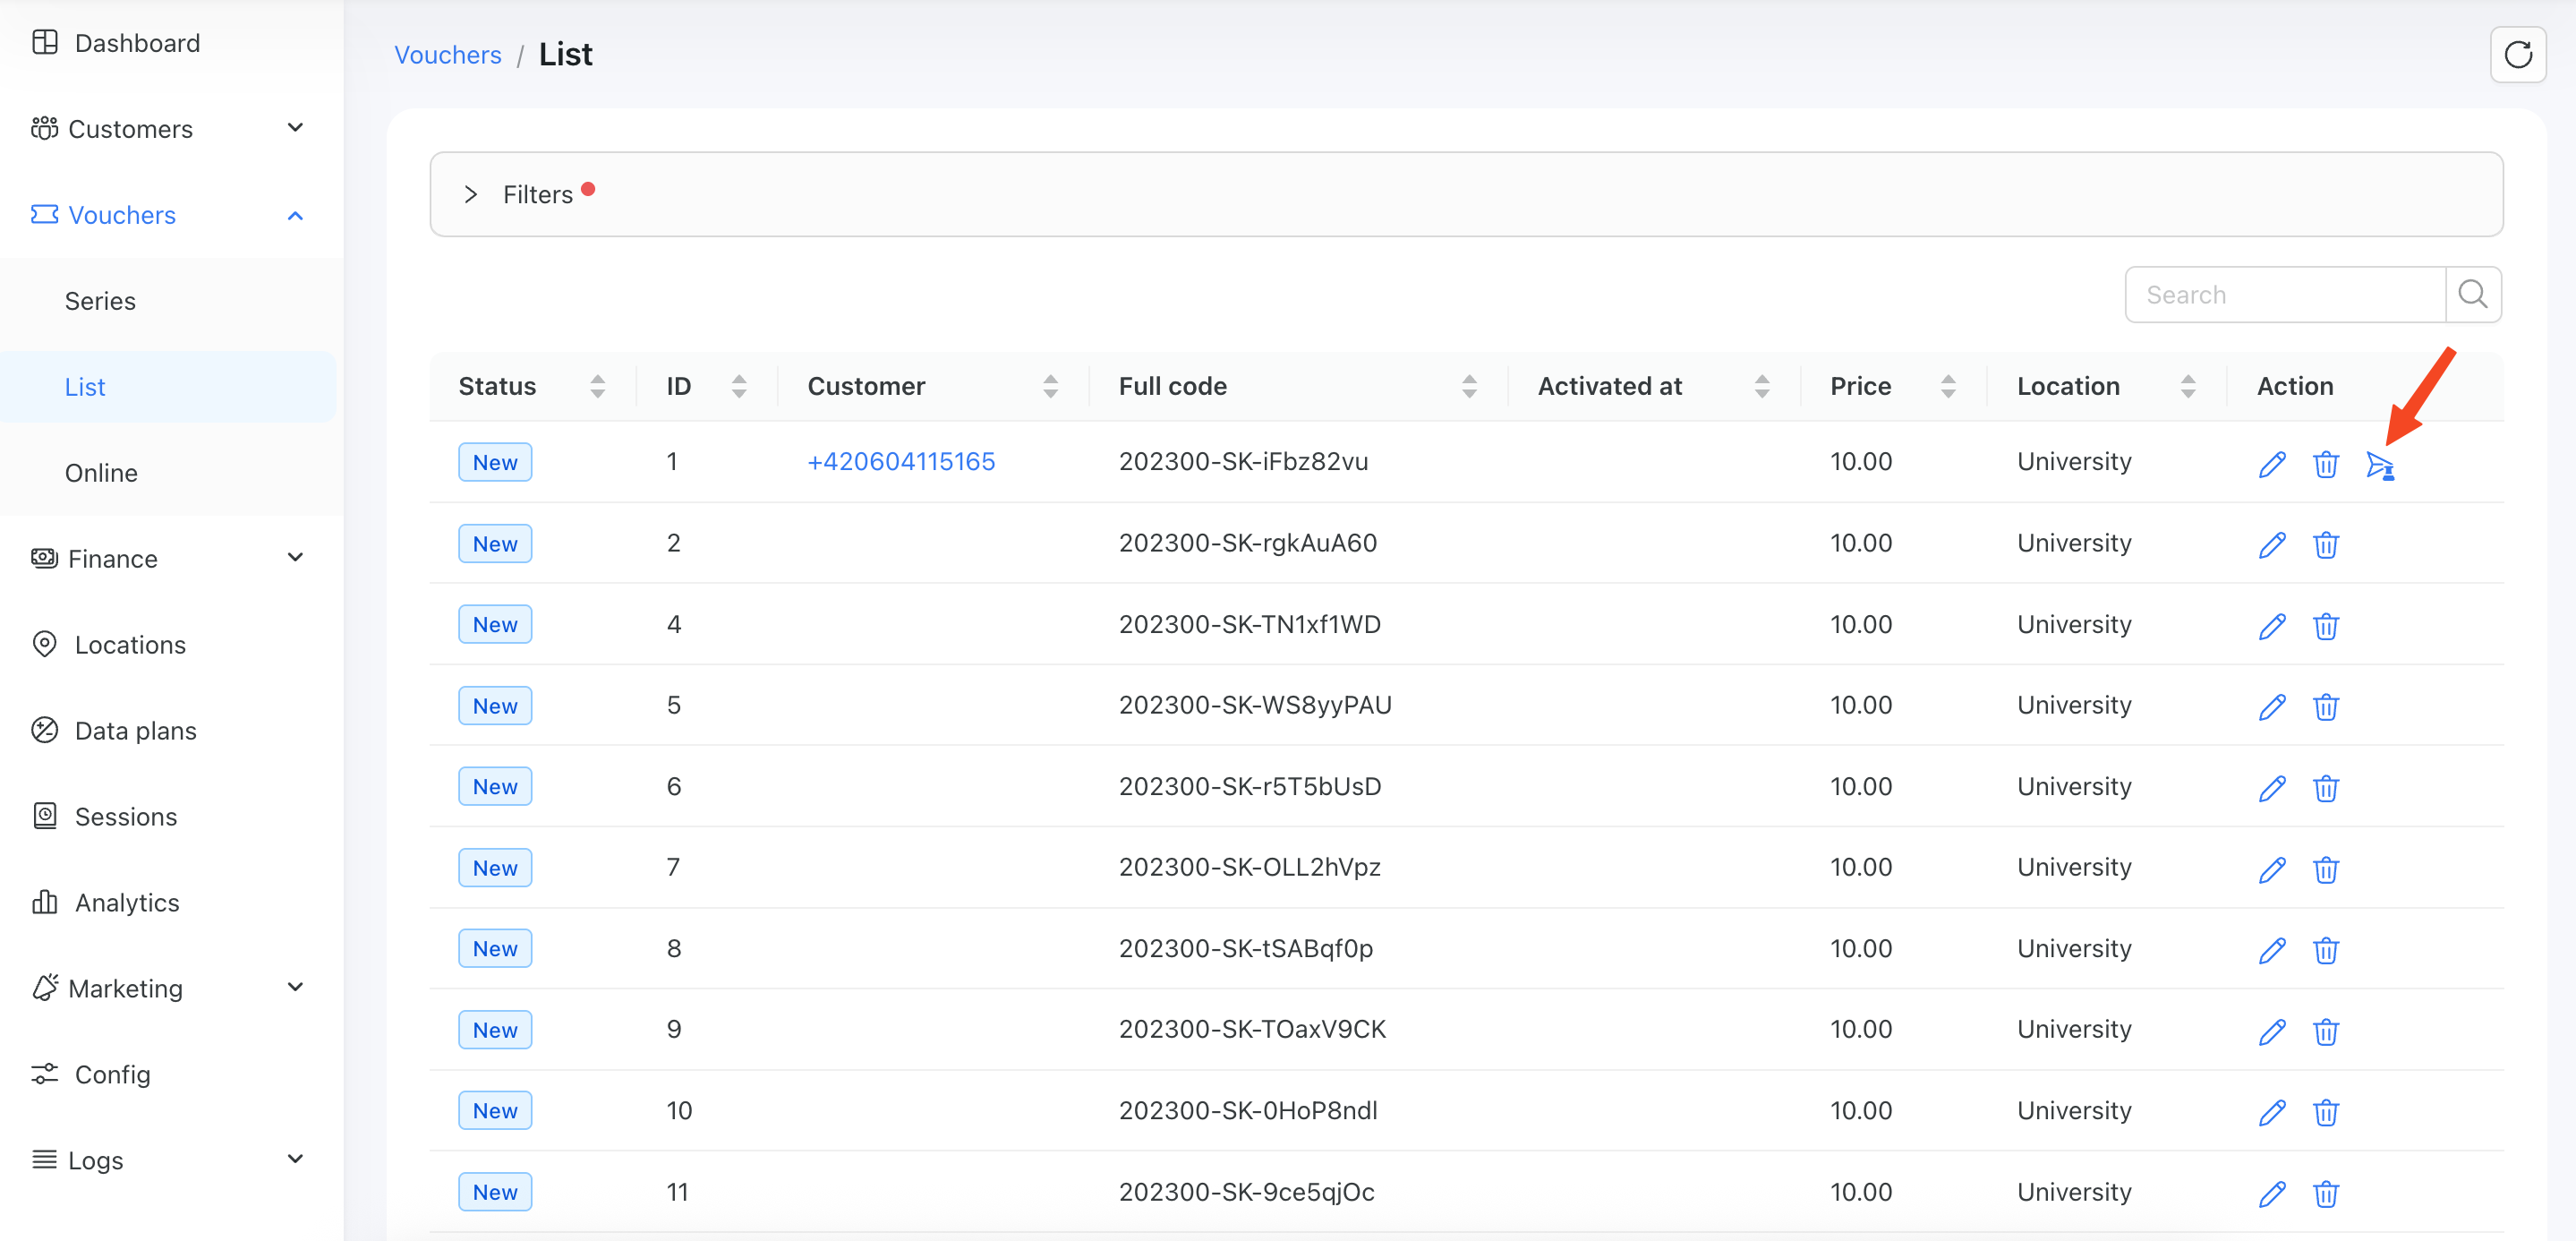
Voucher Delivery over SMS
Send the voucher details to the customer via SMS so they can redeem the voucher later when connecting to Wi-Fi.
Delivery Status & Audit Trail
See per-message status, timestamps, message type under
Logs/SMS Logs. Export logs for reconciliation or compliance.
Connect SMS gateways
By default, Powerlynx doesn’t send SMS directly. To send SMS messages, integrate a third-party SMS gateway. Powerlynx passes the recipient’s phone number and your message to the gateway and logs the response (for example, delivery status or errors). Below are examples of how to connect popular SMS gateways. You may also find our forum discussion on SMS gateways for Powerlynx helpful.
Twilio SMS gateway
We've built integration with Twilio - https://www.twilio.com. They offer various services, including an SMS gateway.
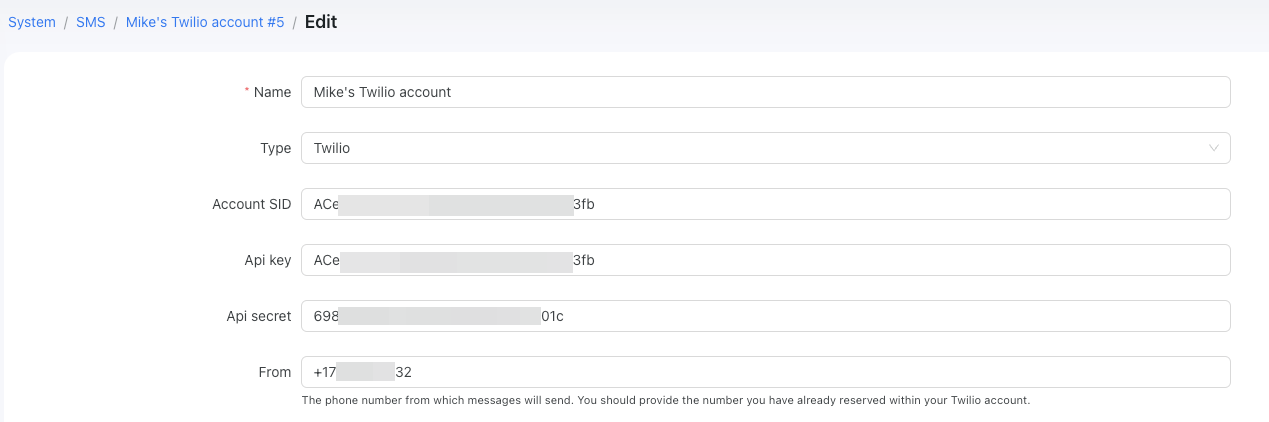
All you need to do is create a Twilio account, obtain the Account SID, Auth Token, and From number values, and then input them into Powerlynx in the designated fields:
TIP
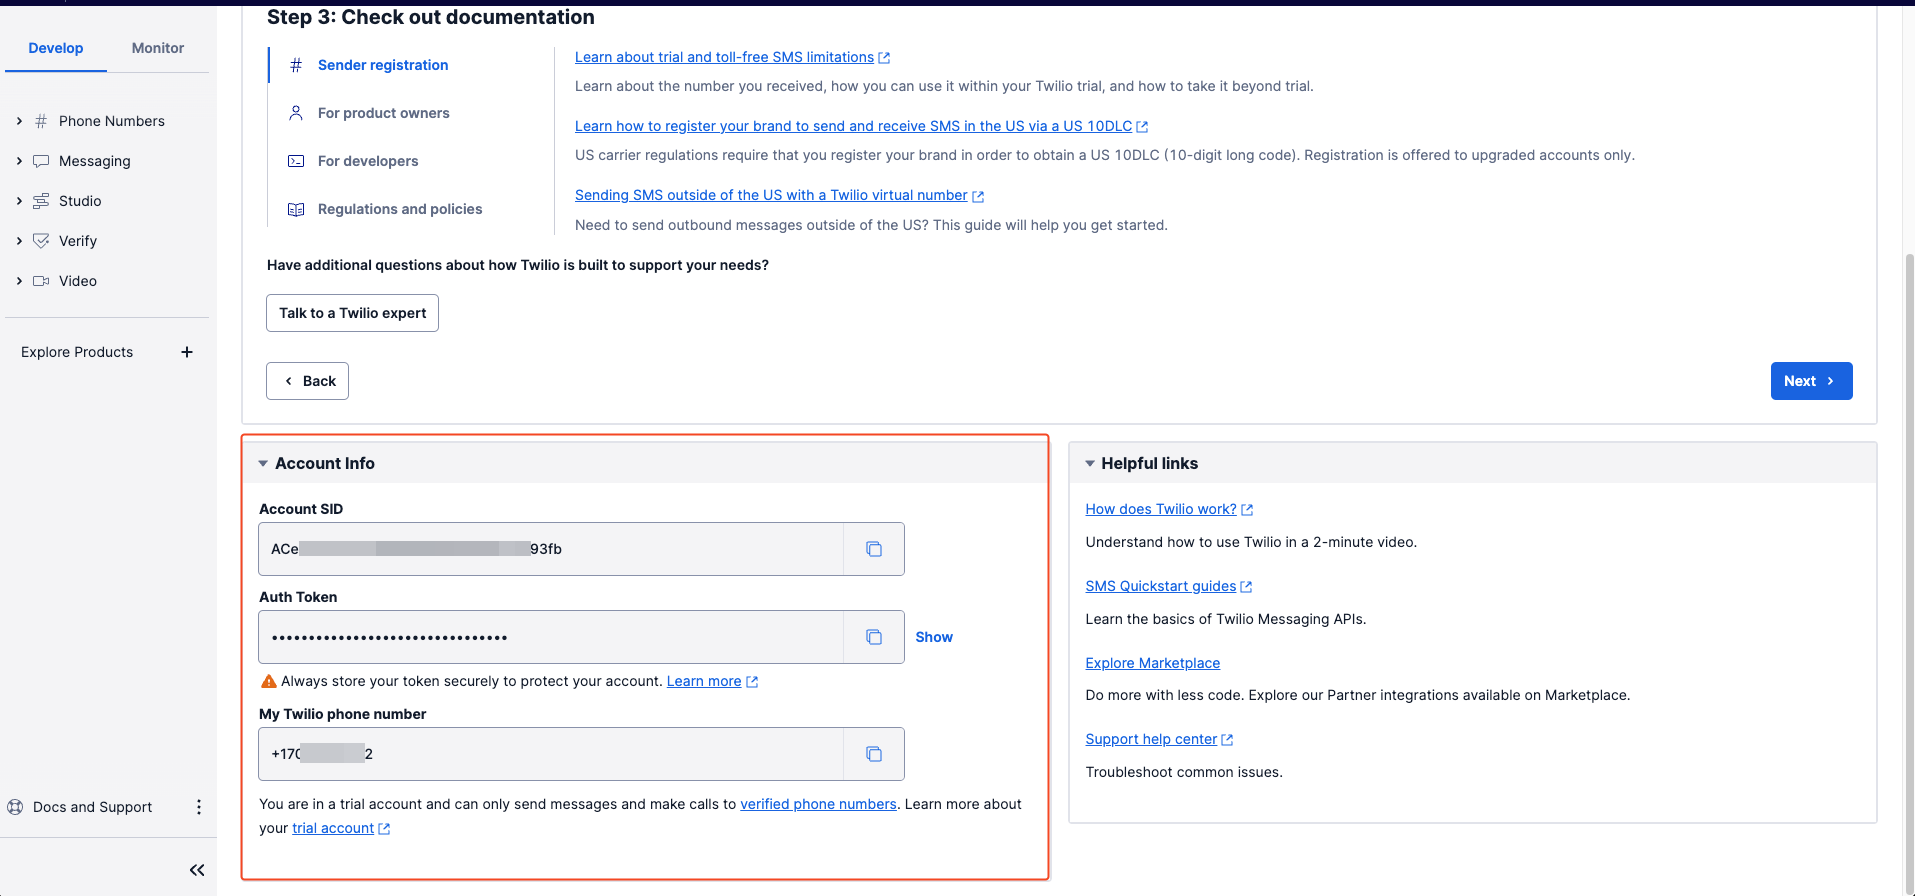
In Powerlynx, the fields should be populated with values from Twilio as follows:
Account SID = Account SID from Twilio
API key = Account SID from Twilio
API secret = Auth Token from Twilio
From = My Twilio phone number
To locate these values, you should log in to your Twilio console using this link - https://console.twilio.com/, create your first SMS app, and follow the instructions. Afterward, you can find the required details under the "Account Info" settings:
Once it's done, click the "Add" button at the bottom. Next step is to test if it works.
For more secure authentication, create an API key with the type set to 'standard', set up permissions, and use it in the "API key" field in Powerlynx. More information can be found here - https://www.twilio.com/docs/usage/api#authenticate-with-http
SMSPortal gateway
We've also developed an integration with SMSPortal. All you need to do is create an account, obtain the API credentials, and use them in Powelrynx.
In your SMSPortal account, navigate to Settings > API Keys, and create a new key with the type set to REST.
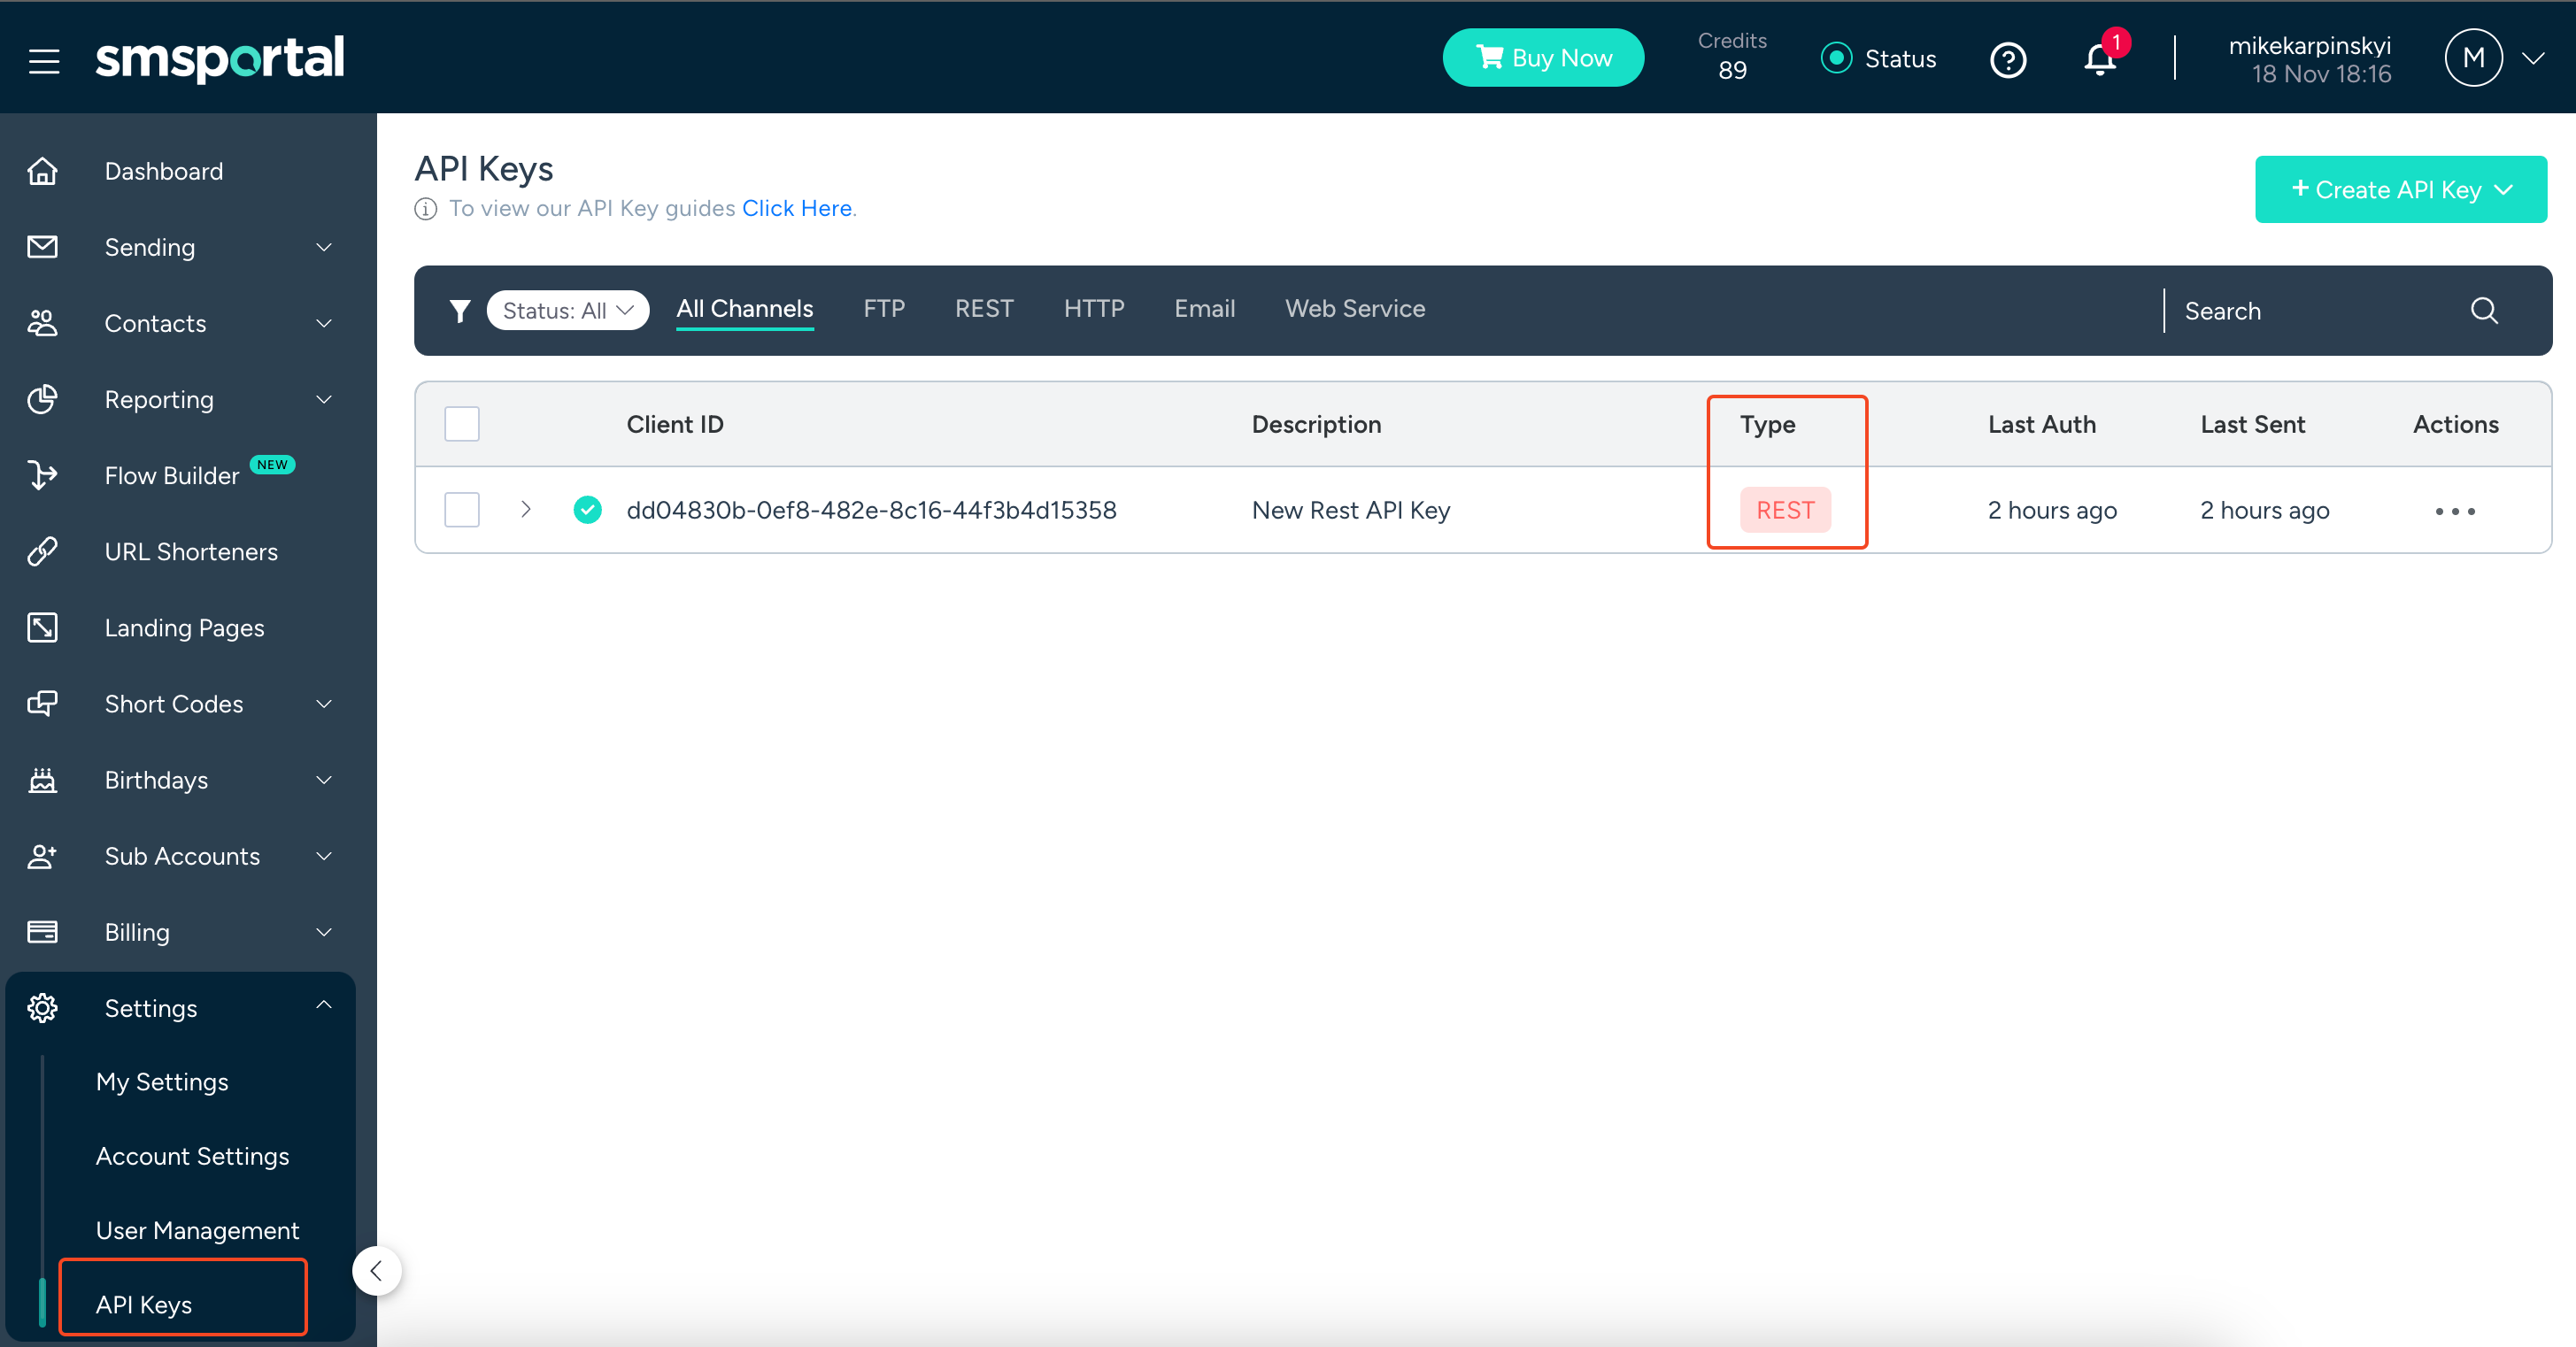
Copy your Client ID and API key, then use them in Powerlynx when adding a new SMS gateway under Config > SMS.
Custom SMS gateway
By "Custom SMS Gateway," we refer to any SMS gateway that is not supported by default in Powerlynx. Currently, we only support Twilio and SMSPortal by default, but you can use any other SMS gateway in Powerlynx. However, be aware that configuring a non-default gateway might be less straightforward and could involve more complex setup processes.
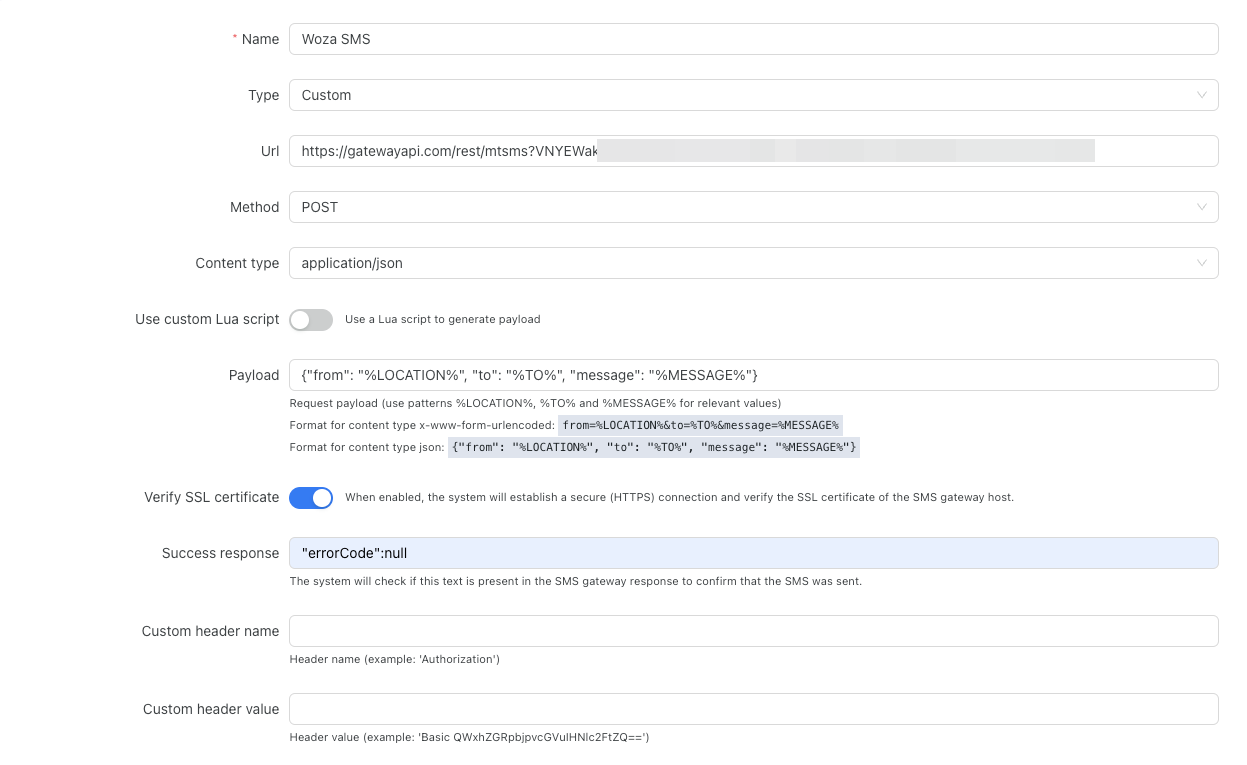
To create a configure your SMS sending service navigate to Config/System/SMS and click on the "Add" button. You will see this form:
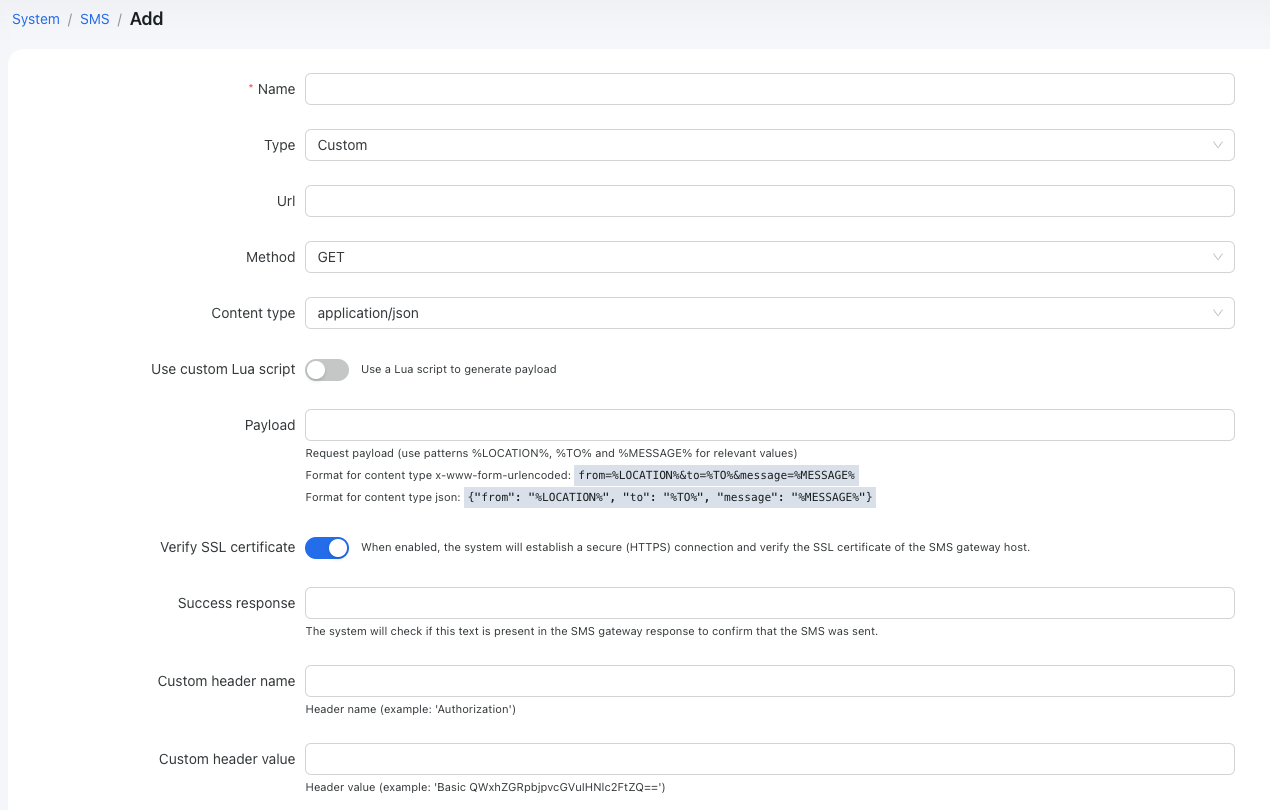
Name - The name of your SMS gateway.
Type - This depends on the selected type, which will present a different set of fields. Three types are available: Custom, Twilio and SMSPortal.
URL - Specify the URL of the SMS gateway (as mentioned in the gateway's documentation).
Method - Select the method to call the gateway (POST or GET).
Content Type - How to handle the payload (JSON or x-www-form-urlencoded). JSON can only be used with the POST method.
Use Custom Lua Script - To be used in special cases when it's impossible to configure your SMS gateway without the engineering of some script (requires development skills).
Payload - The request payload for sending SMS. This depends on the content type (JSON or x-www-form-urlencoded) and the syntax provided by the SMS gateway.
Verify SSL Certificate - If this toggle is enabled, the system will verify the SSL certificate of the SMS gateway host with a secure (HTTPS) connection.
Success Response - If the SMS gateway returns a certain successful response, the text to check the response from the gateway must be configured here so that Splynx can identify which SMS was successfully sent. A successful response should contain the string given in this line.
Custom Header Name - The name of the custom header. To be used in cases when you need to send additional headers to the SMS gateway.
Custom Header Value - The value of the custom header.
Example of configuration:
Test SMS sending
Once you've created and configured your SMS sending service, you can run some tests to ensure you can send SMS from Powerlynx. At the bottom of the page, you will find the "Test section":
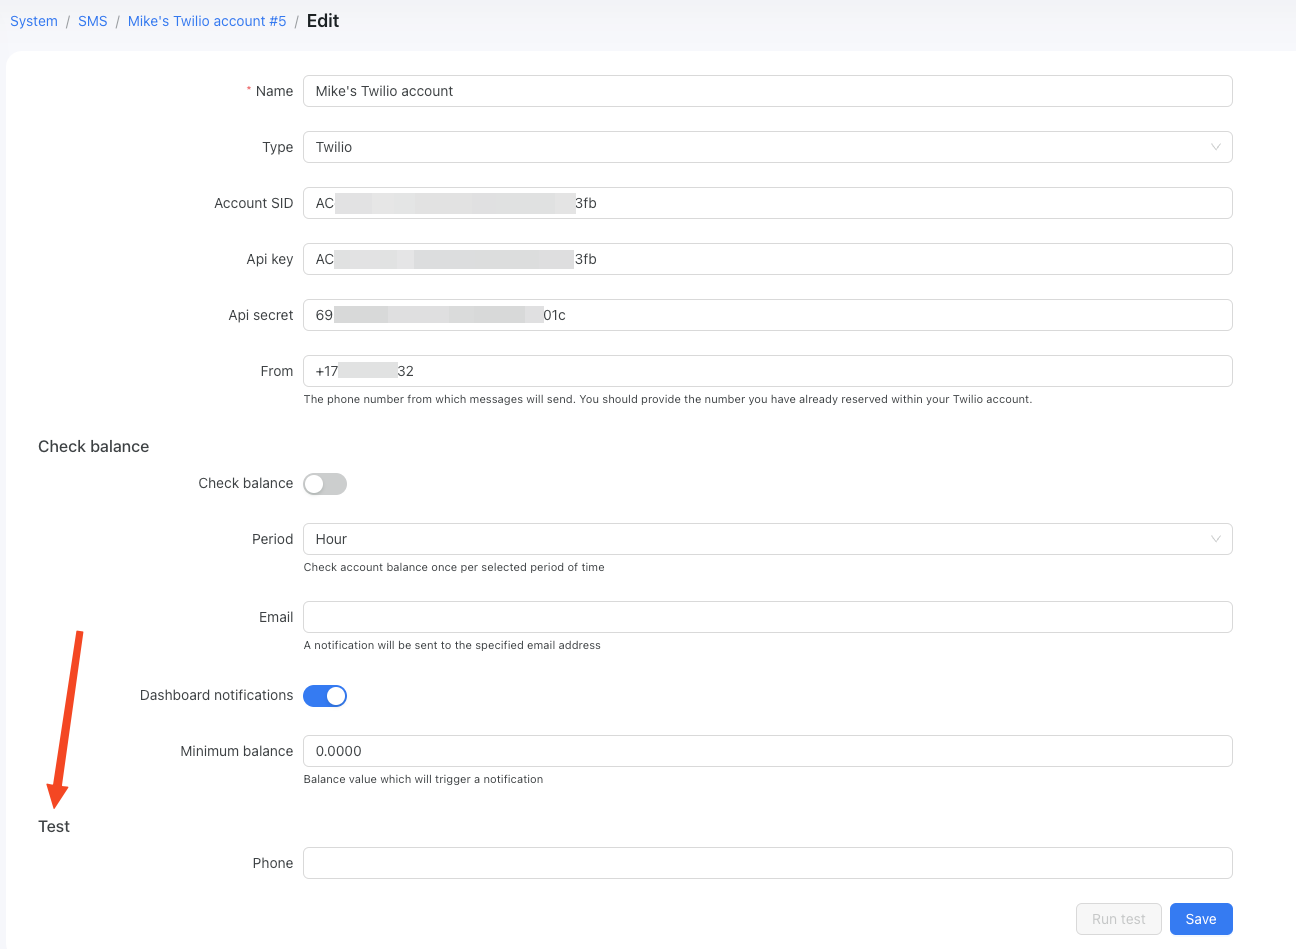
Simply enter your phone number and click the "Run test" button, then check your phone to confirm that you've received the SMS.
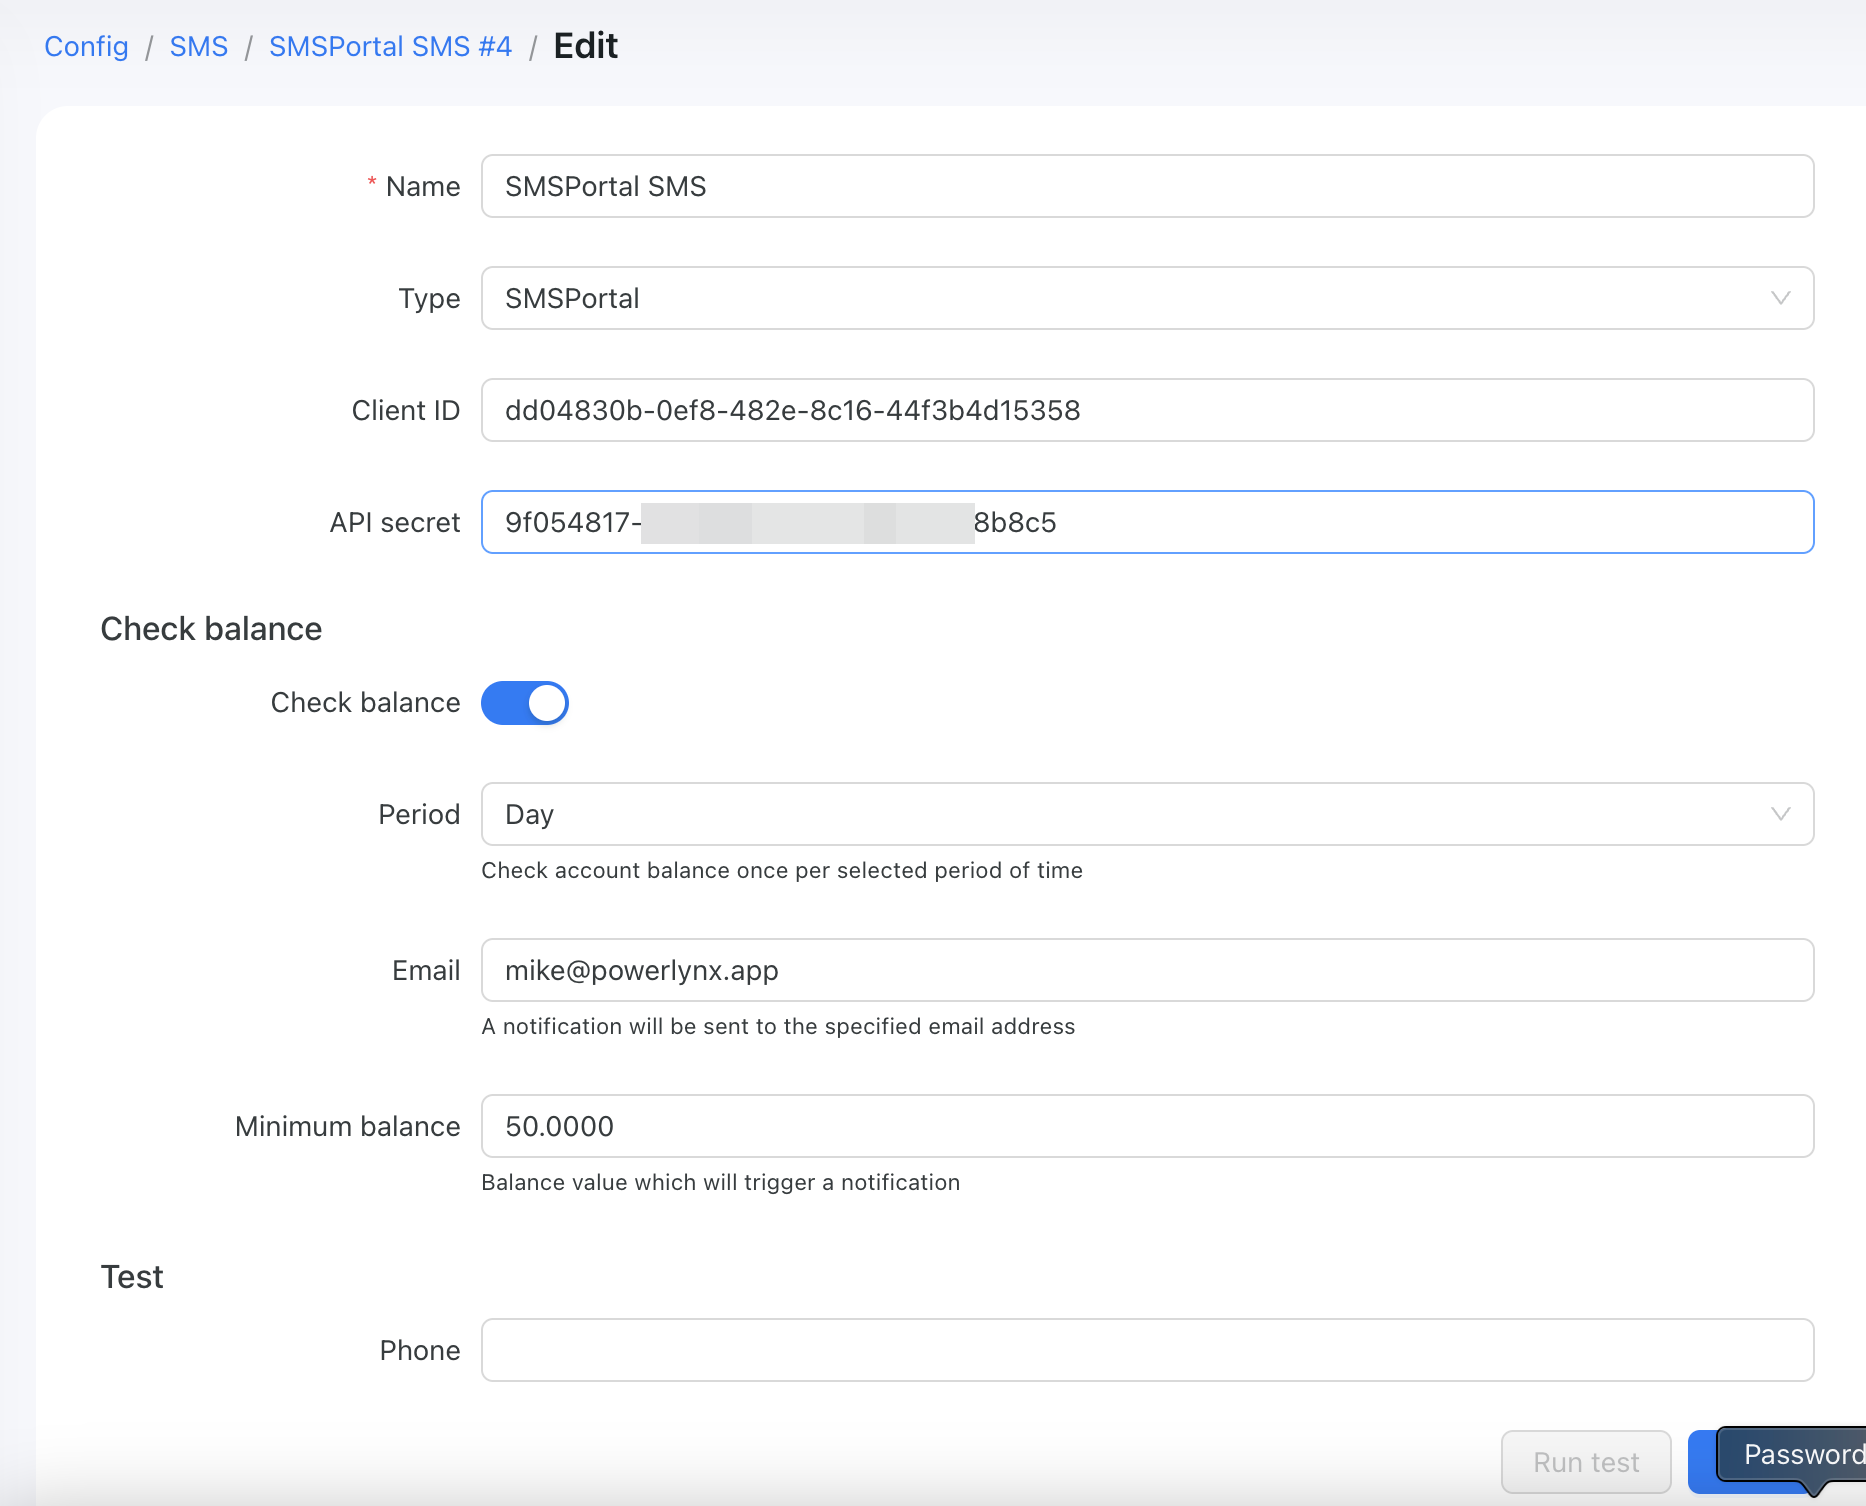
Check balance
The "Check balance" section enables you to configure functionality to check the balance on your SMS gateway, provided it supports this feature. Simply activate it, set the period, enter your email, enable dashboard notifications, and specify the balance value that should trigger notifications. Powerlynx will then send you an email notification and display a warning on the dashboard about a low balance on your SMS gateway, helping prevent the SMS sending service from stopping due to insufficient funds.
Enable, disable, and prioritize SMS gateways.
In the list of SMS gateways, you can easily enable, disable, and change the order through drag and drop. You can also enable a specific SMS gateway for a specific location, among other actions. If you have multiple SMS gateways enabled, the system will use the first one as the primary gateway. Any other enabled gateway will serve as a fallback in case the primary SMS gateway fails to send the SMS. Thus, configuring multiple SMS gateways can enhance the reliability of your SMS sending, ensuring that your customers will receive an SMS from one gateway or another.
Enable the OTP verification for the splash page
Now that you have configured some SMS gateways, you have the option to enable OTP verification for each splash page, although it is not mandatory. Open your splash page settings and choose to enable or disable OTP verification via SMS code. If enabled, customers will be required to confirm their phone numbers using an SMS code. It's important to note that keeping this option enabled for the splash page necessitates a functioning SMS sending service within Powerlynx.
SMS logs
In Powerlynx, you can track all SMS messages sent from the platform under Logs/SMS logs:
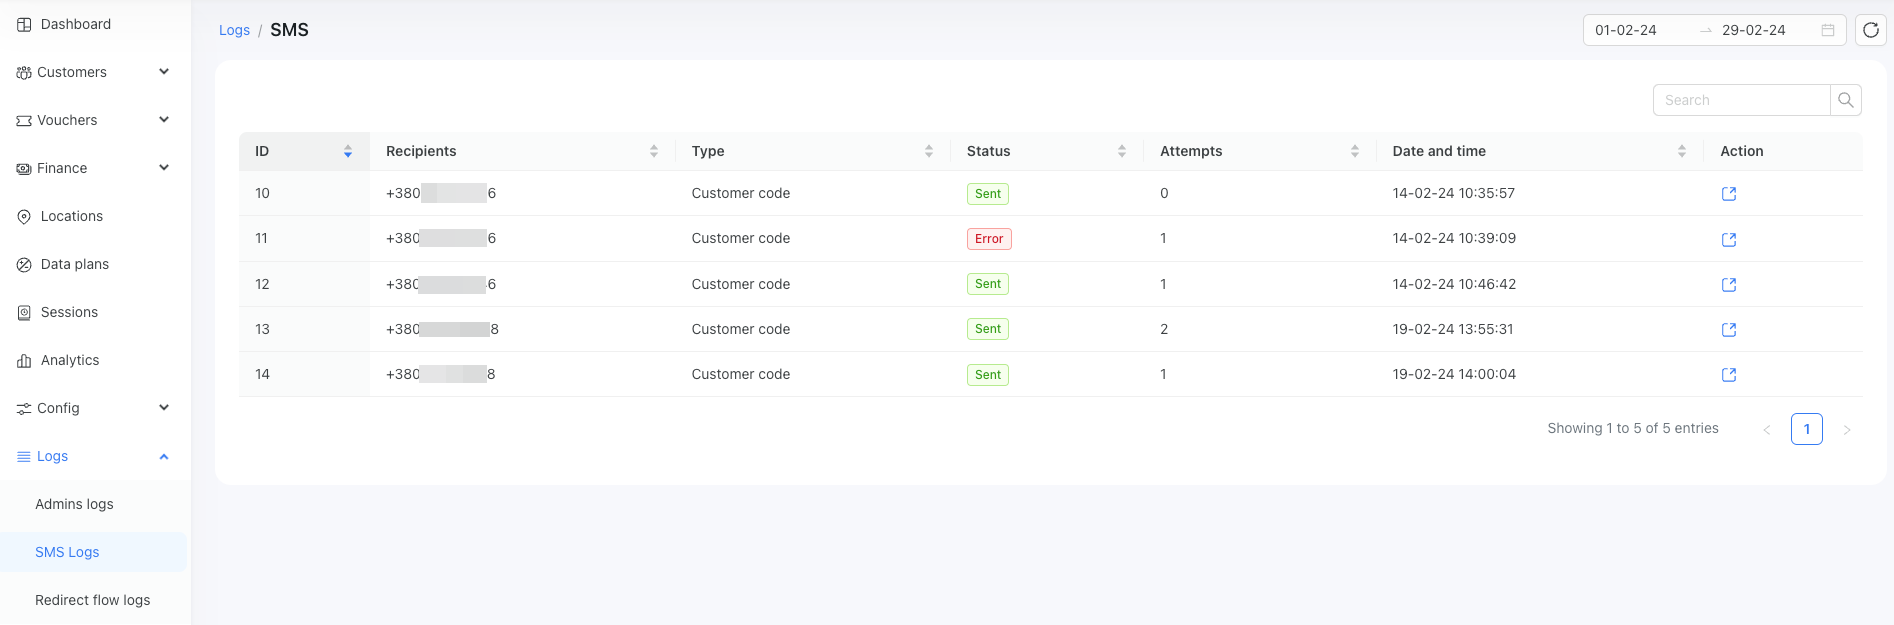
To see the details of each SMS, click on the "Actions" button under each SMS record.