Customer Portal
Overview
The Customer Portal gives customers easy access to their Wi-Fi usage statistics, active vouchers, and voucher history. When a customer connects to the Wi-Fi network, they receive an SMS with a link to the portal, where they can authenticate and view their account details and usage data.
Benefits
- Enhanced User Experience: Customers can easily monitor their data usage and manage their vouchers in one place.
- Real-Time Information: Users can access up-to-date information on their data usage and voucher status, helping them stay informed and in control of their Wi-Fi plans.
- Easy Access: The link to the status page is sent via SMS, or users can be redirected to this page right after logging in. This gives users a direct, secure way to access their account details from any device.
Configuration
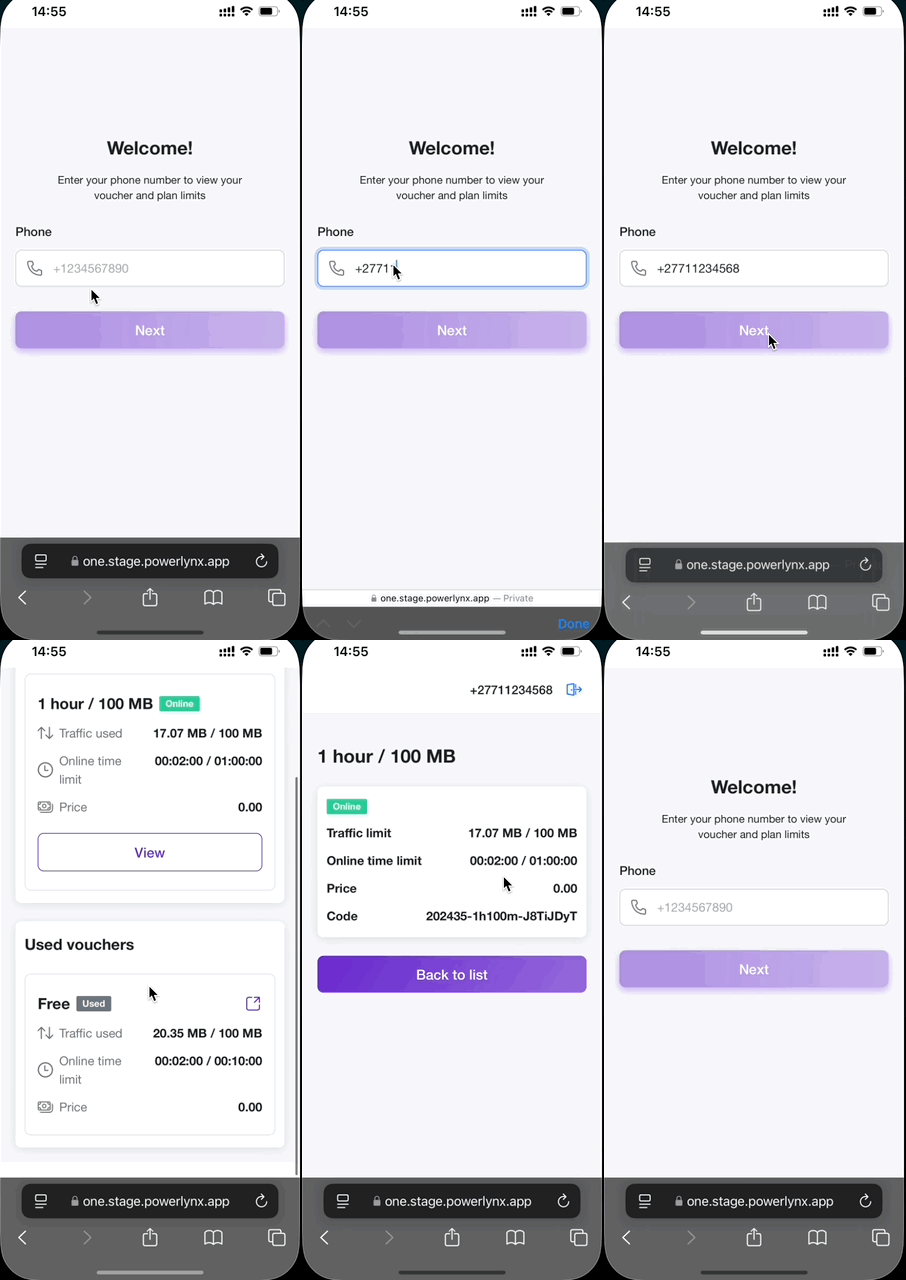
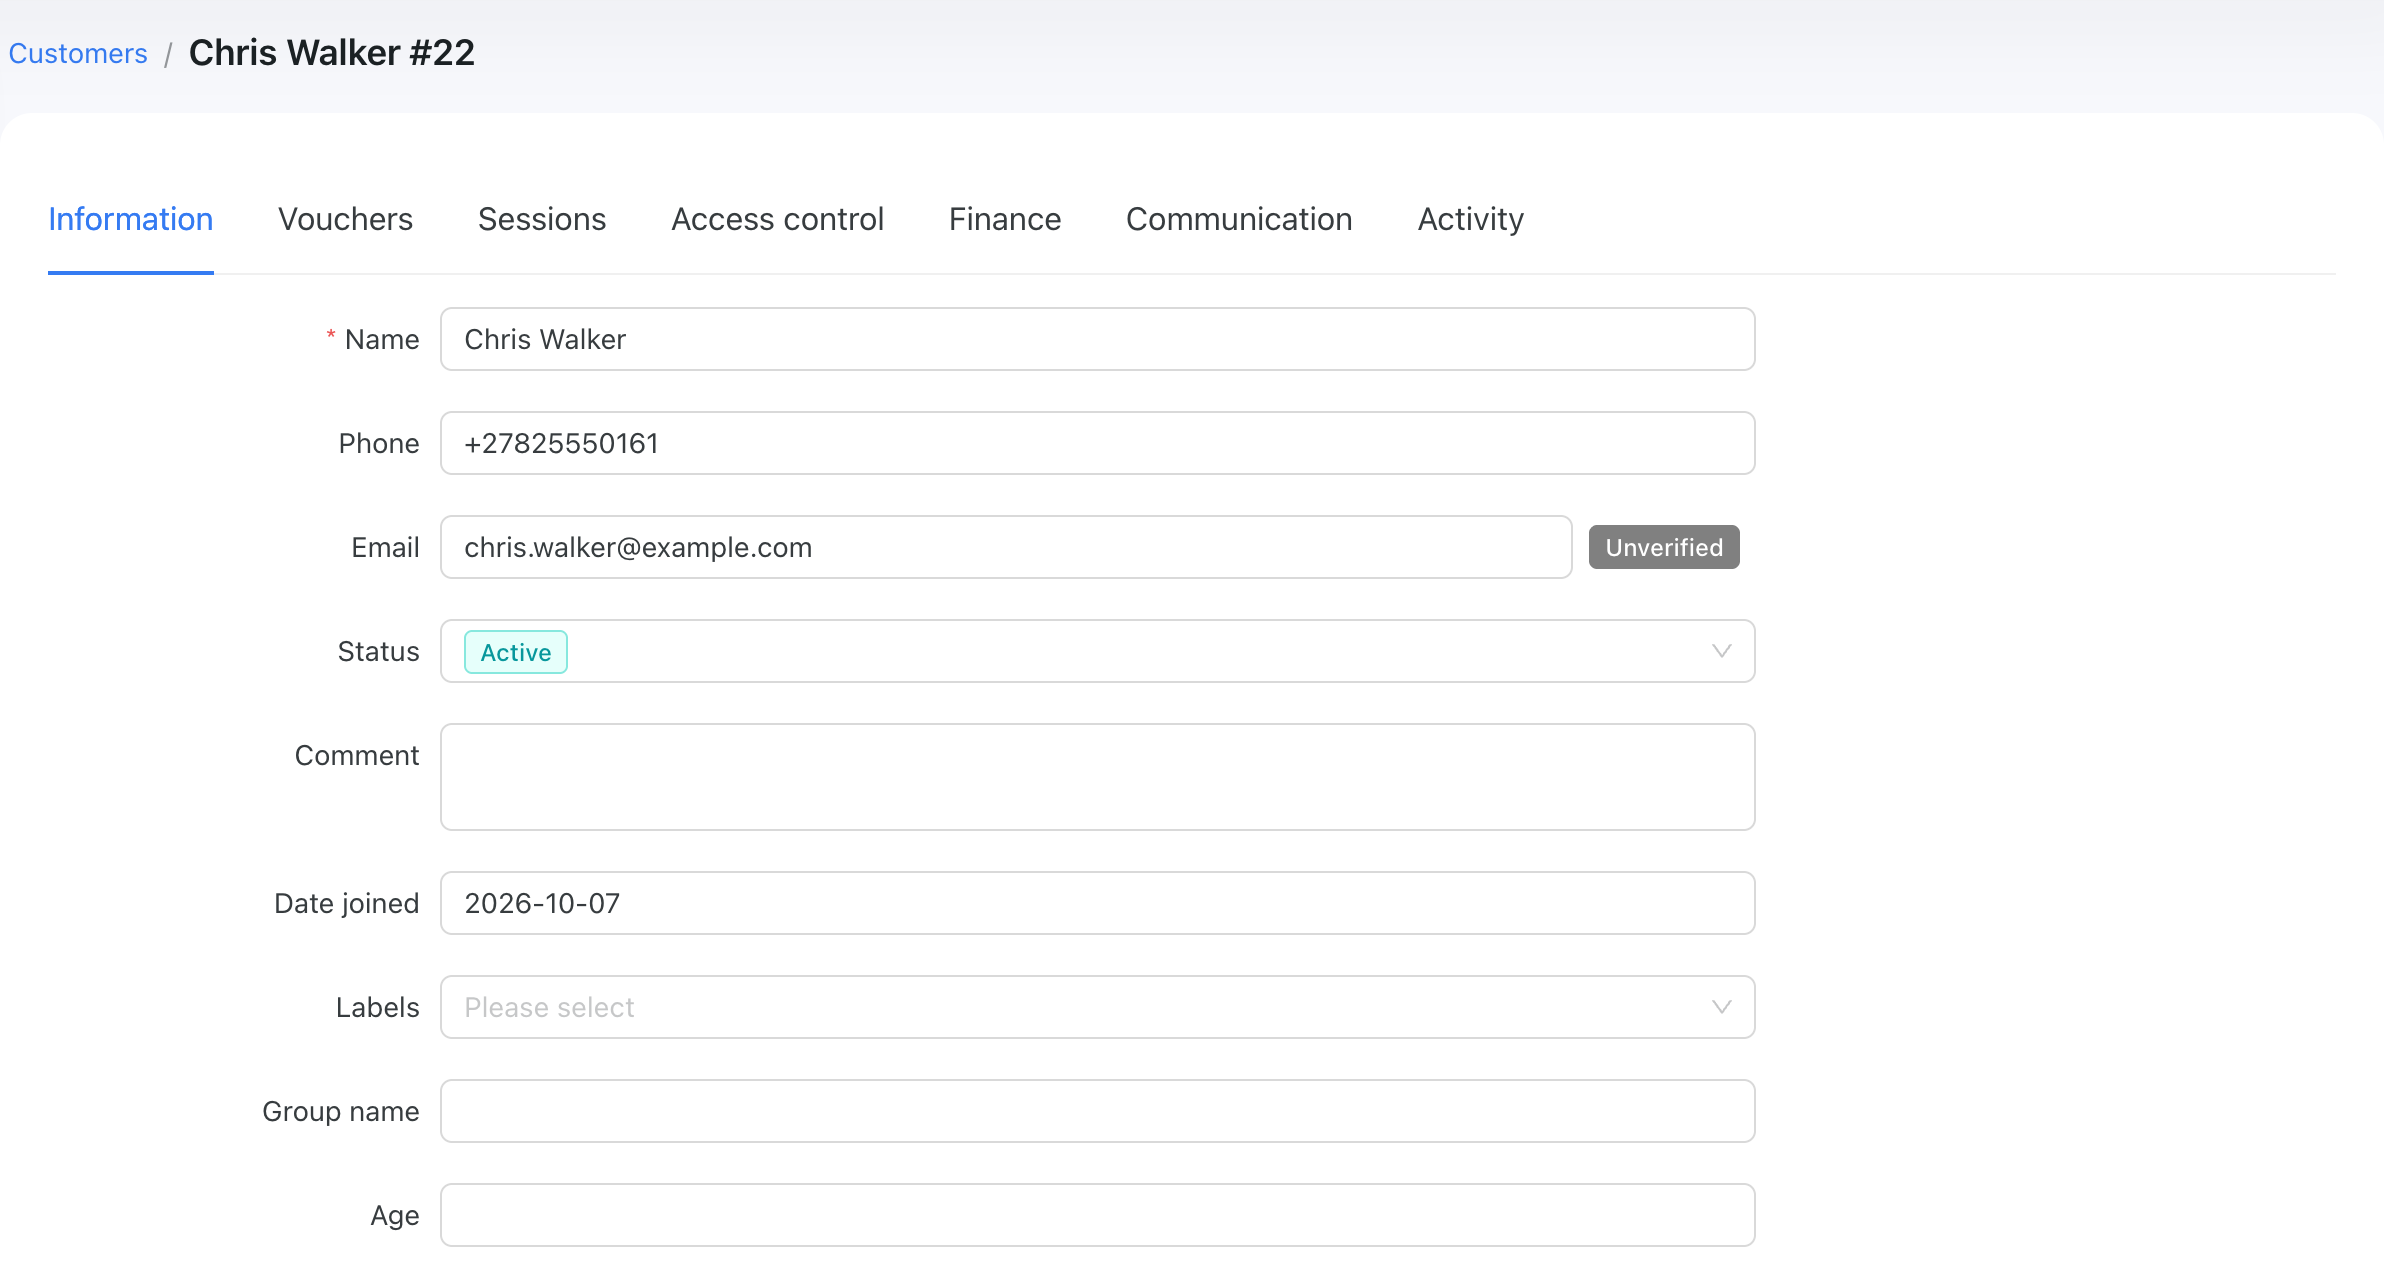
By default, this page is publicly accessible. Each Powerlynx account has its own customer portal page in the following format: https://one.powerlynx.app/portal, where one.powerlynx.app is your Powerlynx URL. If your Powerlynx URL is https://two.powerlynx.app/, simply append /portal at the end of the URL, making it https://two.powerlynx.app/portal. To access this page, the customer needs to provide their phone number registered with Powerlynx:
This URL can be sent to your customers via SMS, also, you can redirect your customers to this page right after they log in.
To enhance security, you can enable SMS-based two-factor authentication (2FA) for the customer portal page. Navigate to the Config > Portal section and find the Use (OTP) for accessing the public status page parameter to enable it. This option is available only if at least one SMS gateway is configured in your system. After entering their phone number, the customer will receive a one-time password (OTP) to access the status page.
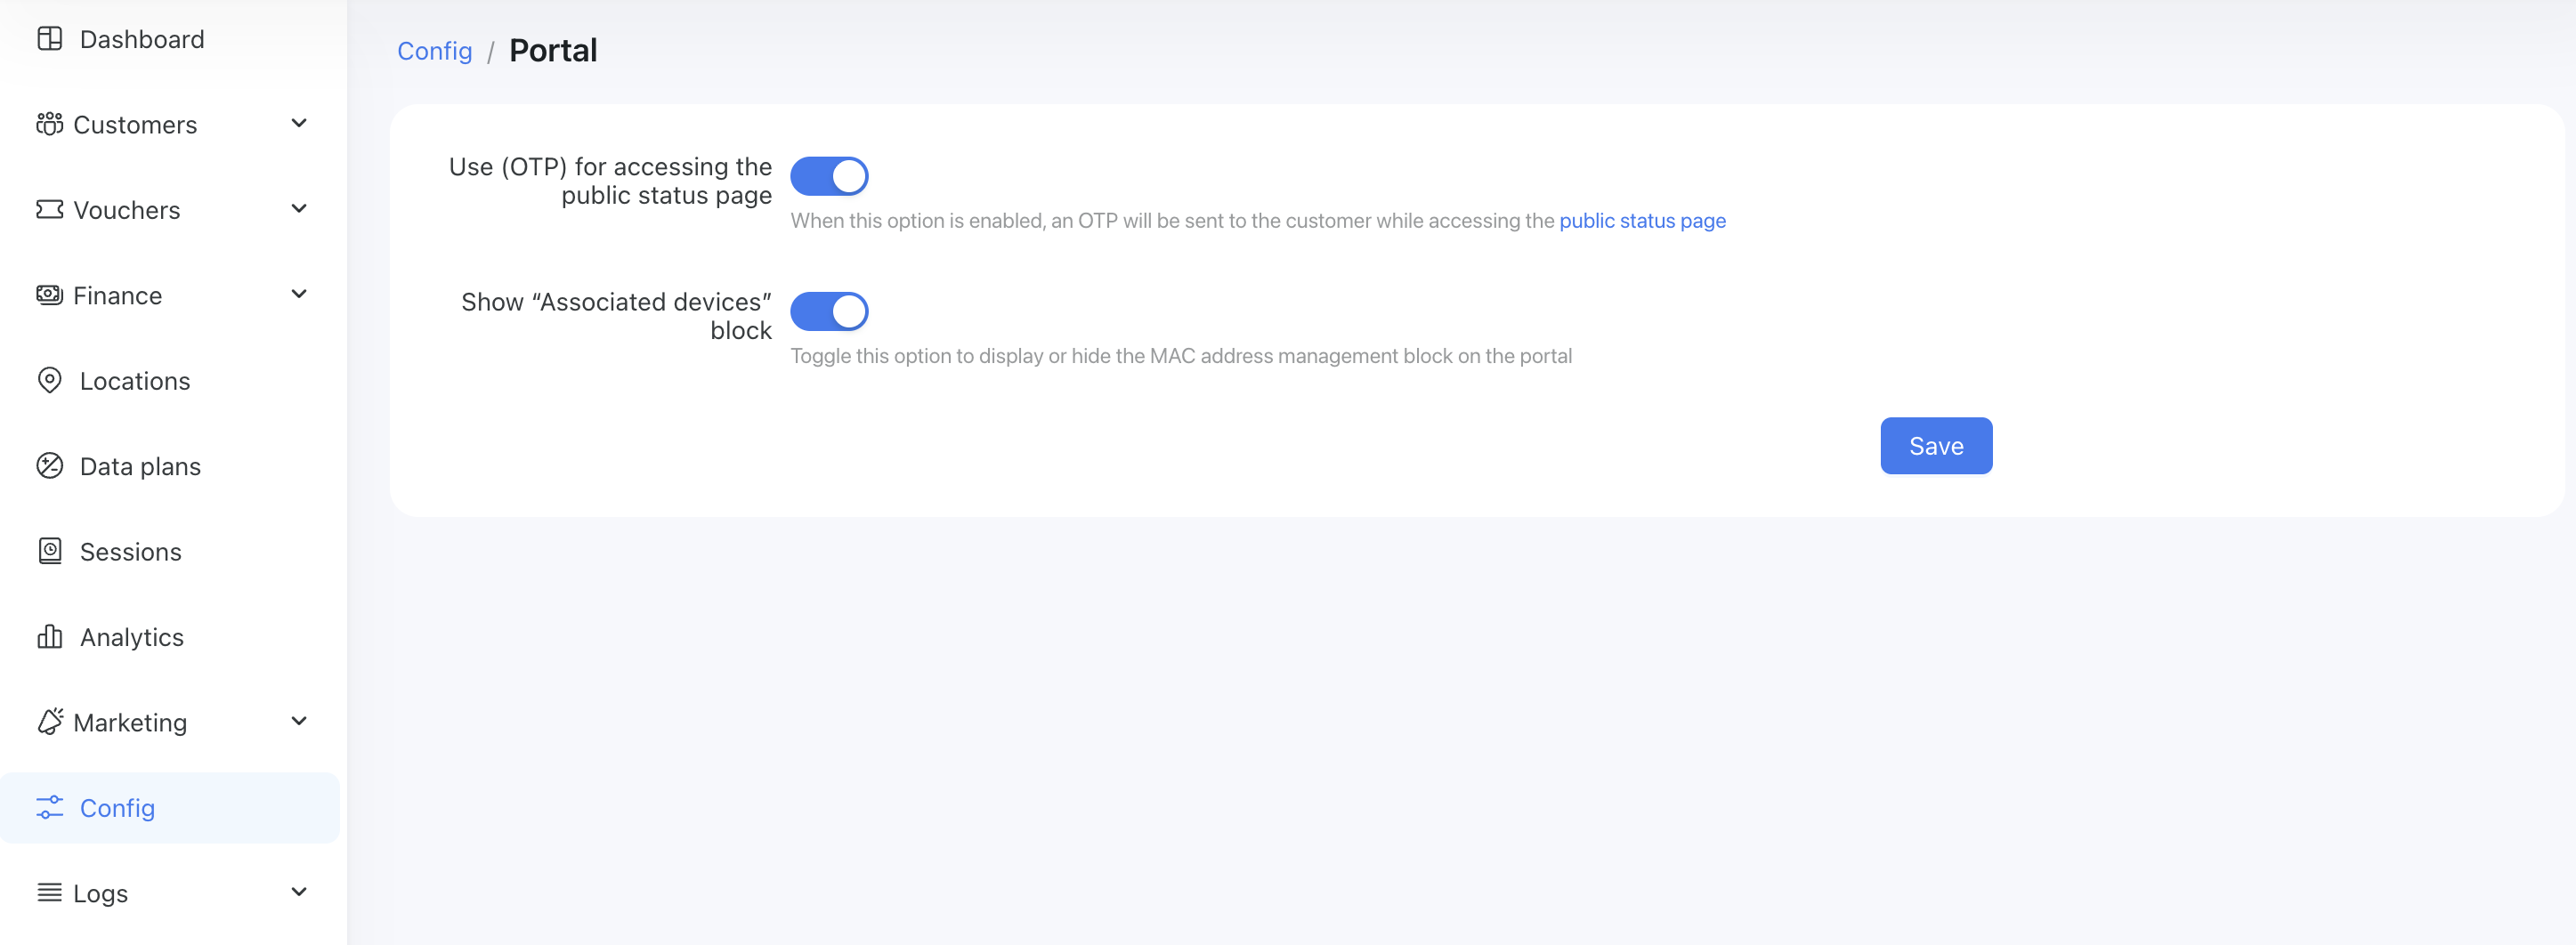
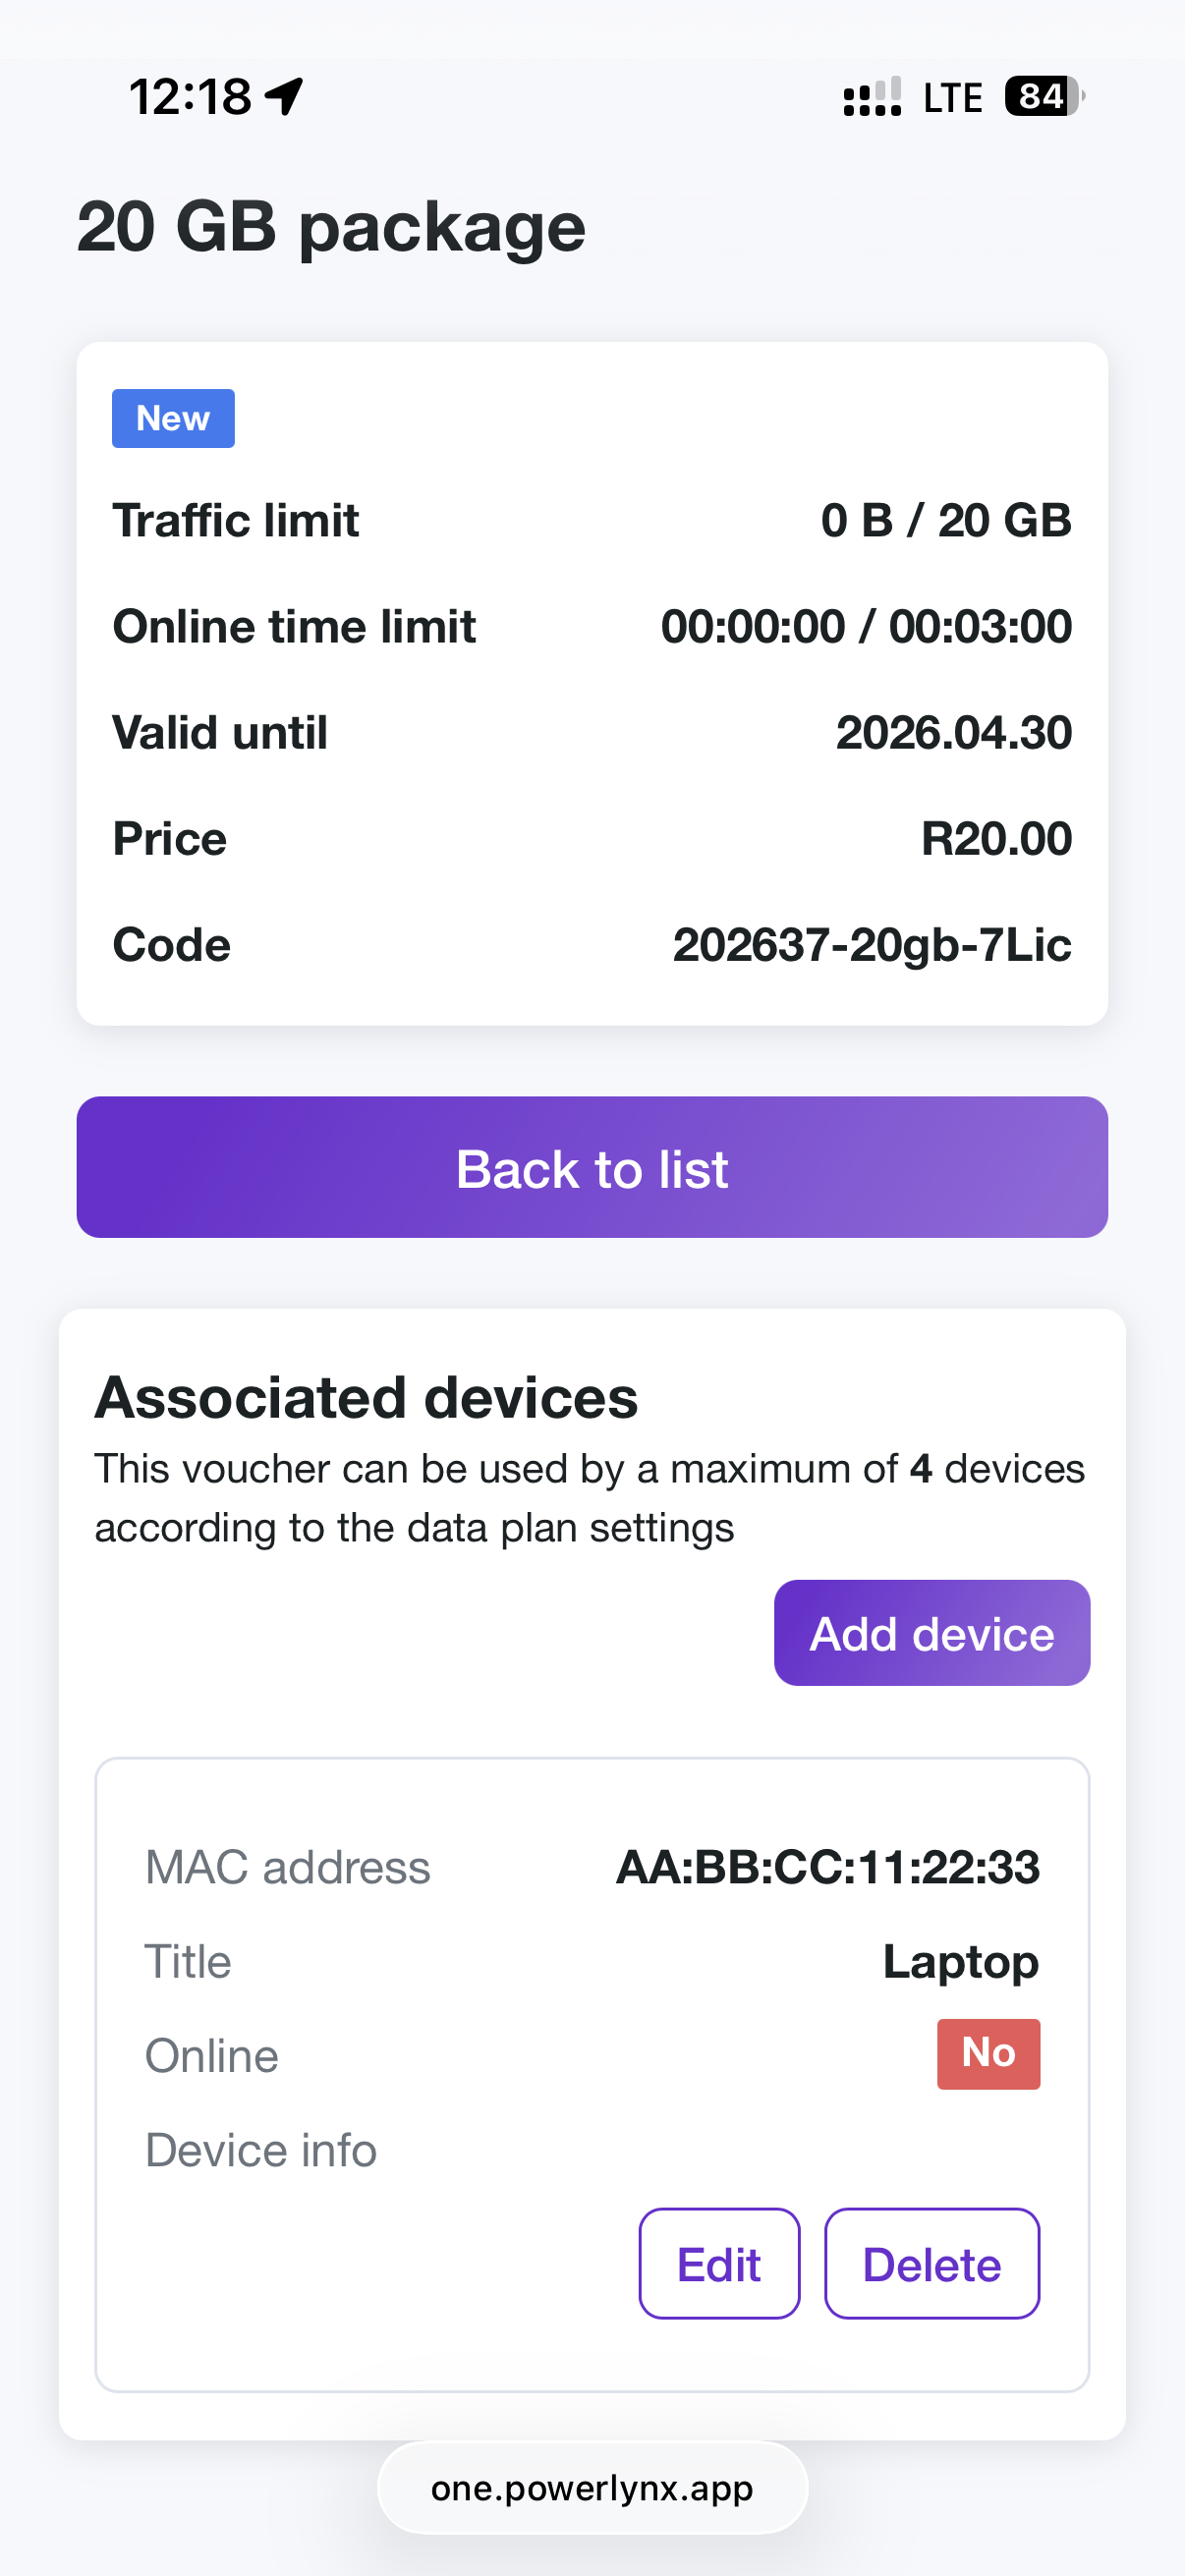
With 2FA enabled, customers can manage their vouchers from the portal page. They can add, edit, or remove MAC addresses associated with their vouchers - for example, to disconnect a specific device.
Use the "Show Associated Devices block" option to enable this feature. When disabled, customers cannot add, edit, or delete MAC addresses from their vouchers.
Your customers can now manage MAC addresses associated with their vouchers:
and see their historical vouchers:
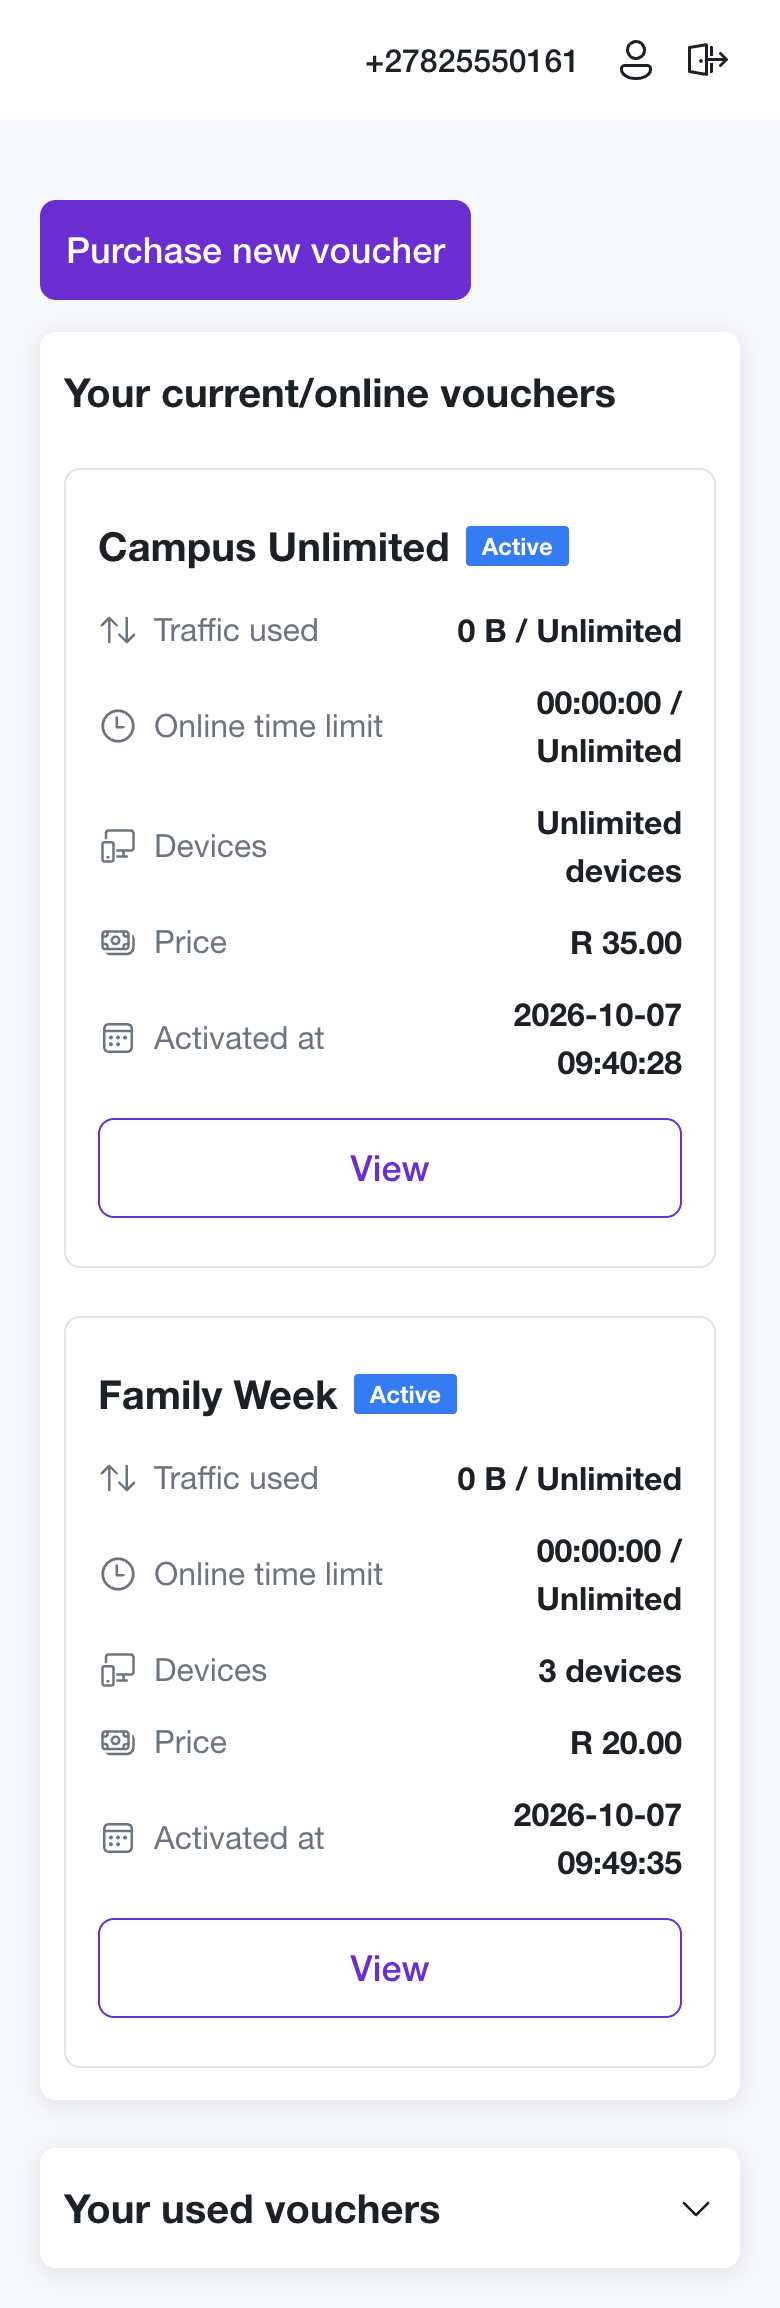
Each voucher card — on the vouchers list and on the page shown after a purchase — and the voucher's own page show a Devices row with how many devices the voucher's data plan allows at the same time: 1 device, 3 devices, or Unlimited devices. If the voucher's data plan has since been deleted, the row is left out and no new device can be added to that voucher.
Moving a device the customer already owns
Typing a MAC address by hand is the slow path, and customers rarely know the address of their own TV. So the Add device dialog also lists the devices that customer already has — the phone that was on last month's voucher, a device registered from My account, a device attached to a voucher they bought but have not started using yet.
Each entry says what linking it will do, because the device may still belong somewhere:
- It is on another of their vouchers — linking moves it off that one.
- It is reserved by a voucher that was purchased but never activated — linking takes it from there.
- It is not on any voucher — linking simply attaches it.
Choosing Link moves the device onto the voucher the customer is looking at. The device keeps the details the captive portal already detected for it, such as the device type, so the entry does not come back blank.
INFO
The number of devices a voucher may carry comes from its data plan, and it is shown above the list. If the voucher is already at its limit, the customer has to remove a device before linking another.
WARNING
If the device is moved away from a voucher it was actively using, that session is disconnected straight away. The device reconnects under the voucher it was just linked to.
Devices already attached to the voucher being viewed are not offered in the list — they are already shown on the page behind the dialog.
To configure SMS notification containing the portal URL - navigate to Config > Communication > Notifications and find the Status page notifications section:
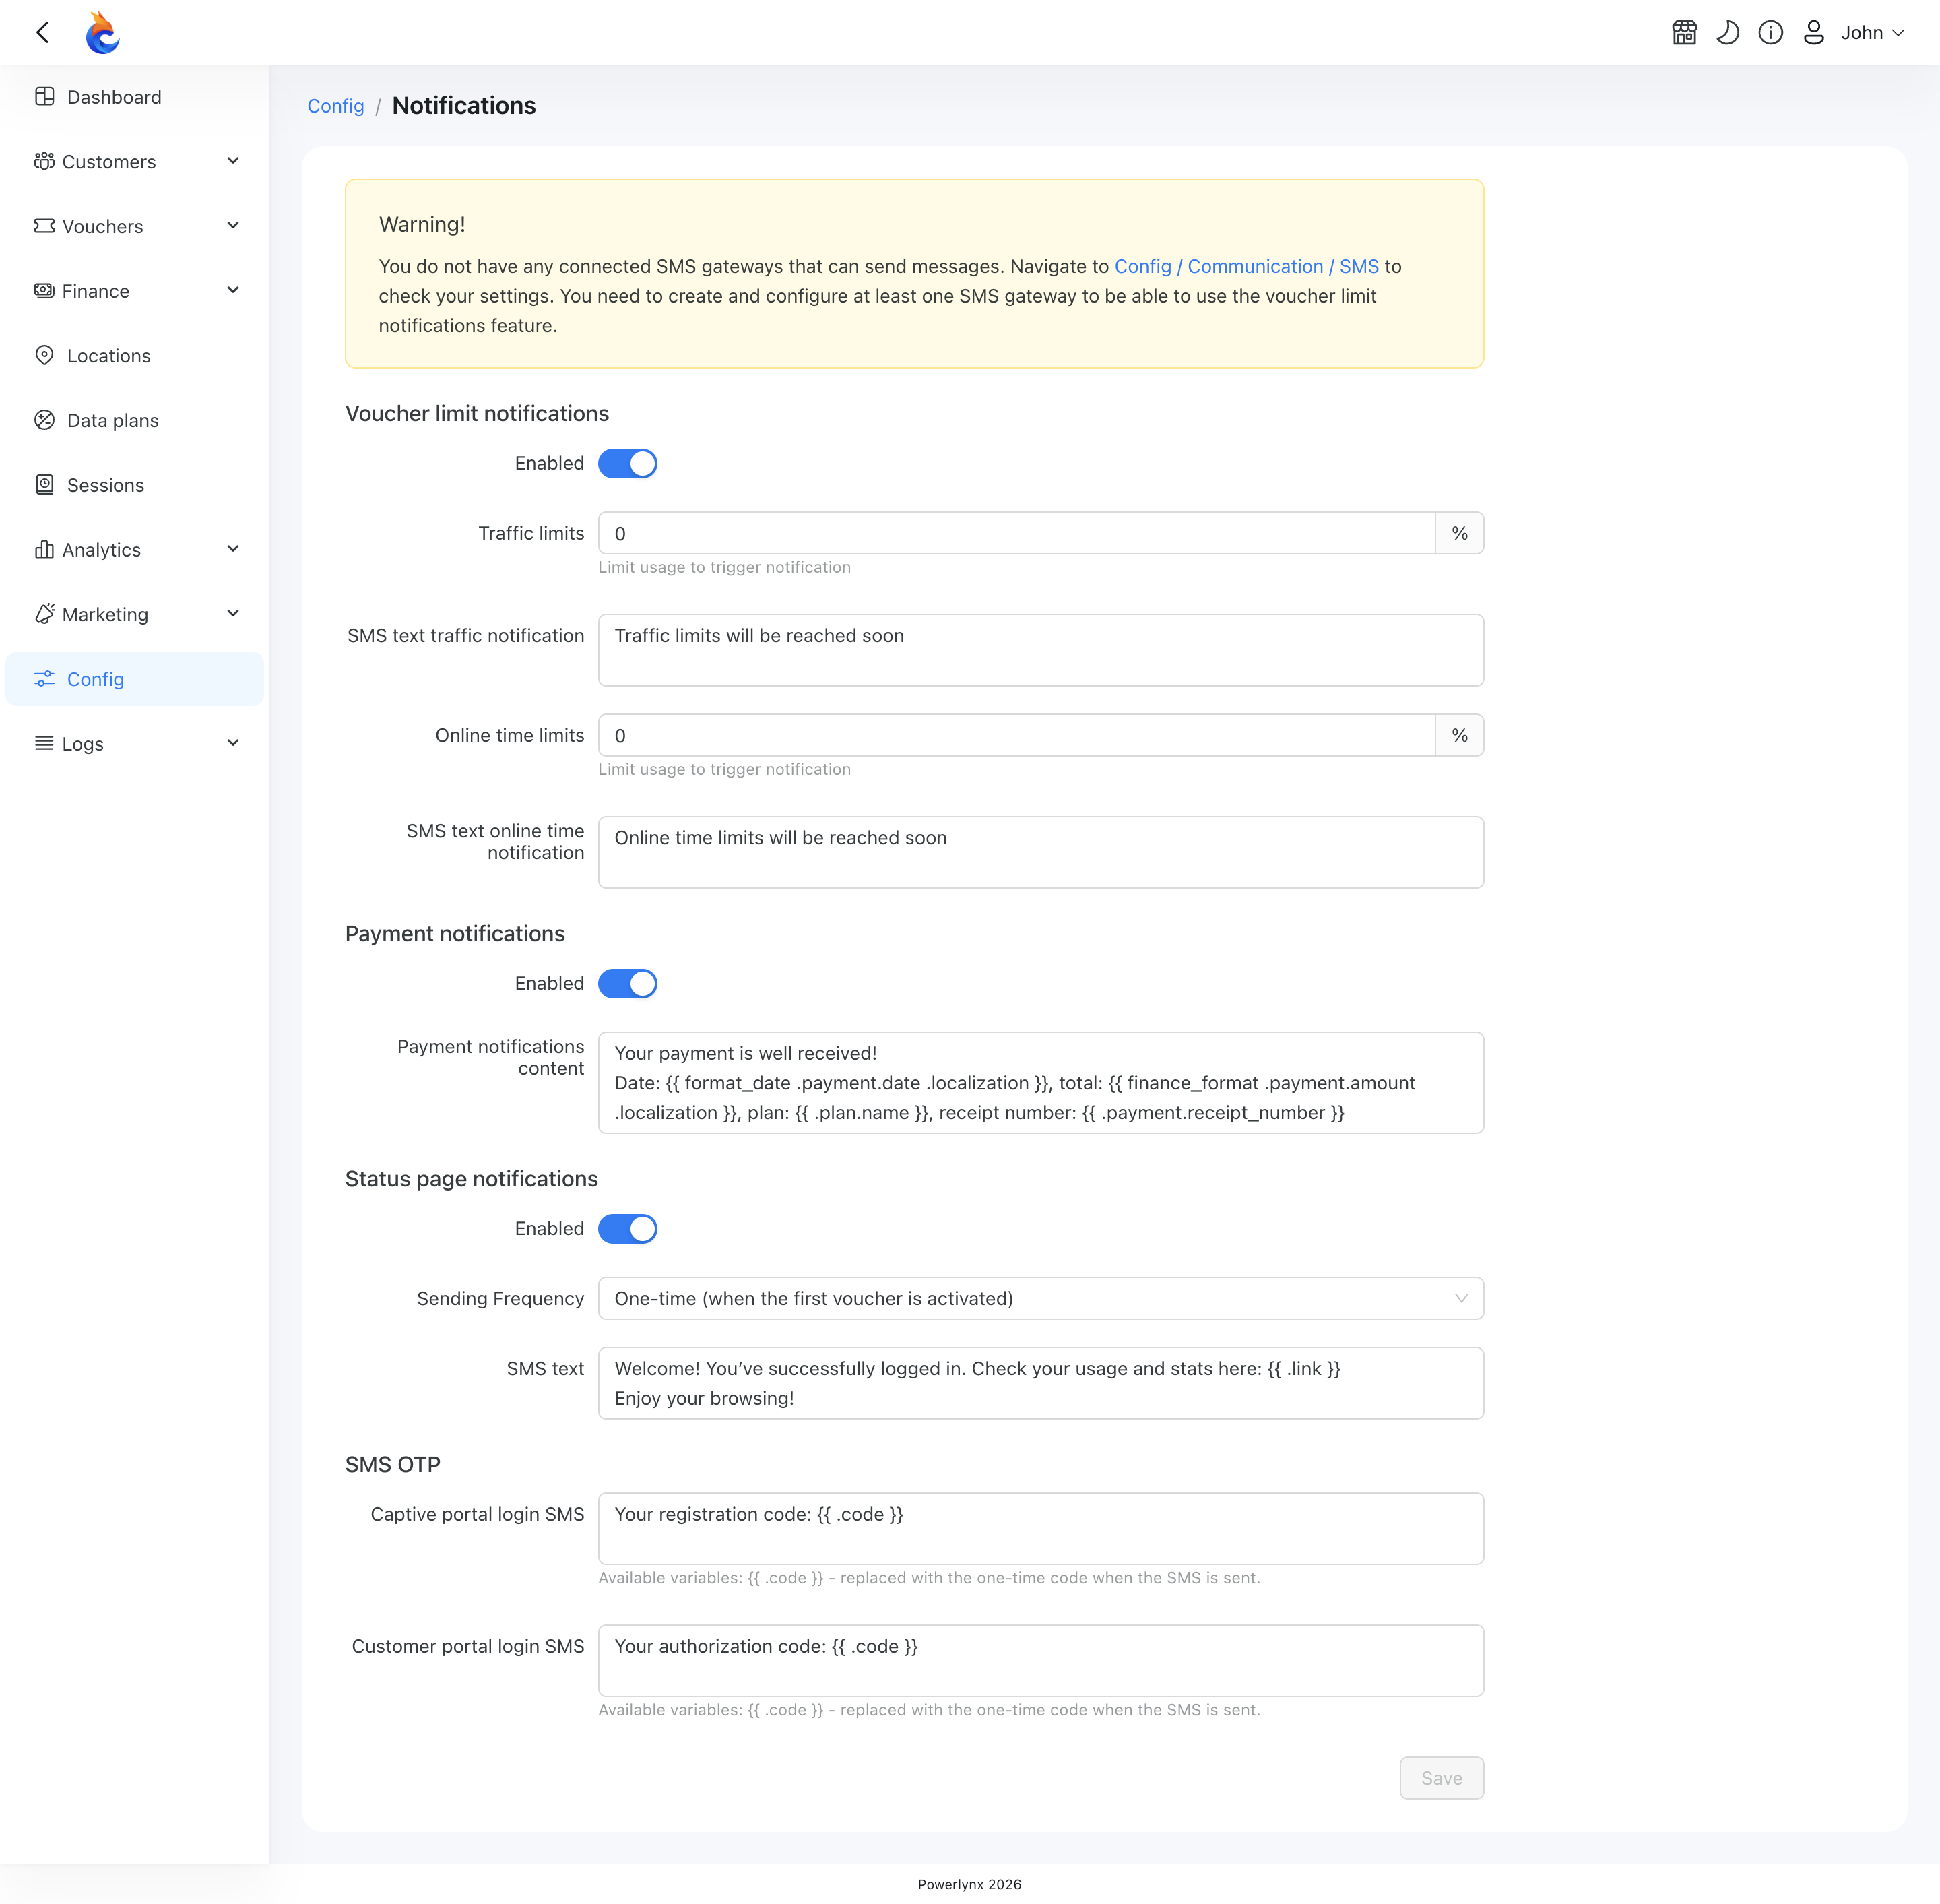
Enable this feature, select sending frequency: one-time or every time a new voucher is activated, and edit the text. You can also customize this message to include personalized content for your customers.
You can monitor SMS sent in Logs > SMS Logs.
Redirecting customers after they connect
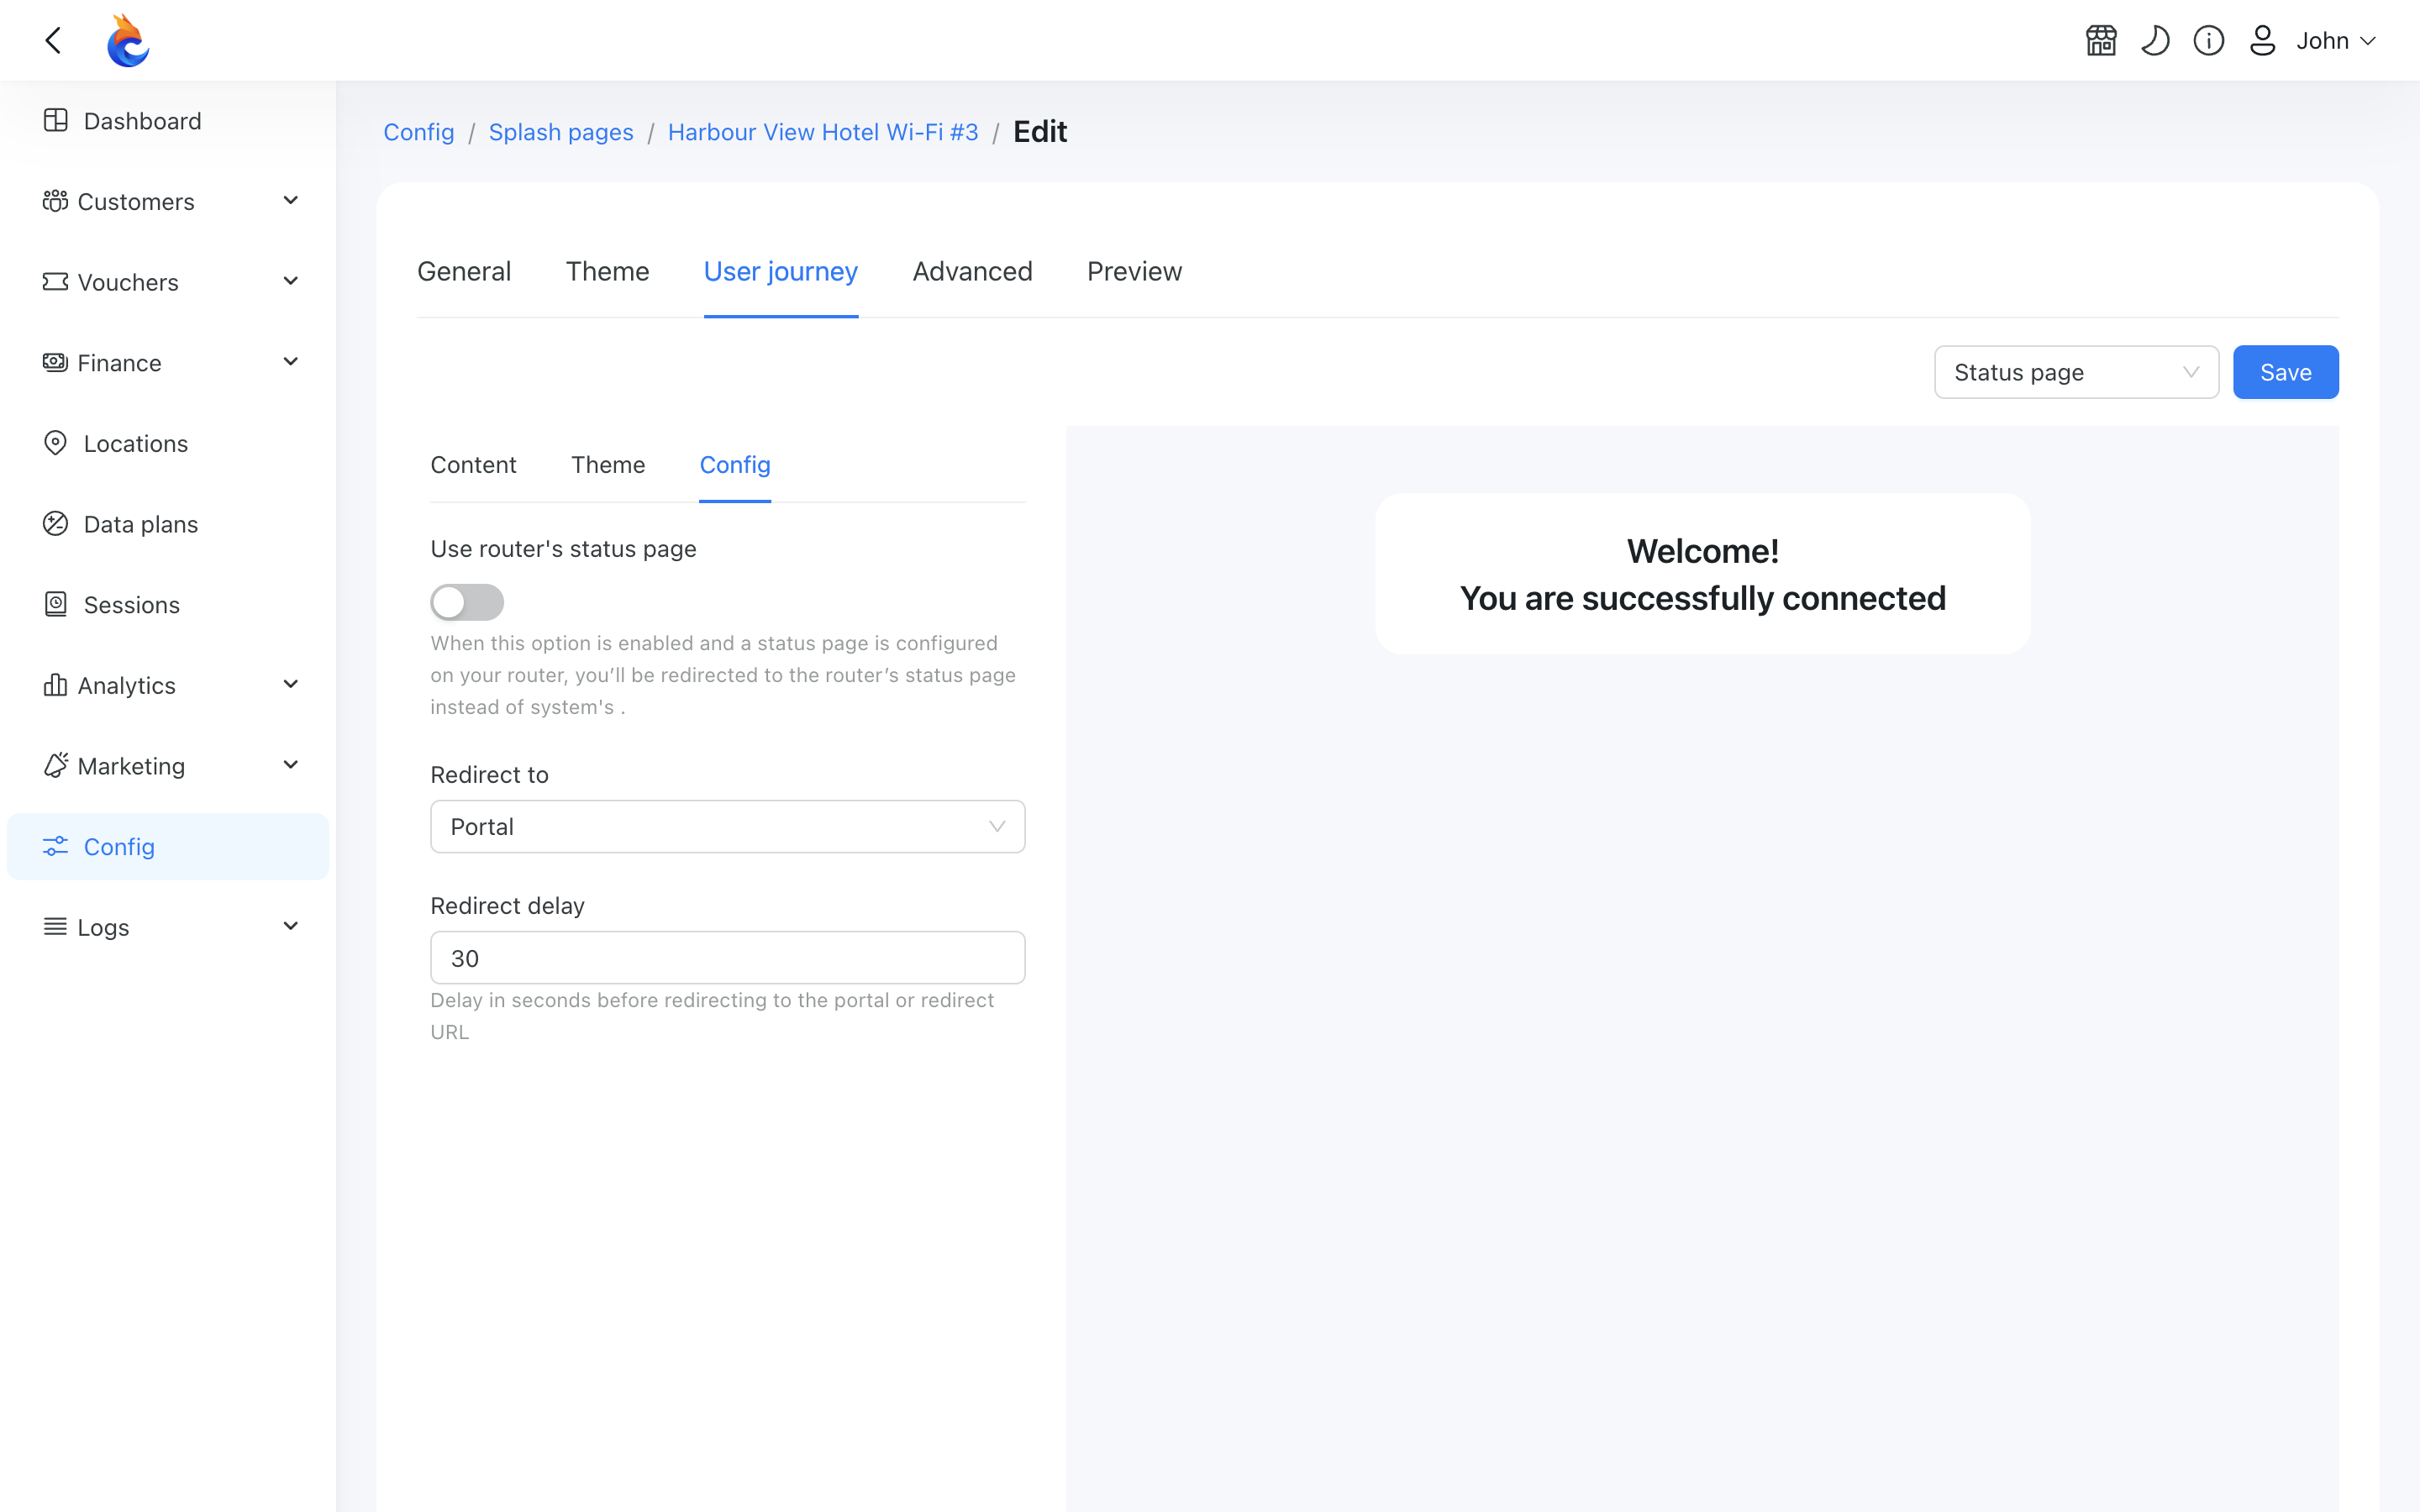
Once a customer is online you can send them somewhere automatically — either to their Customer Portal or to a web address of your choice. This is set per splash page, in its Status page settings.
- Redirect to — choose Portal or Custom URL:
- Portal — the customer is taken to their Customer Portal and logged in automatically, so they land on their account without having to enter their phone number again.
- Custom URL — a URL field appears; enter the address you want customers sent to (for example your homepage or a promotion).
- Delay in seconds before redirecting — how long the status page waits before sending the customer to the portal or redirect URL.