Additional fields on the splash page
Overview
Powerlynx Additional Fields is a feature that enables you to create custom fields and display them on a splash page. This allows you to collect specific information from your customers beyond the default fields like name, email, and phone number.
With this functionality, you can tailor the customer onboarding process to fit your business needs, ensuring you gather all necessary details before granting access.
How it works
- Create Additional Fields – Navigate to the
Config/System/Additional fieldsand add the extra fields you want to collect.

When adding an additional field, you need to set the following parameters:
Title – The field's name visible to the customer.
Internal Name – How the field is stored in the database. It fills in automatically as you type the Title: accents are dropped, letters are lowercased, and spaces and punctuation become
_— for example,Número de teléfonobecomesnumero_de_telefono. You can still type your own name; once you do, the title no longer overwrites it (clear the field to switch auto-fill back on). If the title has no latin letters — say, only digits or a non-latin alphabet — the name stays empty and you type it yourself. The name can't be changed after the field is created, andid(in any case) is reserved, so it can't be used as a name; names likeid_numberare fine.Type – The data type of the field depends on the data you want to store: string, integer, select, select multiple, date, and more.
Readonly – If enabled, the field cannot be edited from the GUI.
Hidden – If enabled, the field will be hidden from the GUI.
Use on Splash Page (Most Important) – Defines whether this field can be assigned to the splash page.
- Assign to Splash Page – Once the field is created and the "Use on Splash Page" toggle is enabled, you will see a new option available on your splash pages:
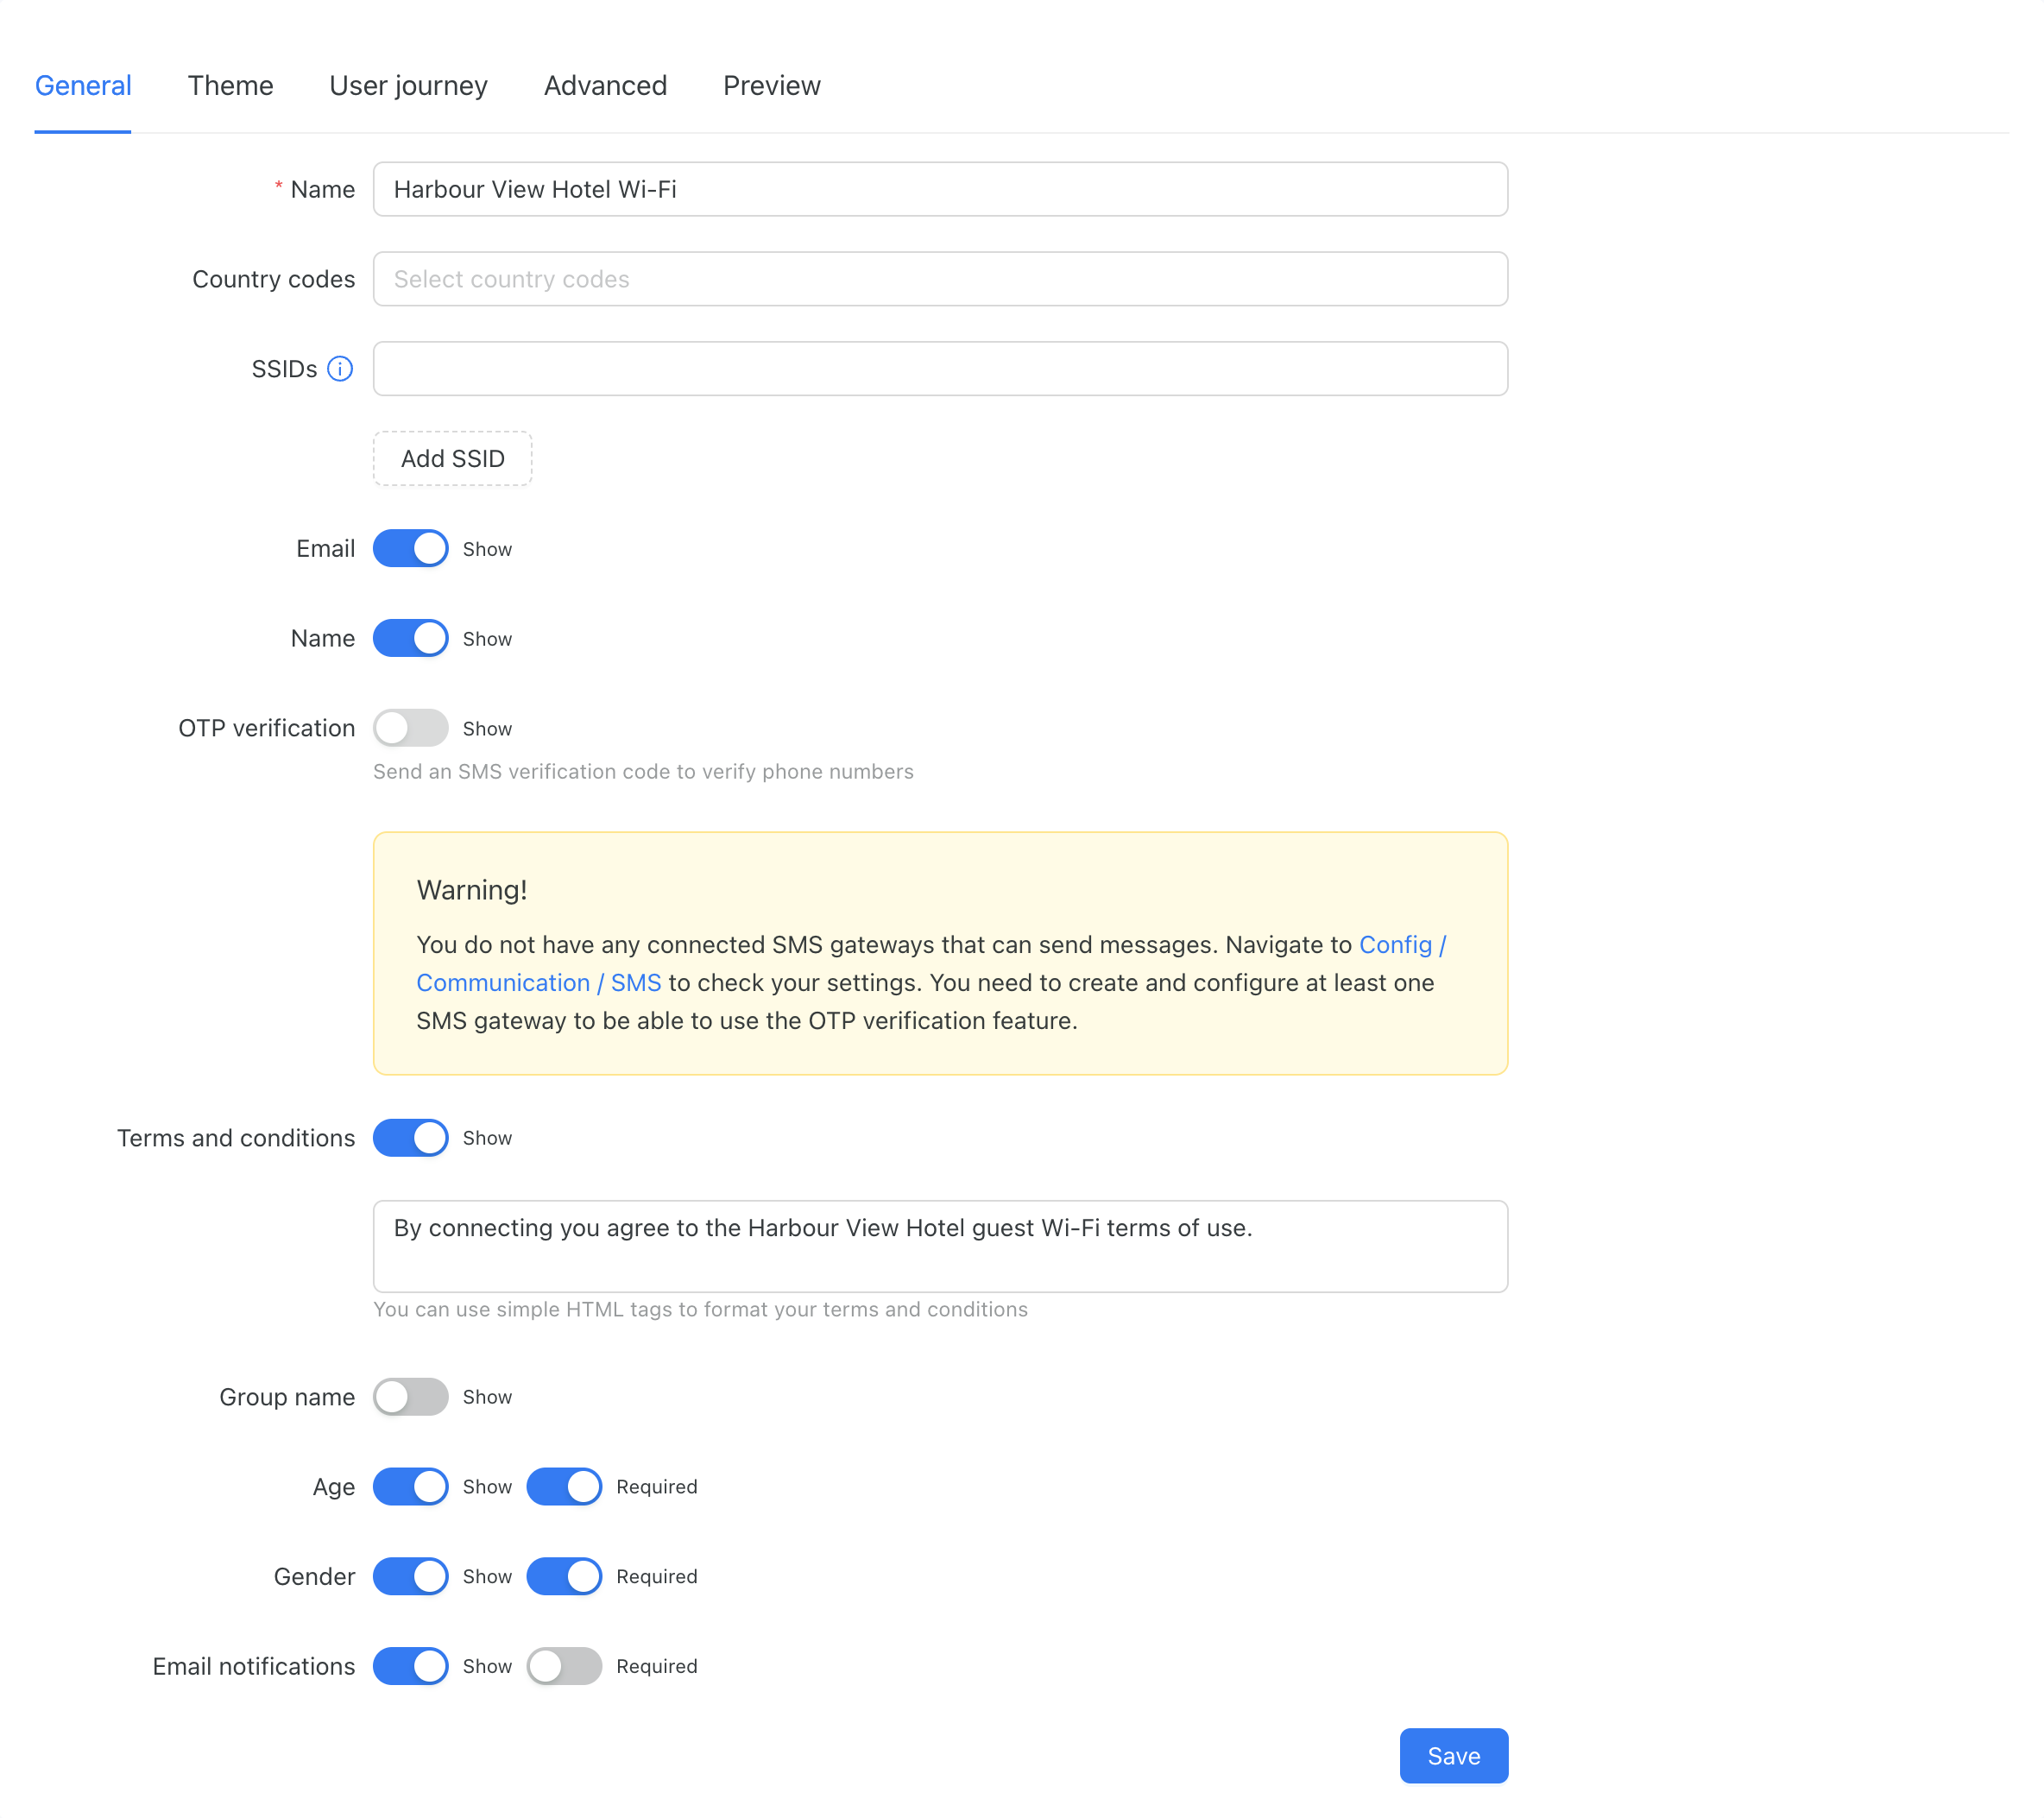
Enable the "Required" toggle for this field to make it mandatory on the splash page.
- Collect and Store Data – On the splash page, the customer will be prompted to enter data into the fields you have enabled.
Example
I want to ask my customers for their age, gender, and whether they would like to receive various notifications from our product via email.
This is my set of additional fields:
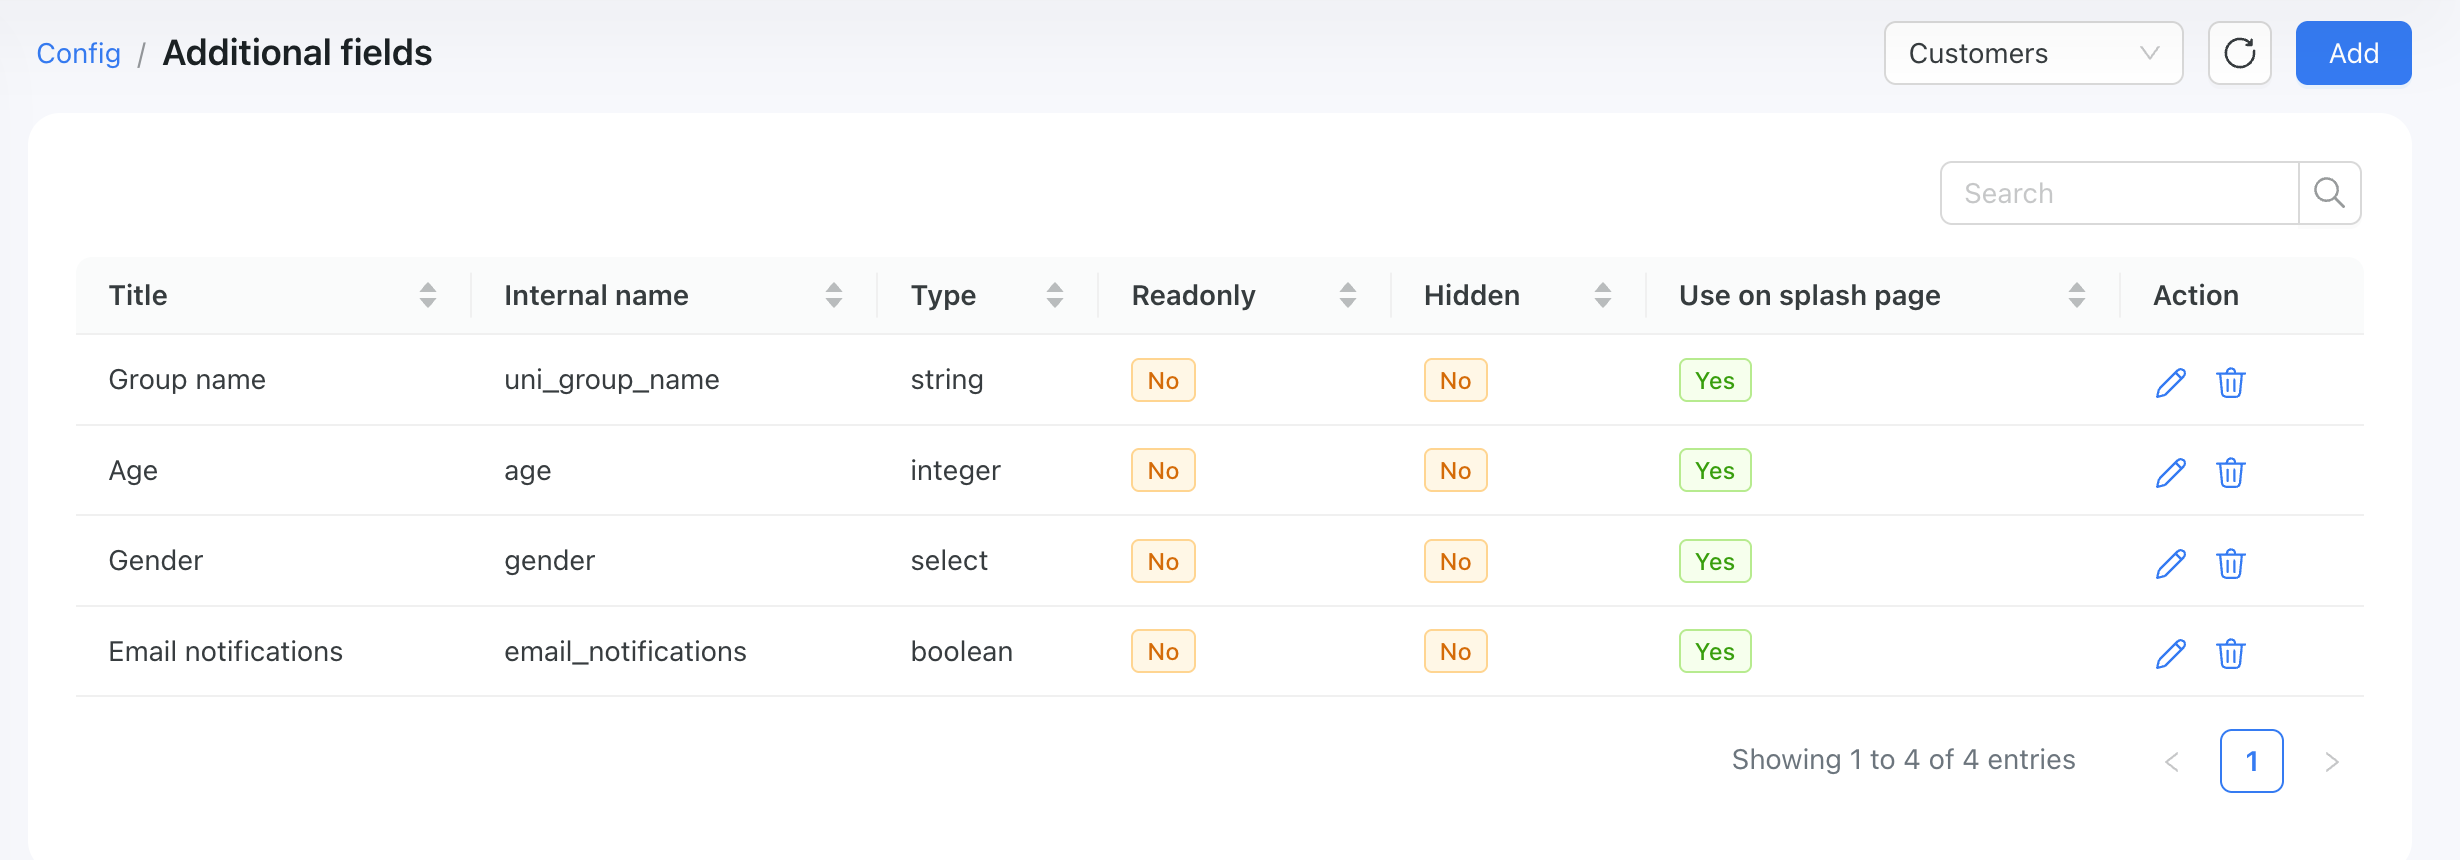
Splash page settings:
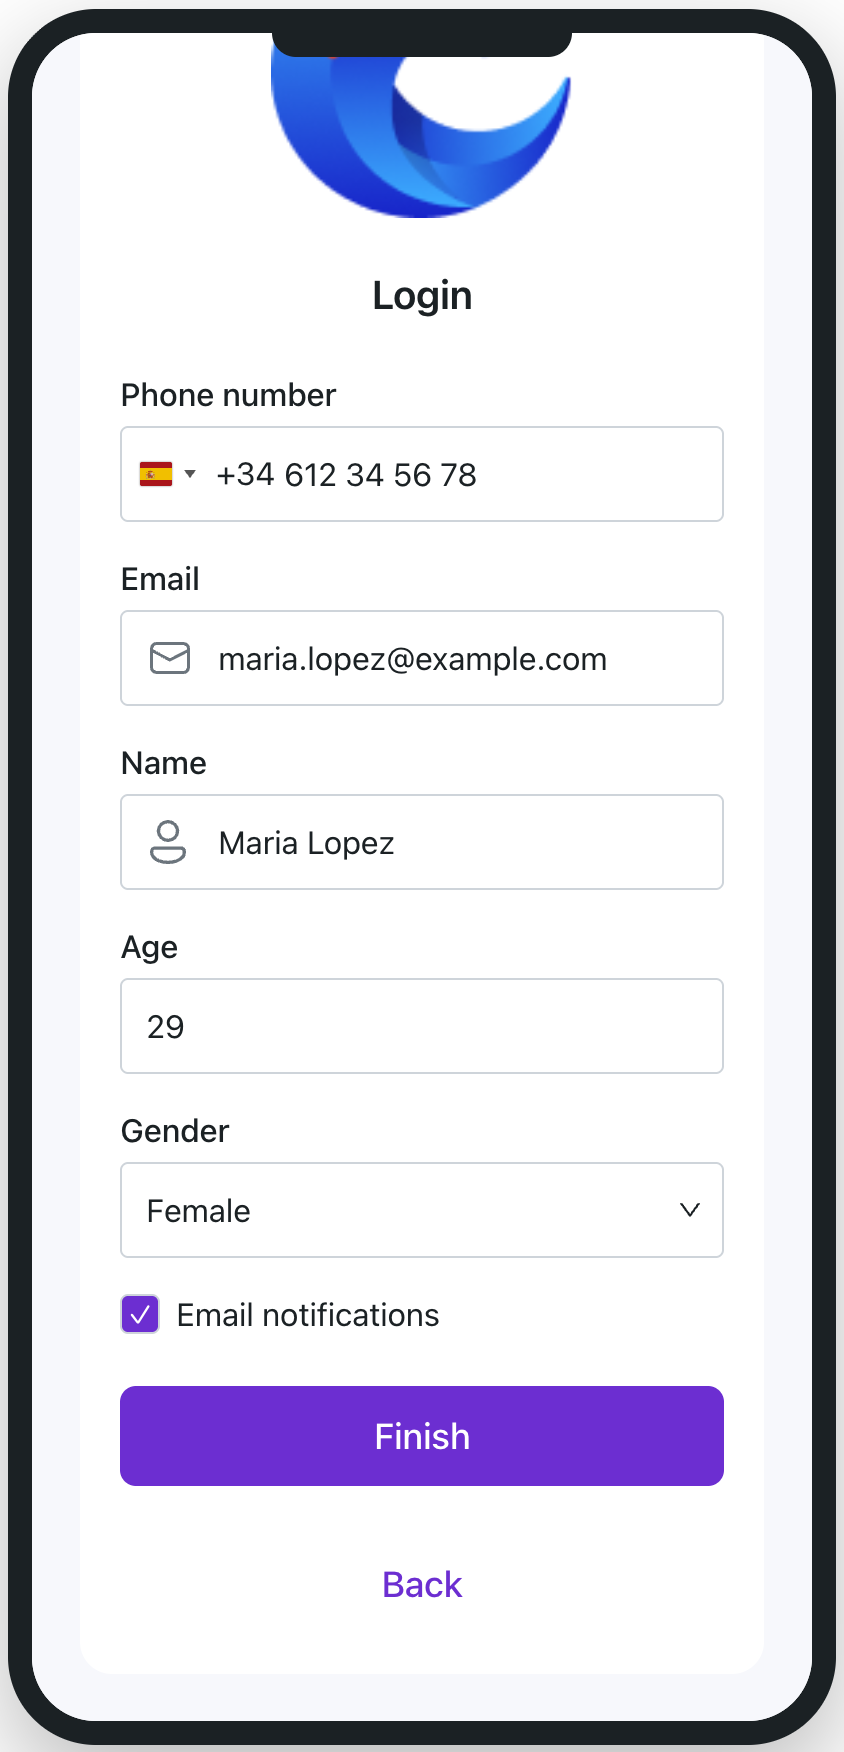
With this setup, I will ask my customers to provide their email (required), and name (required), as well as their age (required), gender (required), and an optional checkbox to opt in for various emails from our product.
How it looks on the splash page:
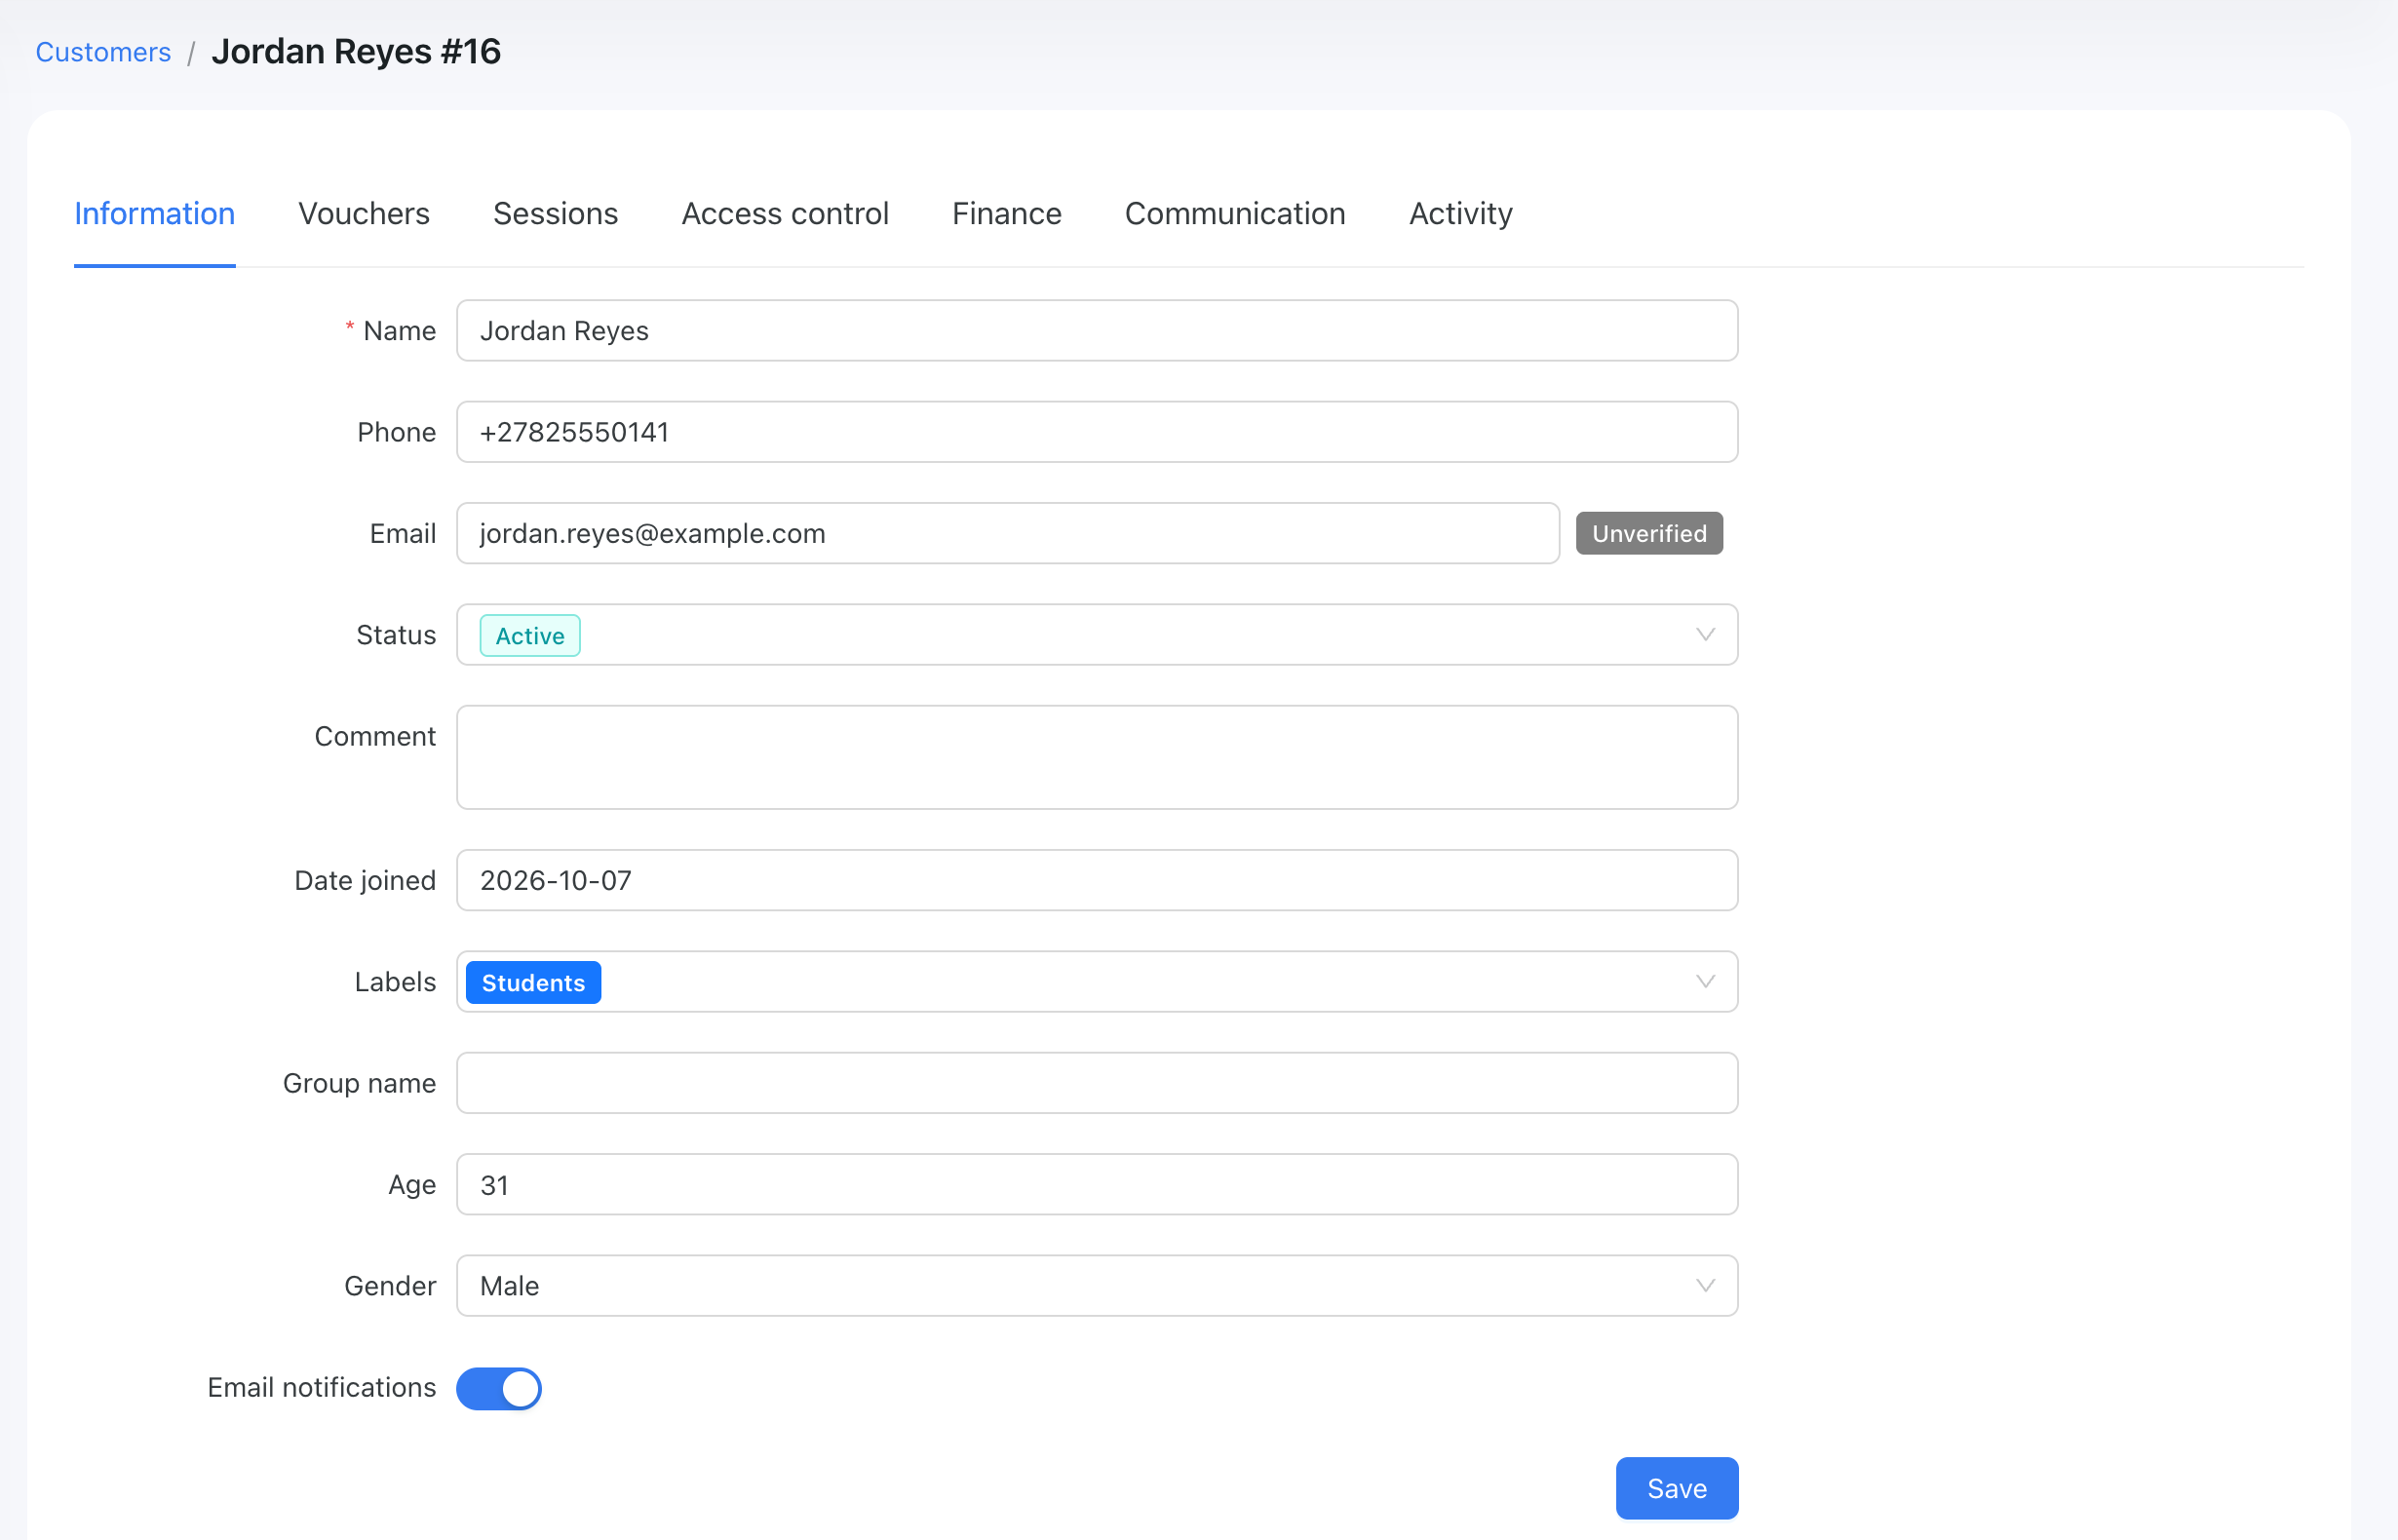
Customer in Powerlynx with collected data:
You can export the collected data using our reporting feature.
Asking existing customers for missing fields
Re-survey asks returning customers for any required additional fields they haven't filled in yet, and holds back network access until they complete them. It's useful when you add a new required field after customers have already signed up — for example a national ID for a new regulation — since those existing customers have the field blank, and re-survey collects it on their next captive-portal visit.
It has two strengths, set per splash page:
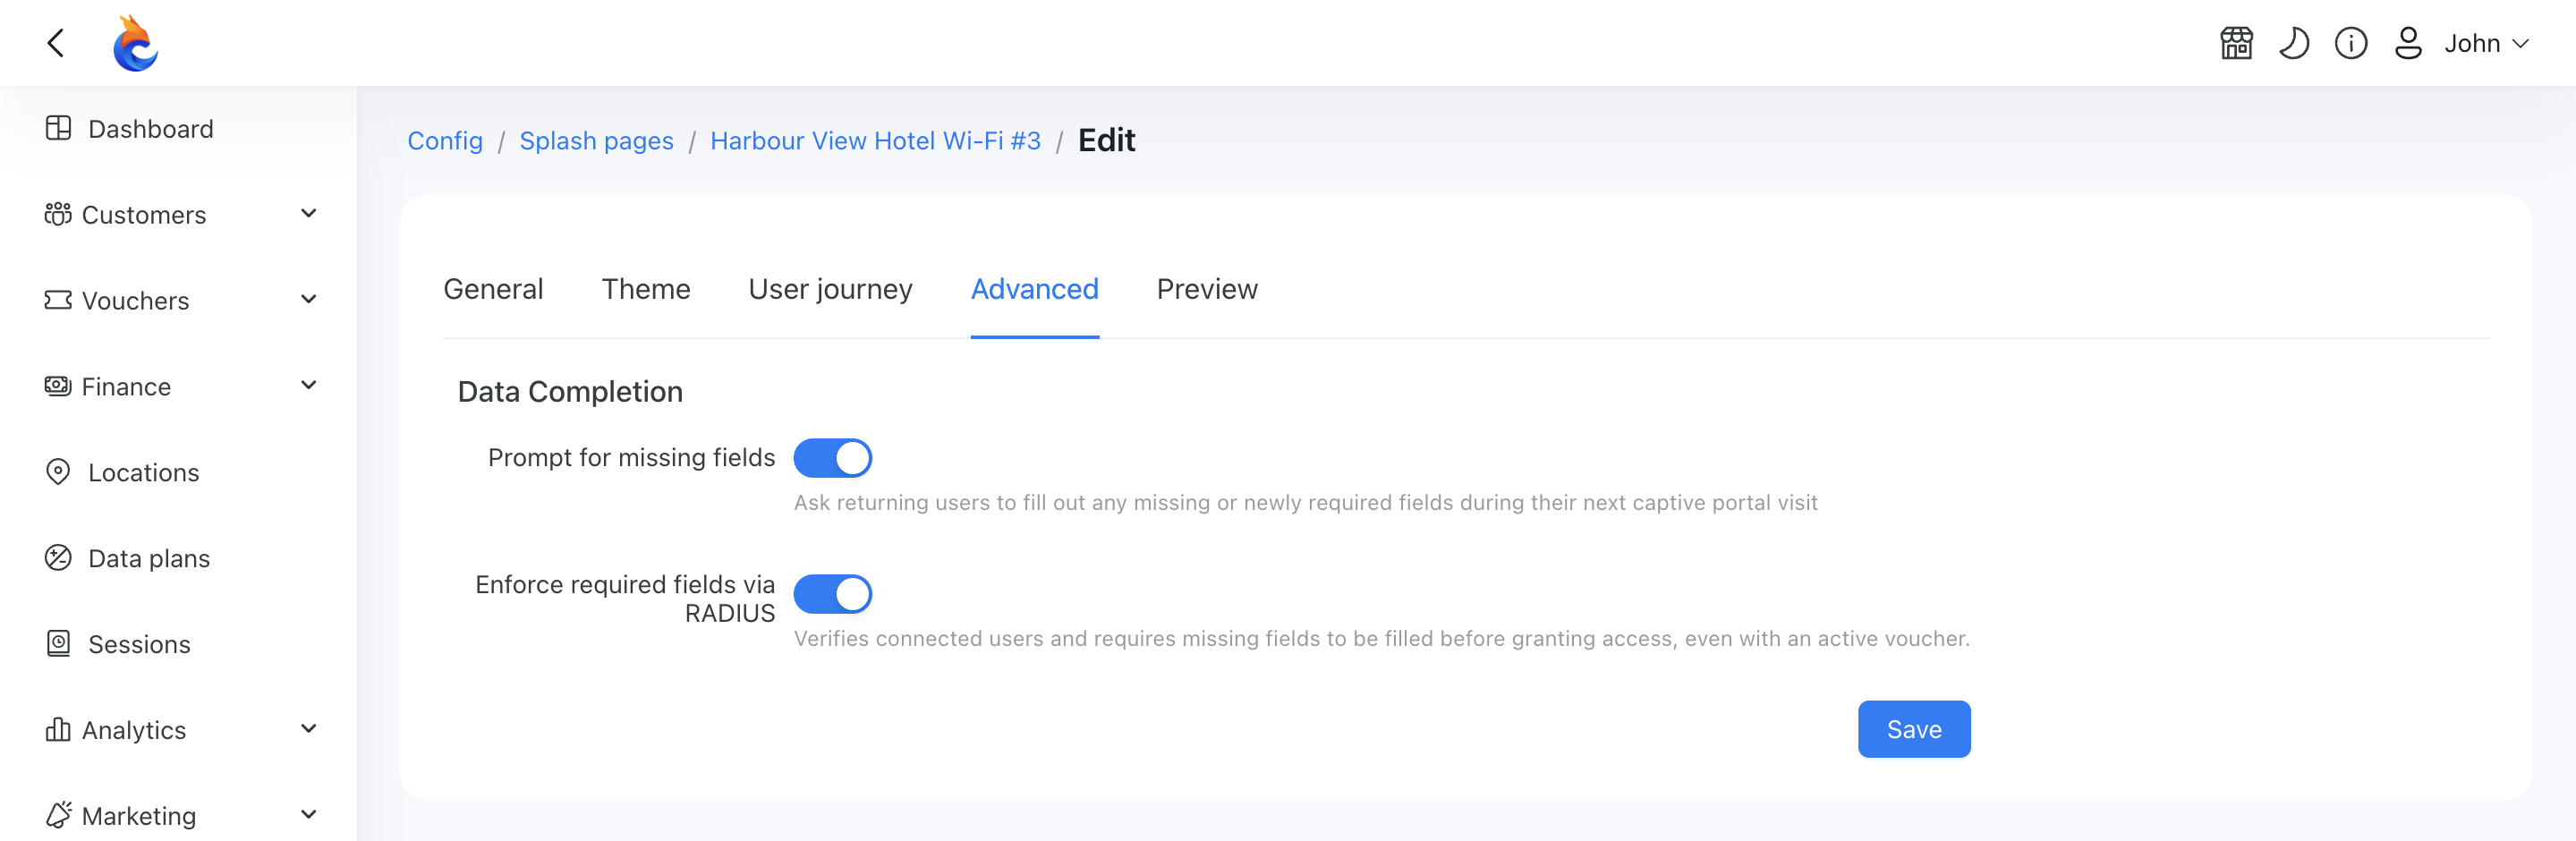
- Prompt for missing fields (soft). A returning customer who has no active voucher and is buying a new one is shown the missing required fields as an extra step before the plan / buy screen.
- Enforce required fields via RADIUS (hard). A returning customer who reconnects with an active voucher — who would otherwise be let straight online — is instead sent back to the captive portal to fill the missing fields first, and only let online once they're saved. This mode needs a router that supports a walled garden.
Enabling it
- Go to
Config → Portal → Splash pagesand open (or create) a splash page. - On the General tab, make sure the fields you want to collect are marked Required and shown on the splash page.
- On the Advanced tab, in the Data Completion section, turn on Prompt for missing fields.
- Optionally also turn on Enforce required fields via RADIUS (available only once the first toggle is on) to enforce it even for customers reconnecting with an active voucher.
- Save.
What the customer sees
A returning customer who is missing a required field is shown a "Complete your details" step that lists only the fields they still need to fill — never ones they've already answered. After they fill them in and continue:
- If they have an active voucher, they're put straight back online (no new purchase).
- If they don't, they carry on to plan selection as usual.
If they don't actually owe any field by the time the step loads, it's skipped and they're let through without seeing an empty form.