Quick‑Start Guide (~10 minutes)
This guide walks you through the minimum set‑up required to see Powerlynx in action. Follow the six steps below with any supported access point or gateway.
Prerequisites
A Powerlynx admin account (sign up for free if you haven’t already).
A compatible device that can redirect to an external captive portal and speak RADIUS.
Basic network connectivity from the device to the internet.
1️⃣ Create & brand your splash page
In the Powerlynx dashboard, navigate to
Config/System/Splash pagesPress the "Add" button and configure your splash page.
Upload your logo, tweak colours/fonts, and add optional elements (T&C, social login, adverts, etc.).
Hit Save & Publish.
2️⃣ Create a FREE data plan (for quick testing)
Using this manual, create a data plan with a price of 0. When the plan price is zero, the customer won't be redirected to the payment gateway. This allows us to test whether the user flow works correctly without triggering a redirect to the payment page. Later, we can update the price to test the flow with the payment gateways.
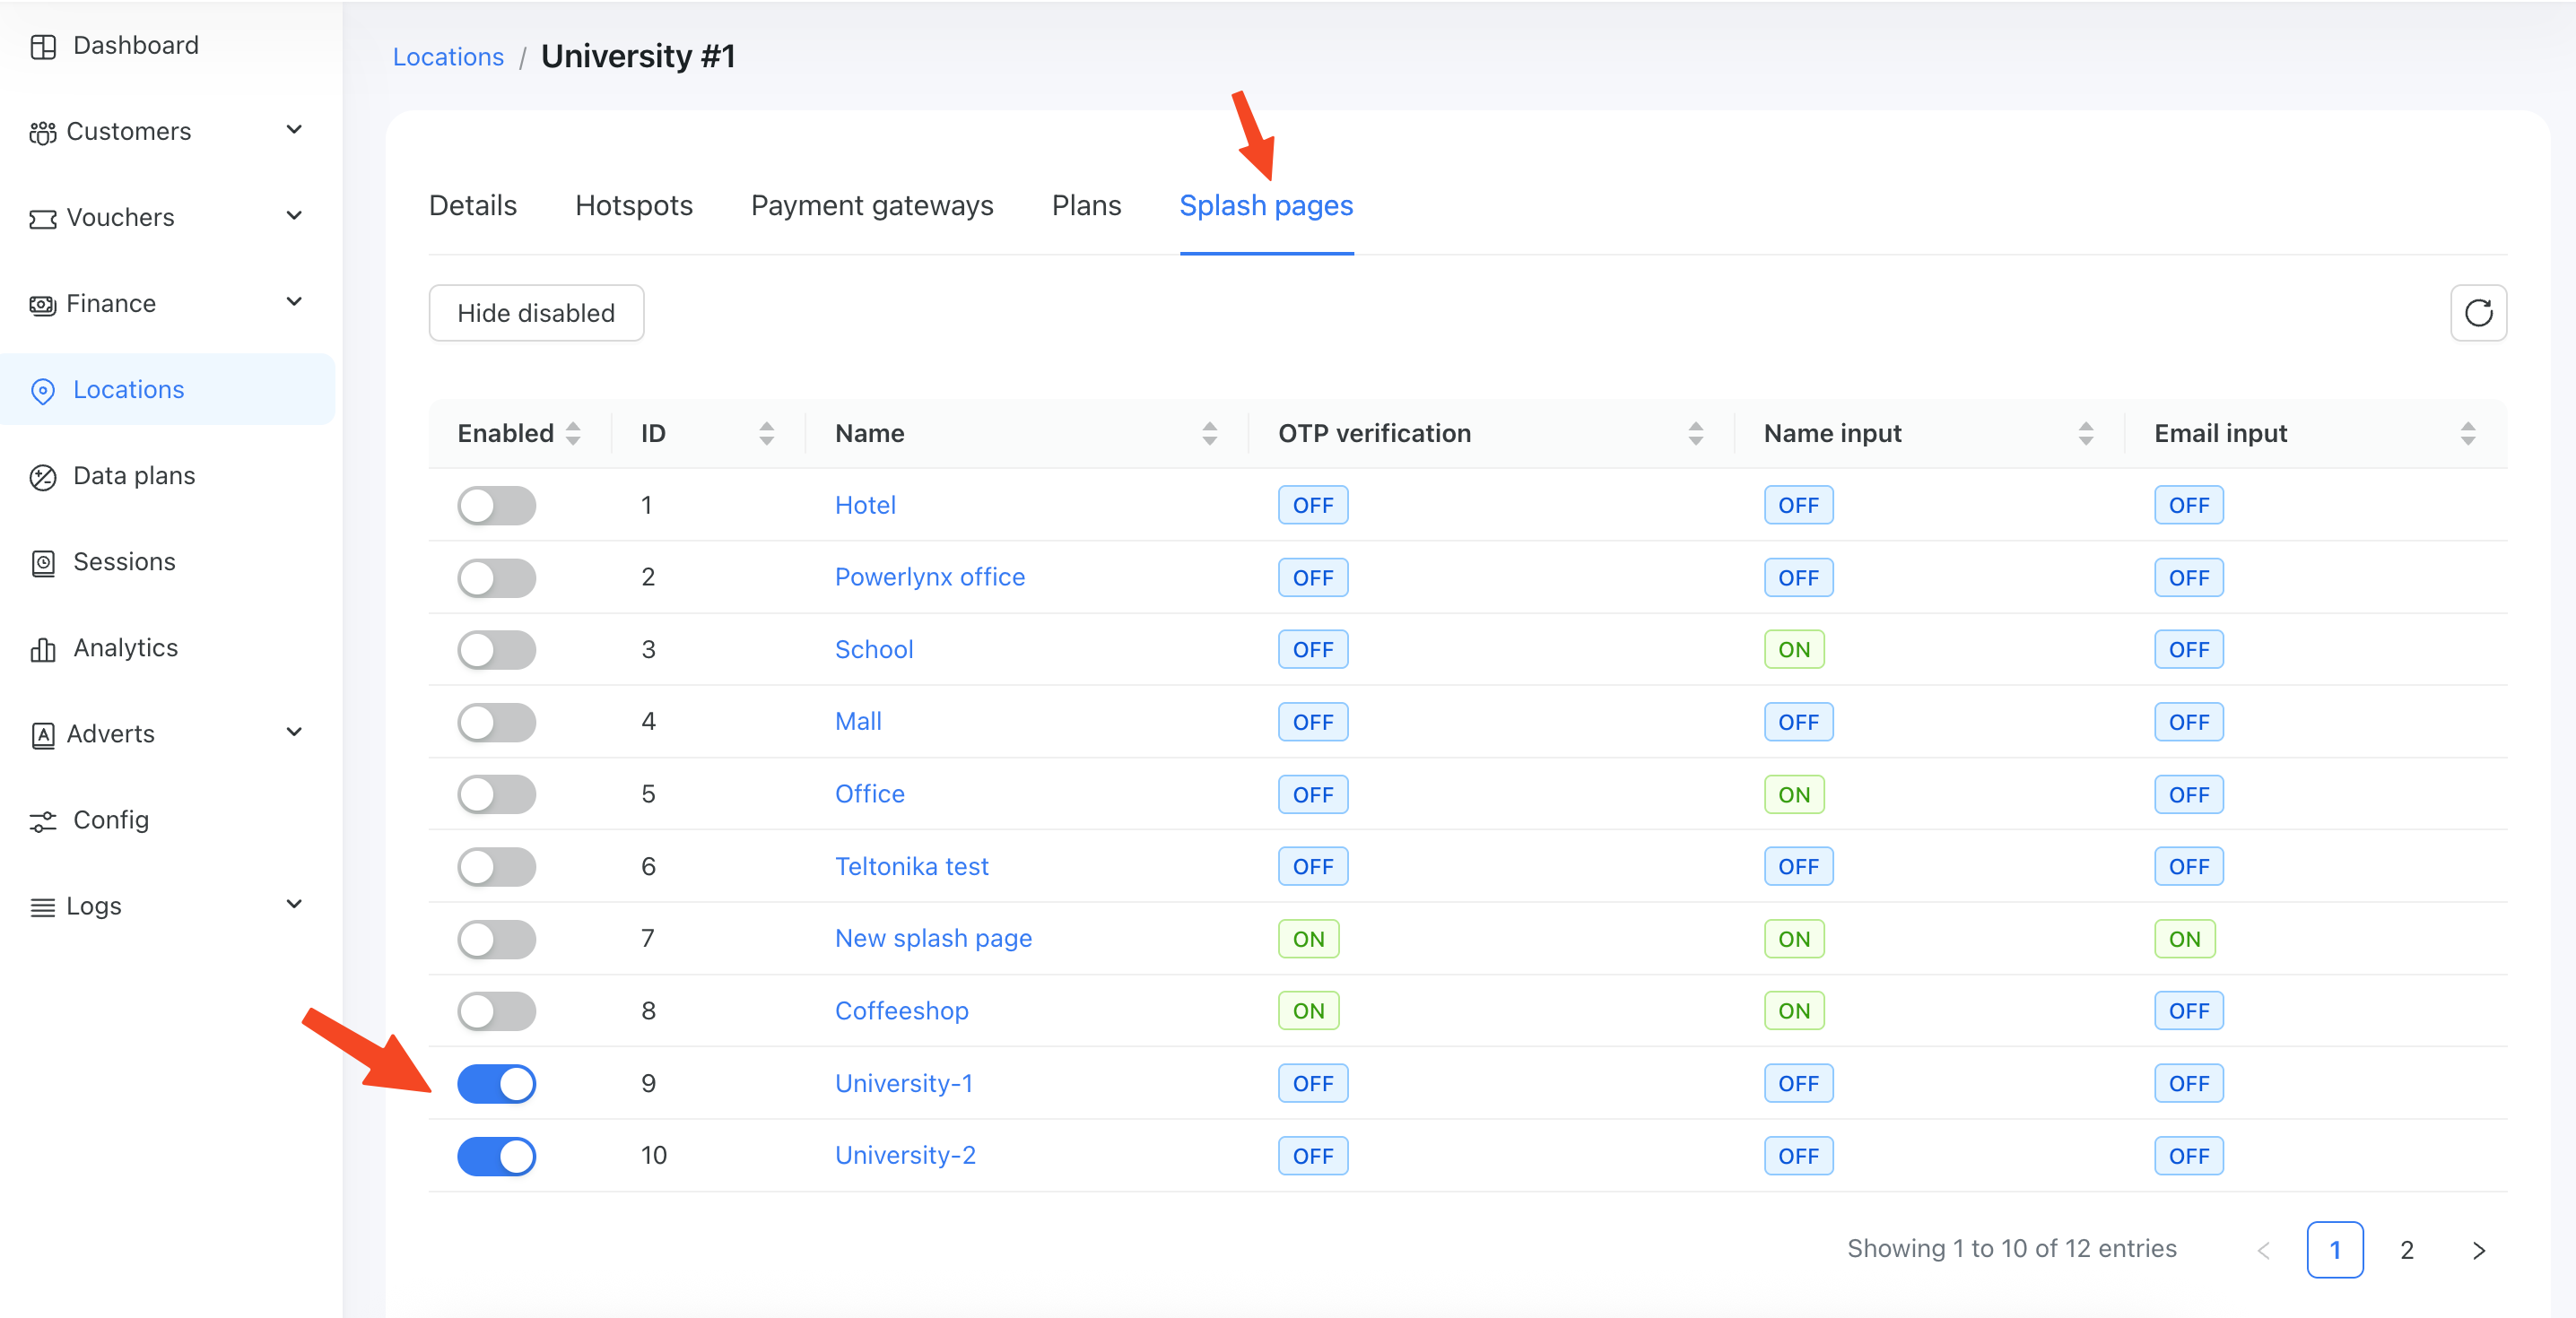
3️⃣ Assign the splash page to a location
Open the Locations menu and select a default location (or create a new one). Then, switch to the Splash Pages tab and enable the splash page you created in step #1 for this location.
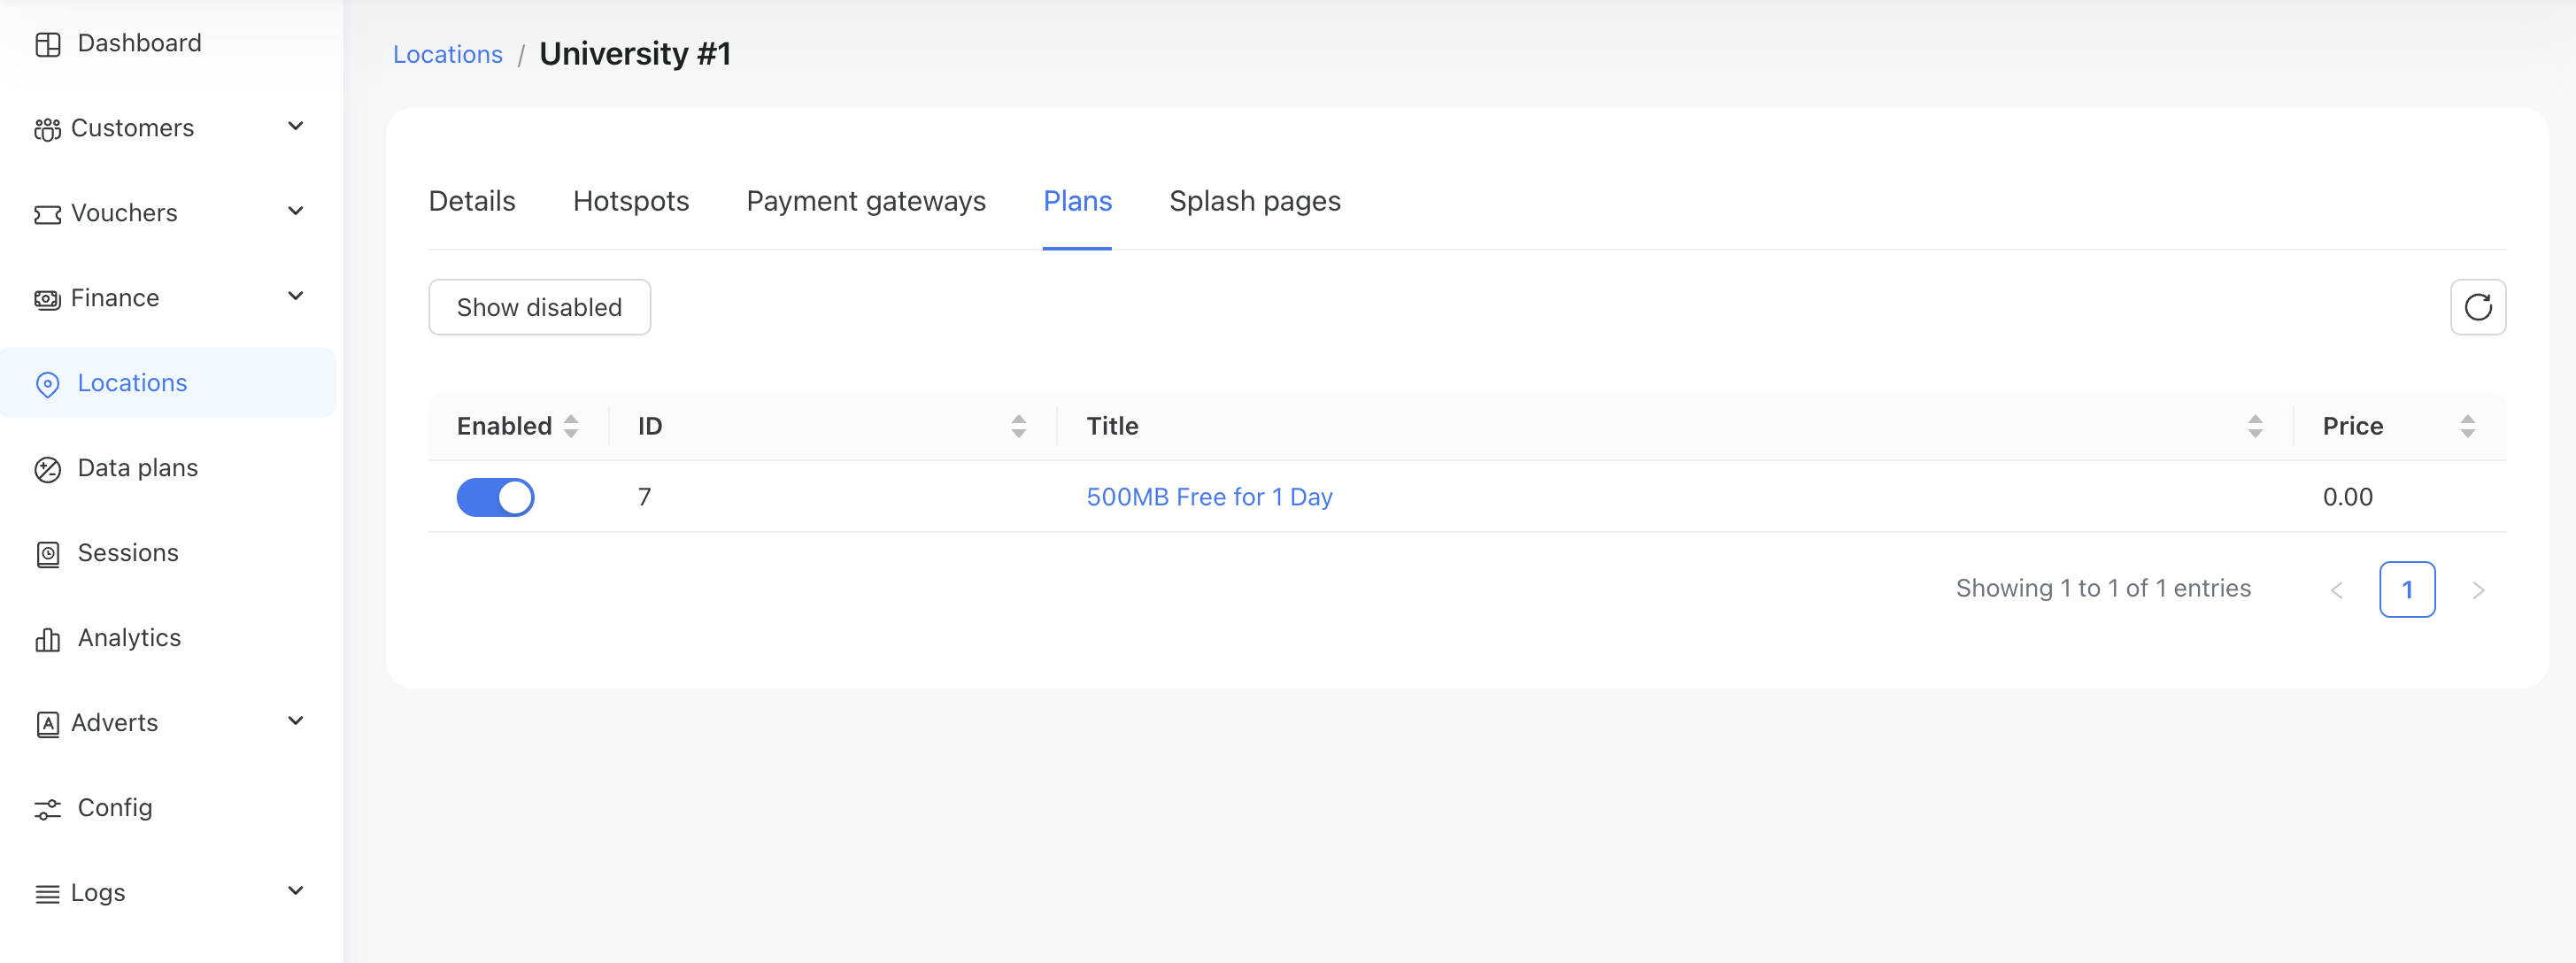
4️⃣ Enable the data plan for that location
Switch to the Plans tab and enable the data plan you created in step #2 for this location.
5️⃣ Connect your hotspot
Using one of the manuals, add your hotspot to this location.
MikroTik is the easiest option and is perfectly suitable for Powerlynx.
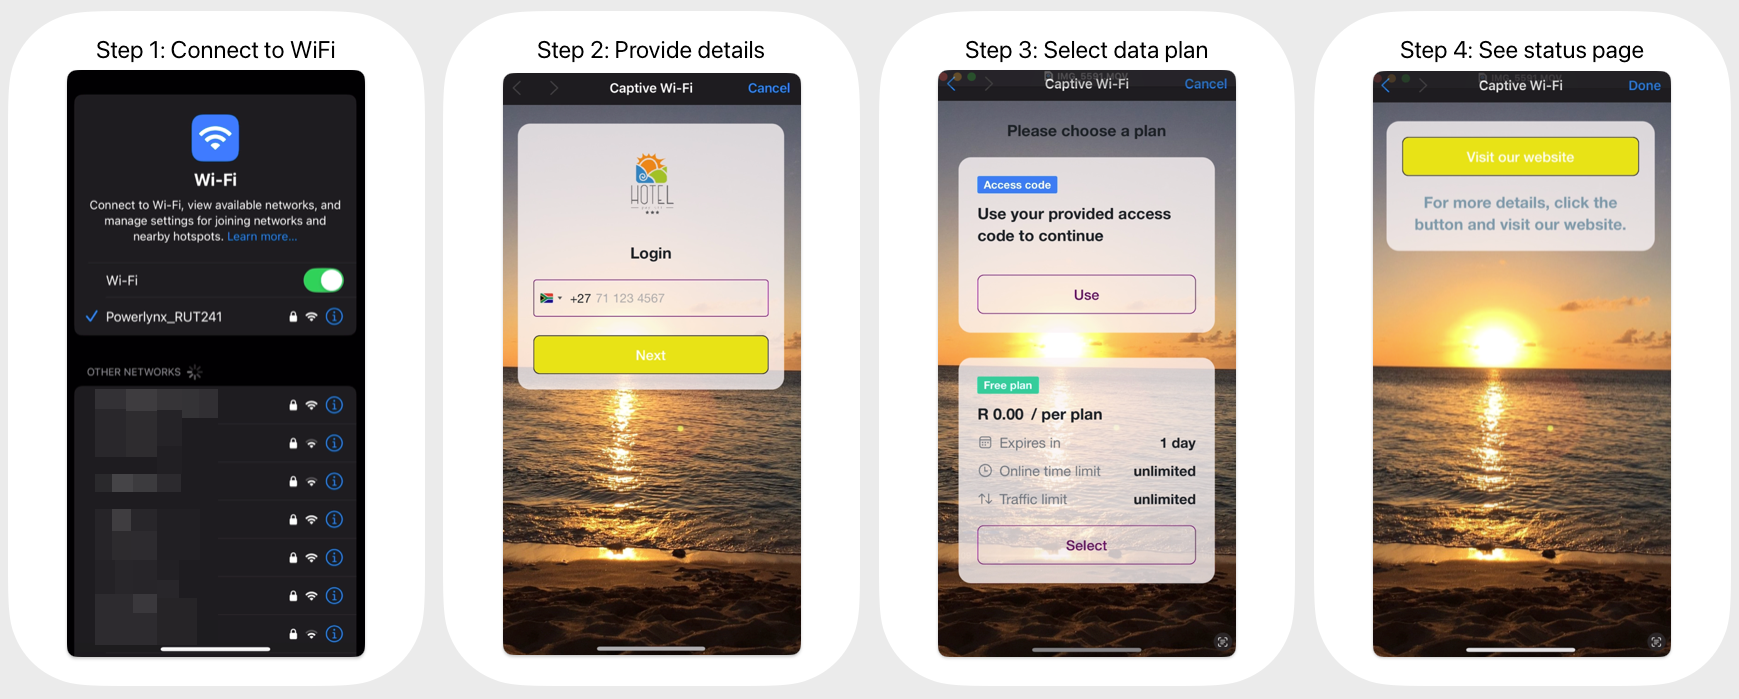
6️⃣ Test the flow
Connect to the WiFi and verify the user flow.