Connect Cudy hotspot with Powerlynx
In this manual, we will guide you on how to add a Cudy router as a hotspot in Powerlynx. In our example, we are using a Cudy WR1300 router. Customers will connect to the Wi-Fi provided by the router.
Update firmware
Make sure that your device is using the latest available firmware. Go to the General Settings / Firmware page and click on the Check for updates button.
Configure Wireguard VPN
Create a new hotspot in Powerlynx with the NAS type set to Cudy and the connection type set to WireGuard.
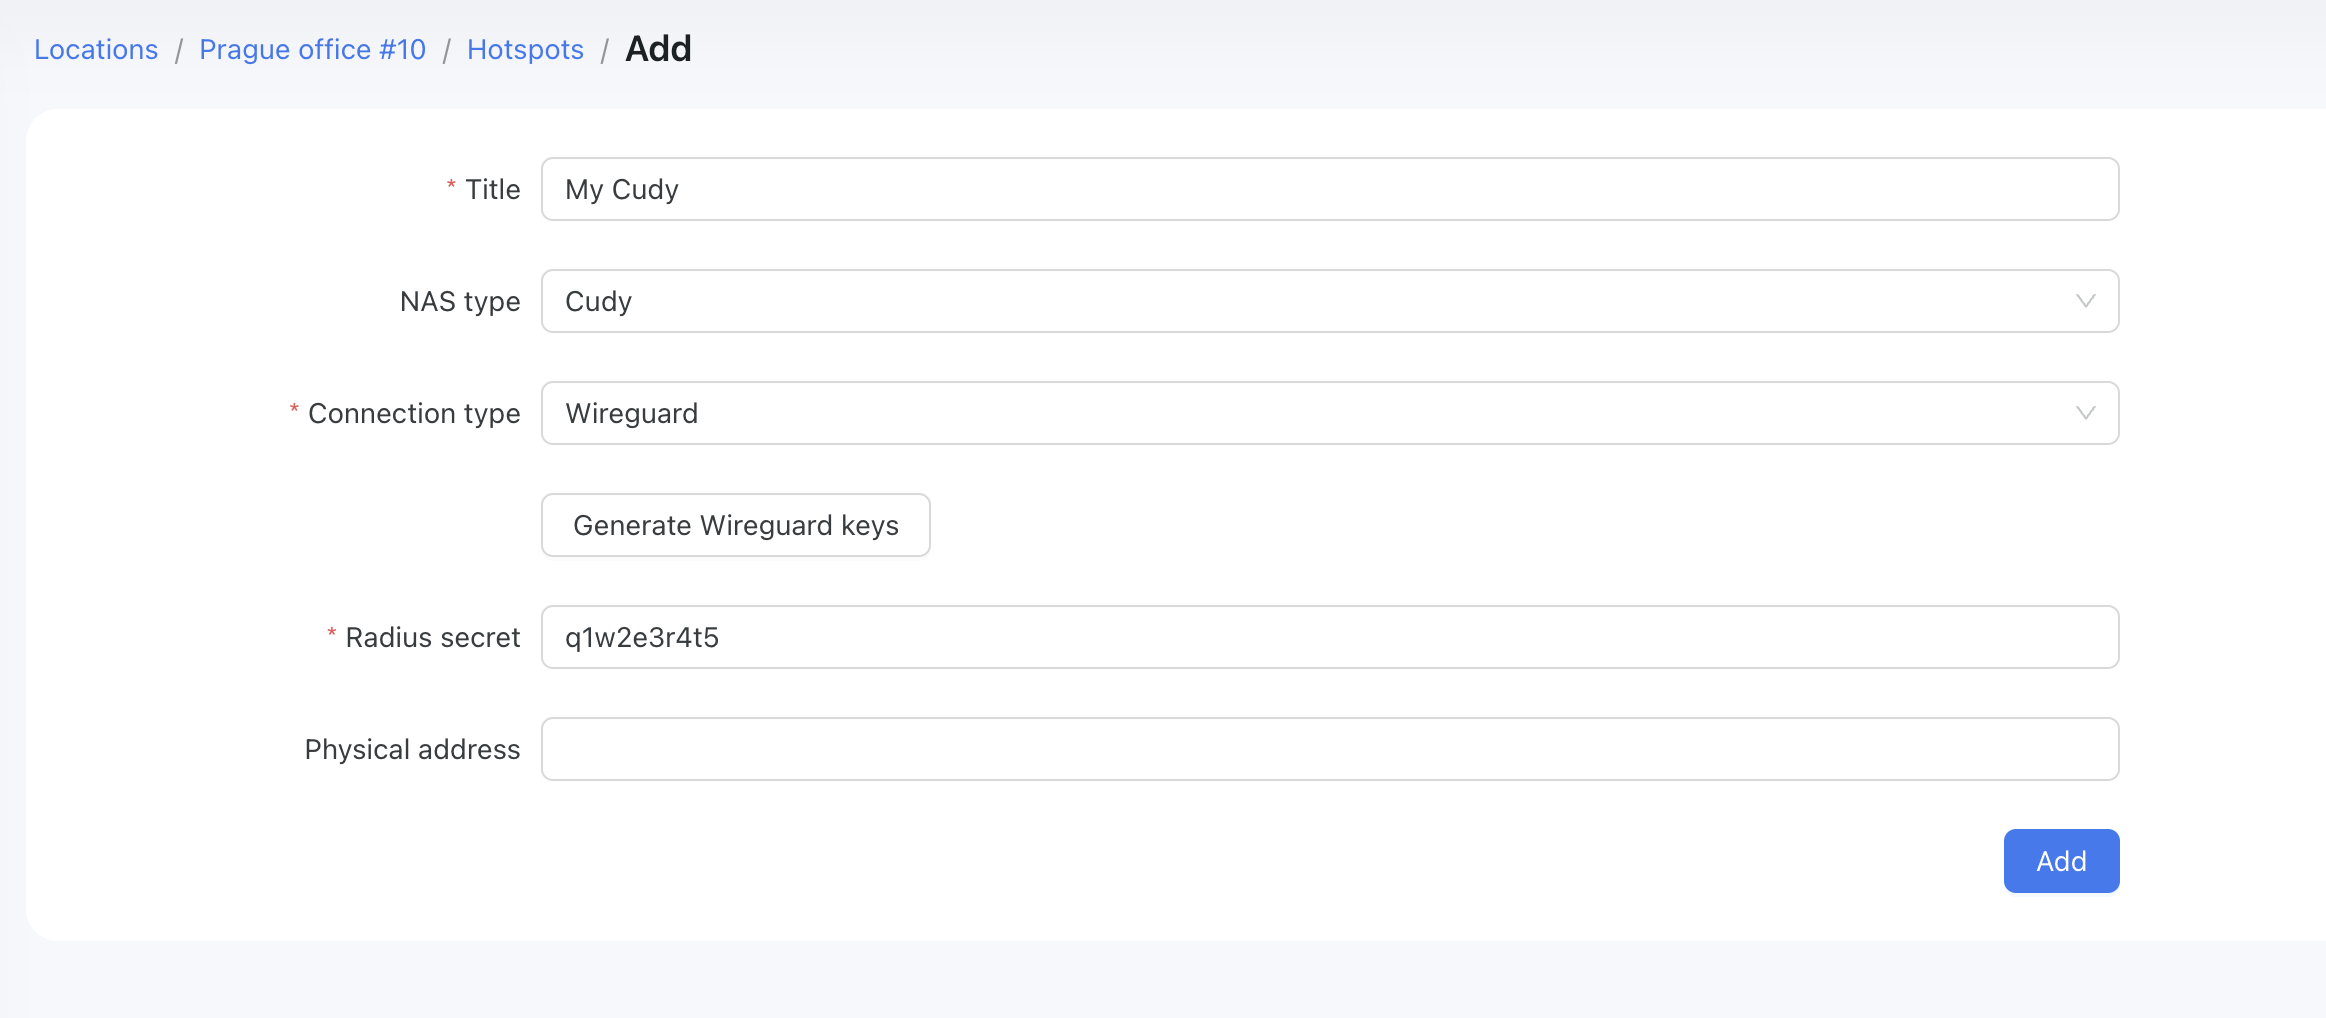
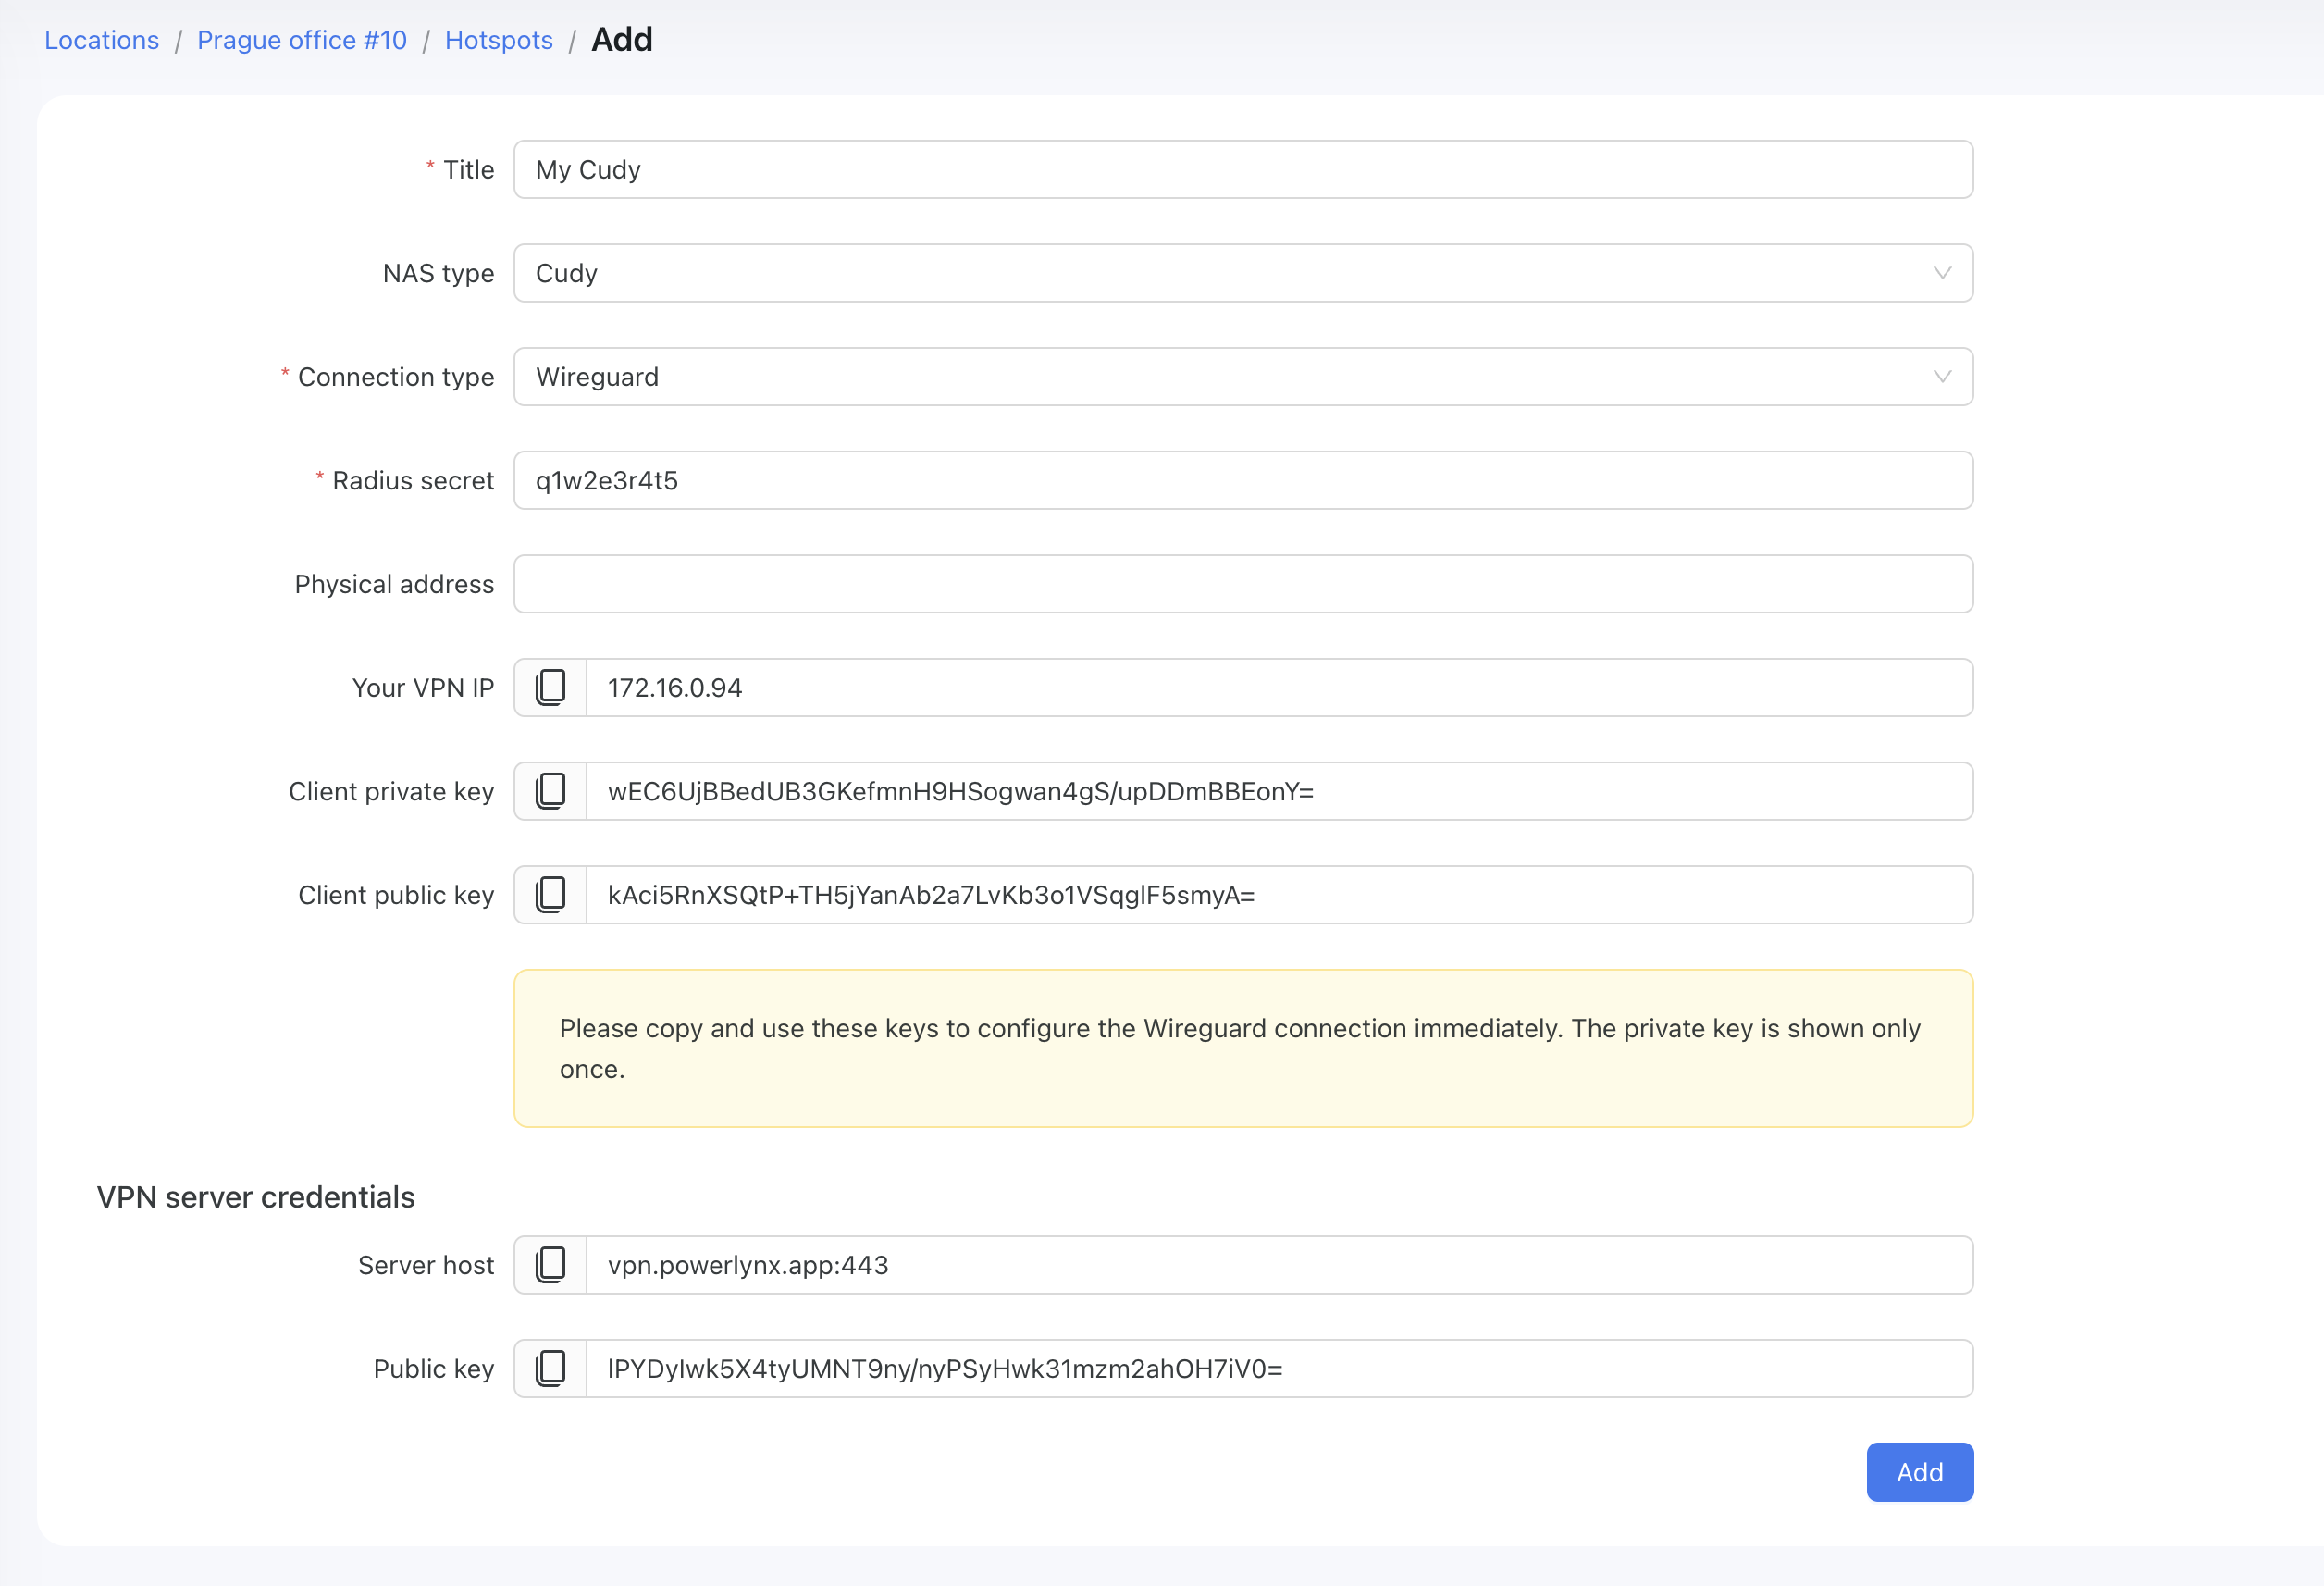
Click on the Generate Wireguard keys button and use them to create Wireguard interface on your device.
On the Cudy device, go to General settings / VPN.
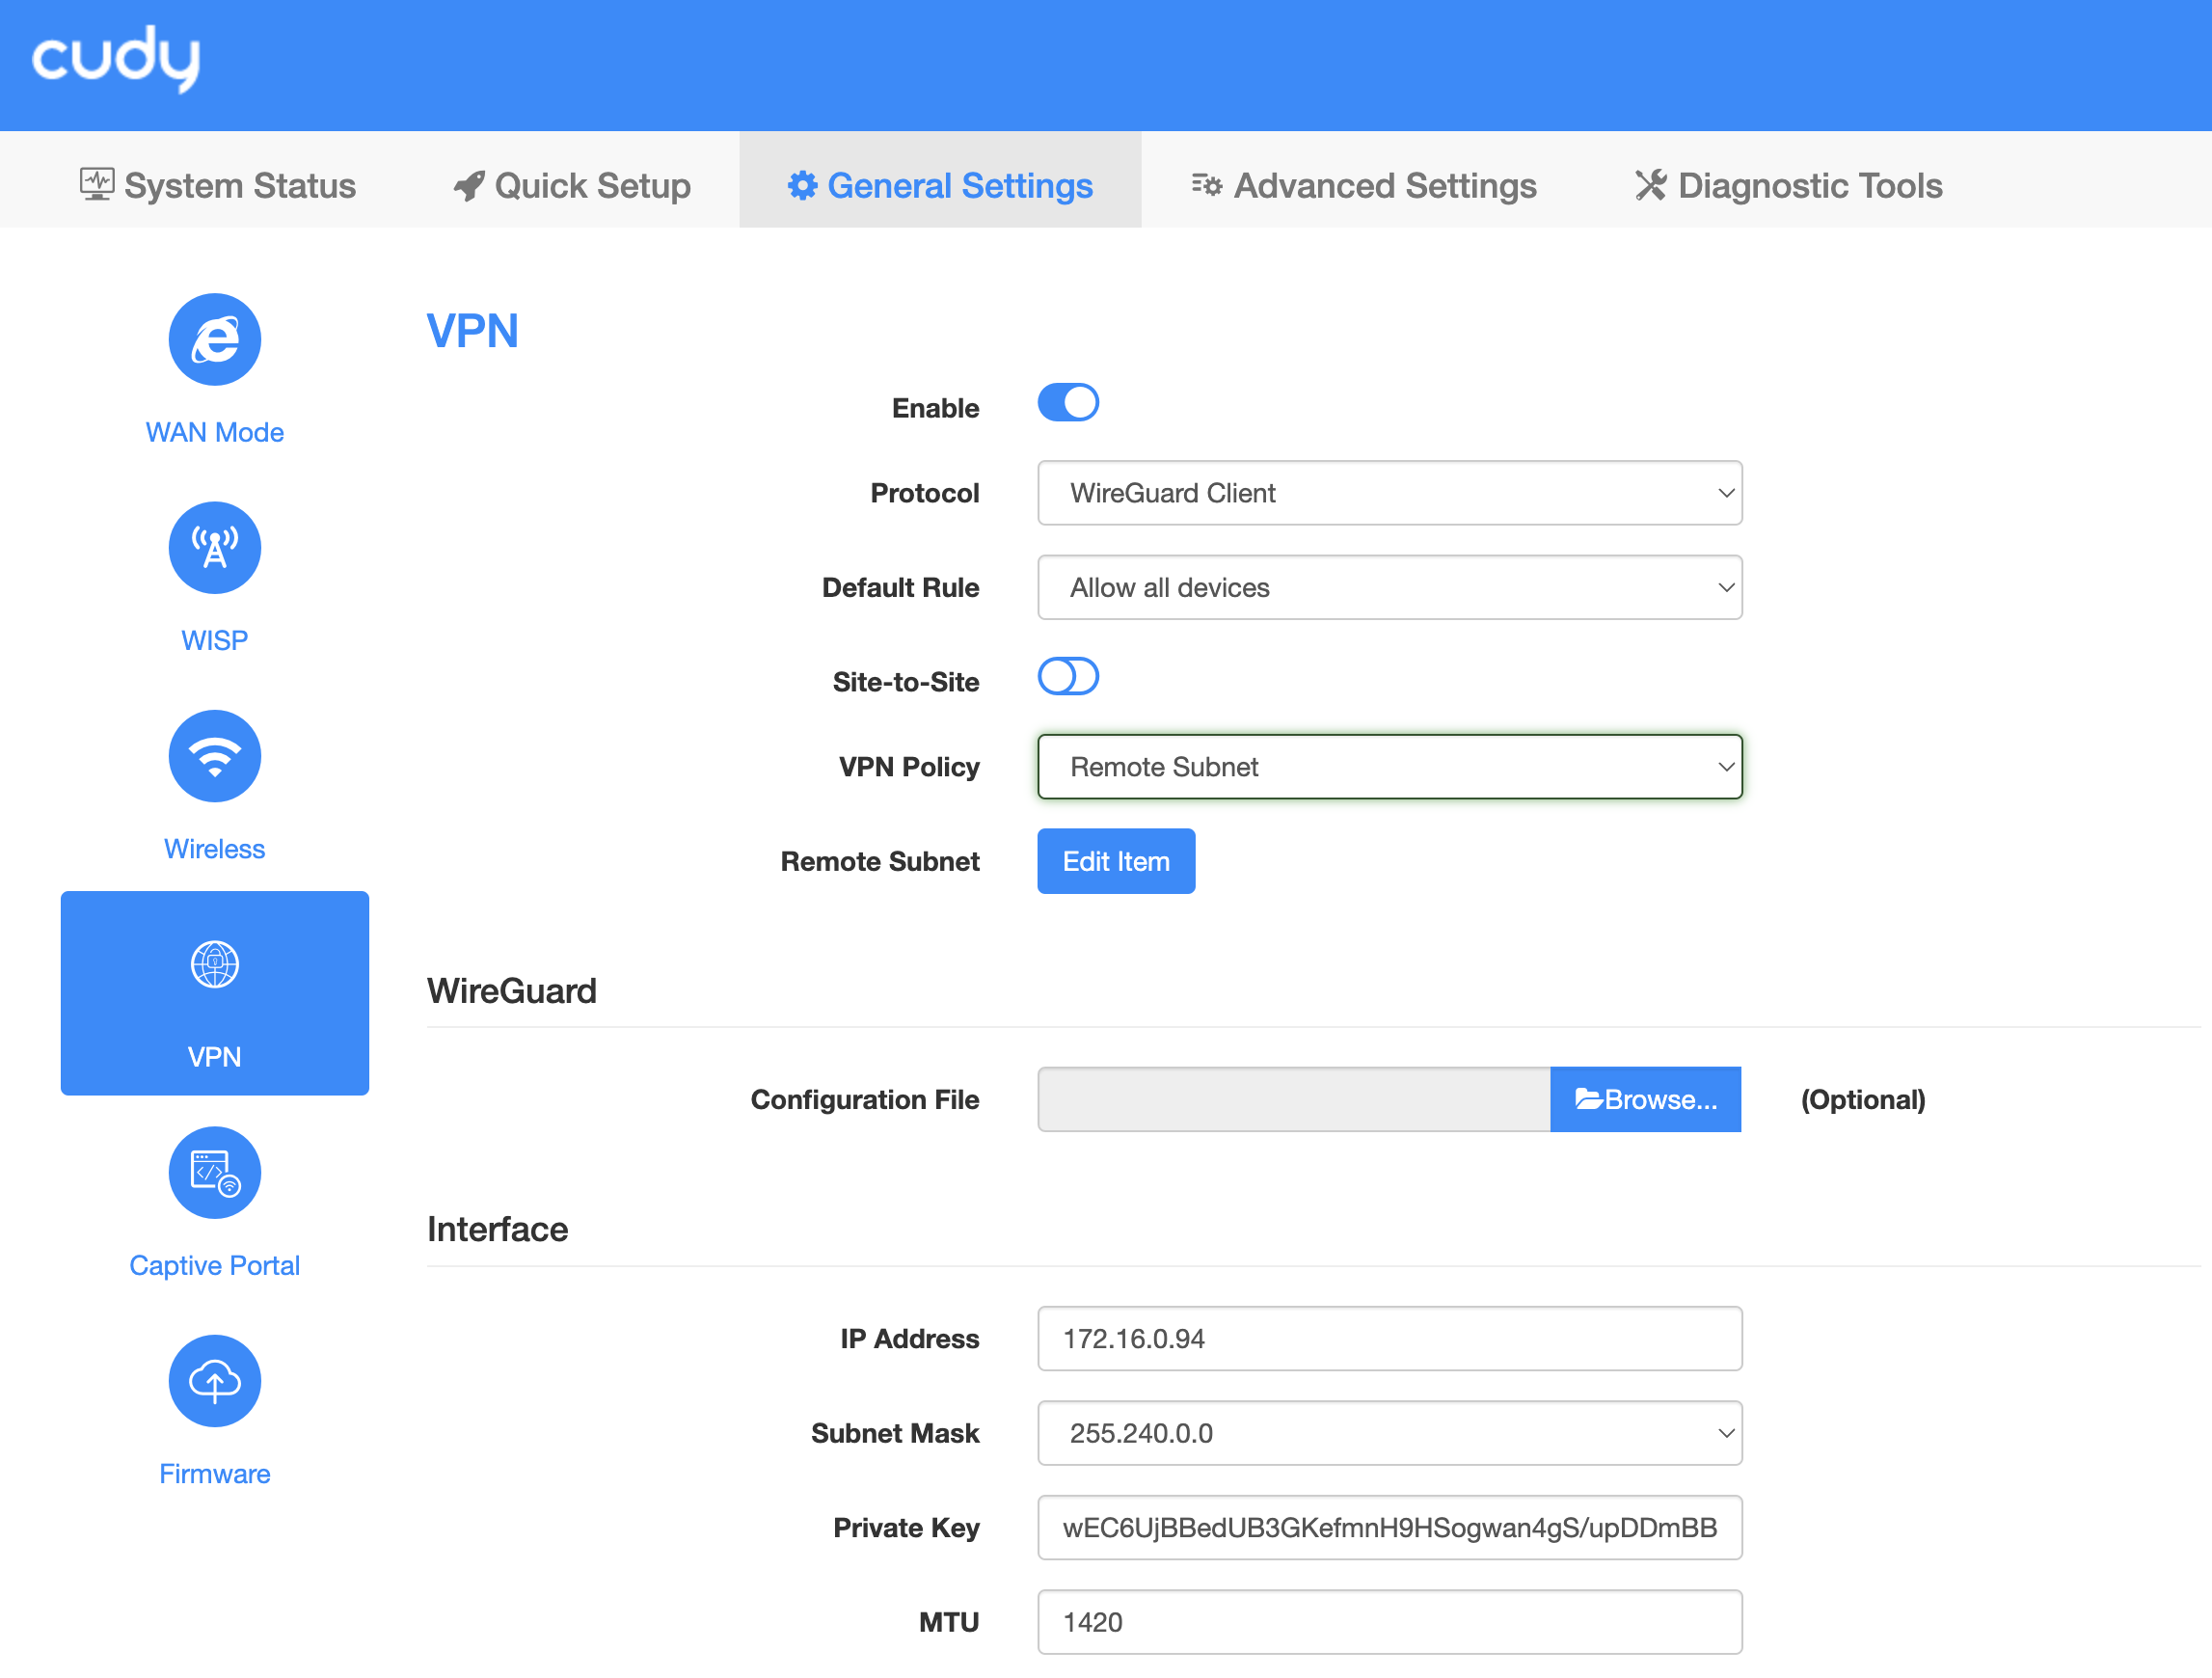
- Turn on the
Enableswitch. - Choose
WireGuard Clientunder theProtocolselect. - Choose
Allow all devicesunder theDefault Ruleselect. - Disable the
Site-to-Siteswitch. - Choose
Remote Subnetunder theVPN Policyselect. - Click the
Edit itembutton near theRemote Subnetfield. Add a new subnet as shown in the screenshot and click on theSavebutton.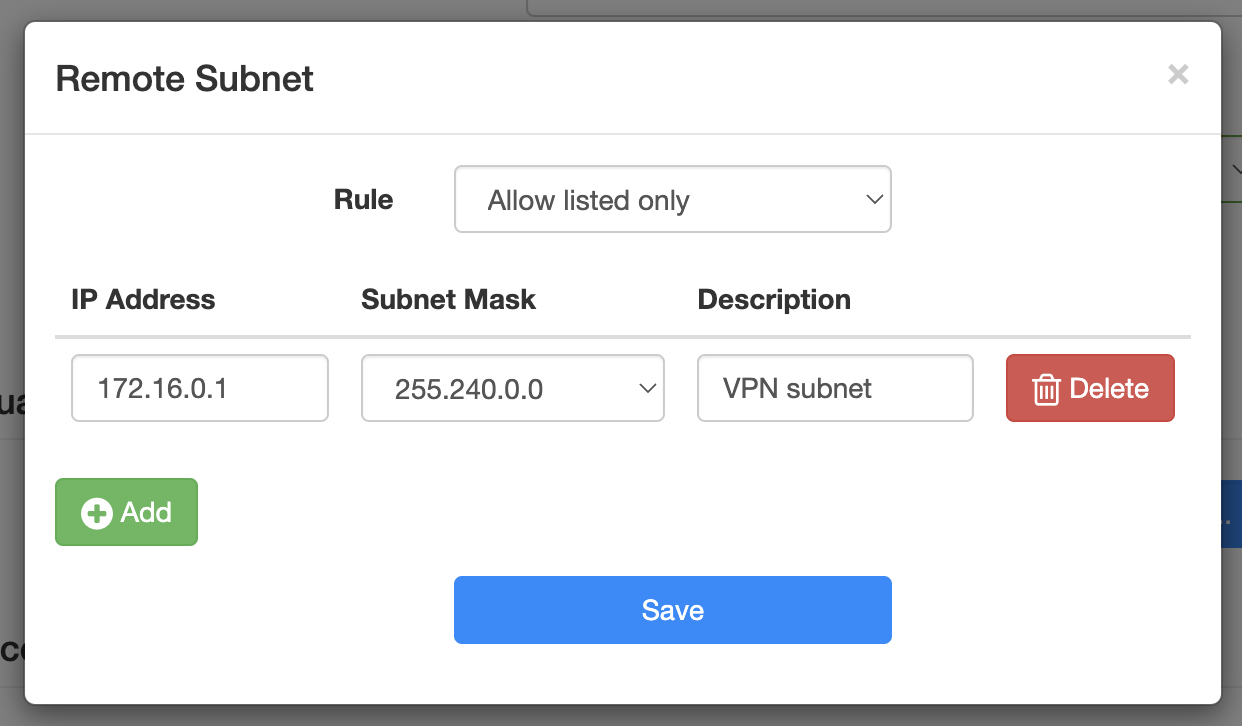
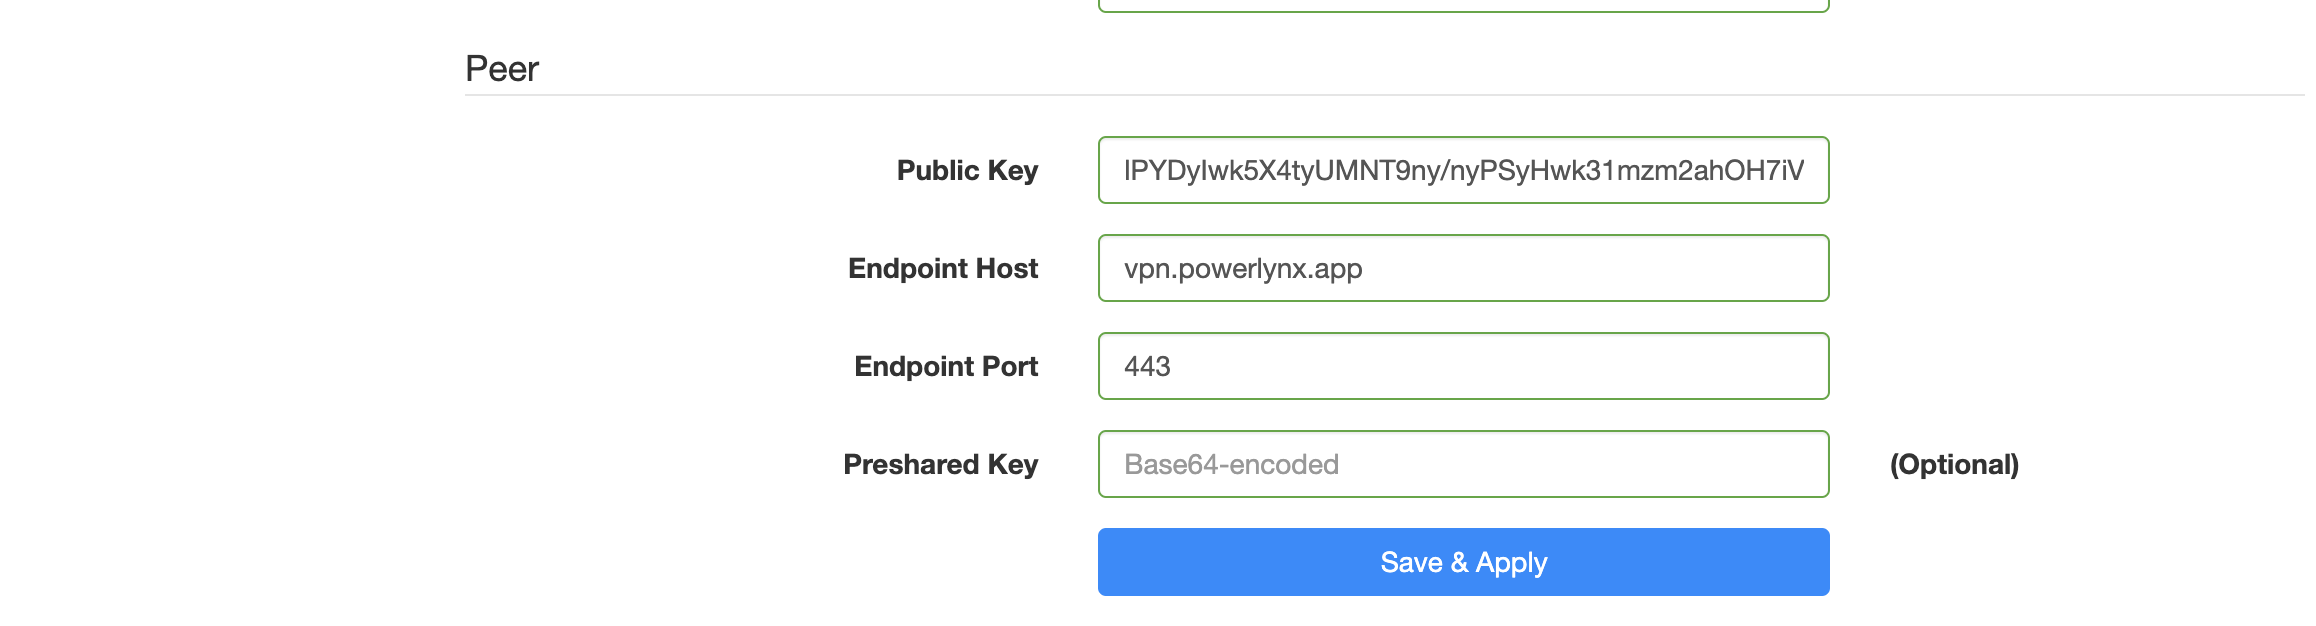
- Under the
Interfacesection, set theIP Addressto the value of theYour VPN IPfield in Powerlynx. - Set the
Subnet Maskfield to255.240.0.0. - Set the
Private Keyfield to the value of theClient private keyfield in Powerlynx. - Keep the default value for the
MTUfield. - Copy the
Public keyfield value from Powerlynx under theVPN server credentialsand paste it into thePublic Keyfield on your Cudy device under thePeersection. - Copy the
Server hostfield value from Powerlynx under theVPN server credentialsand paste it into theEndpoint Hostfield on your Cudy device. - Input
443into theEndpoint portfield. - Click on the
Save & Applybutton.
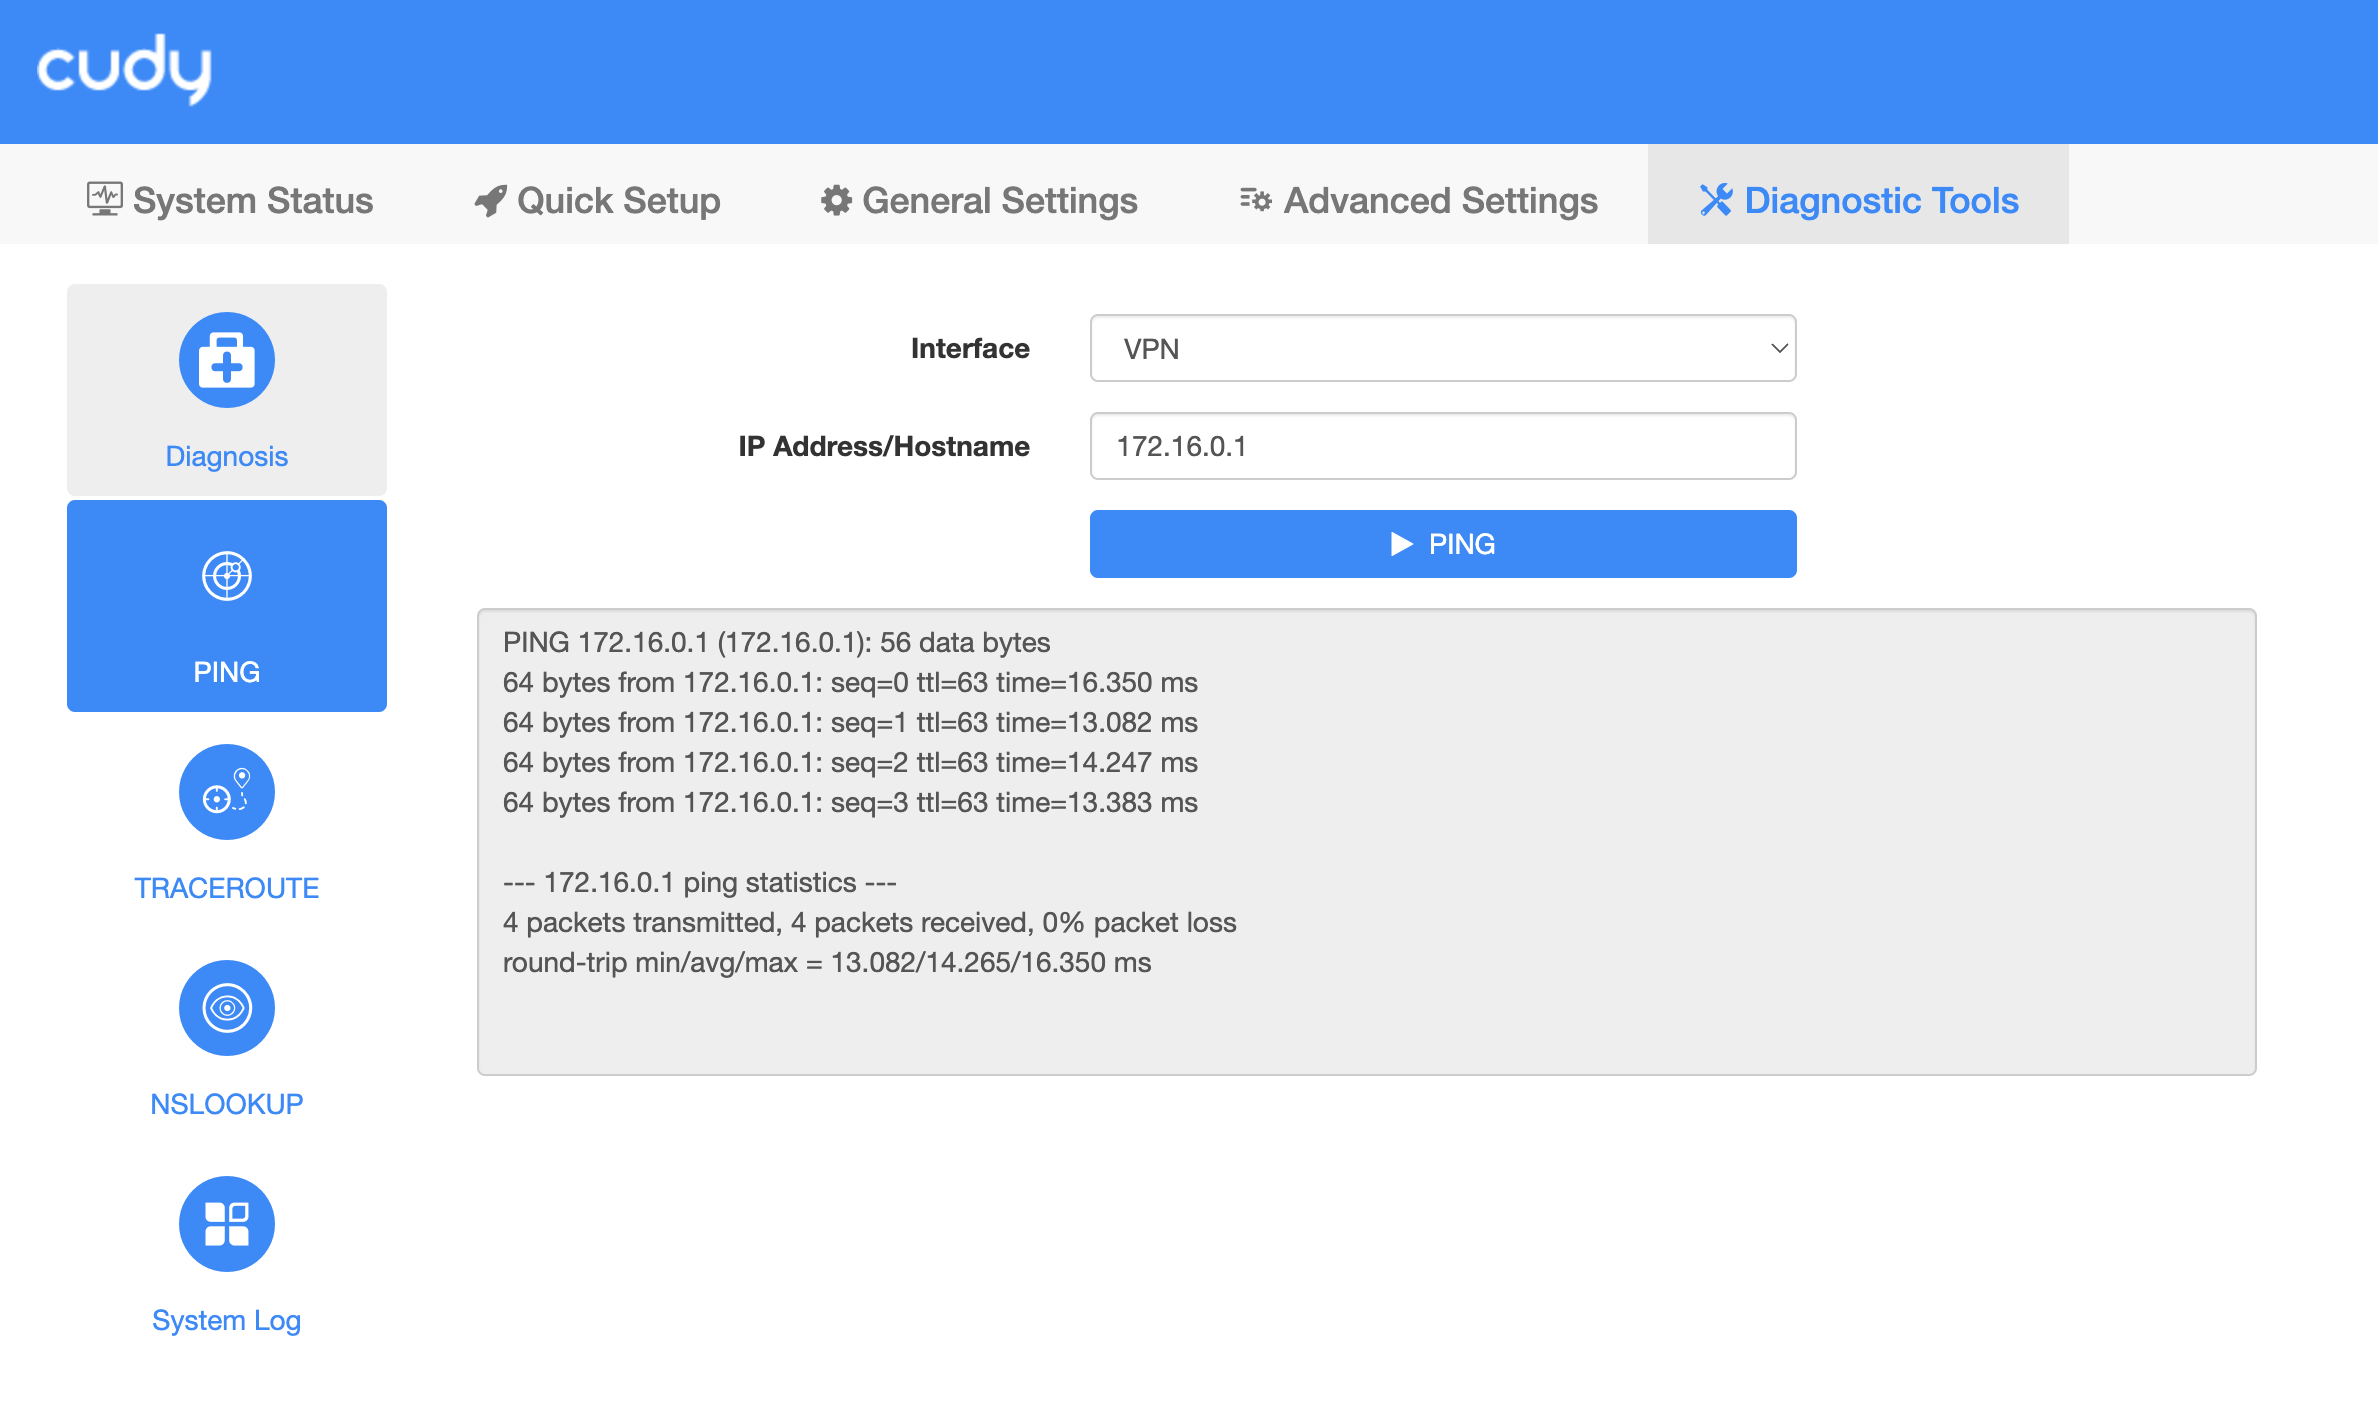
Confirm the VPN is up by using the Ping tool located on the Diagnostic Tools / Ping page to ping the 172.16.0.1 IP address:
Setup captive portal
Next, navigate to the General Settings / Captive portal page.
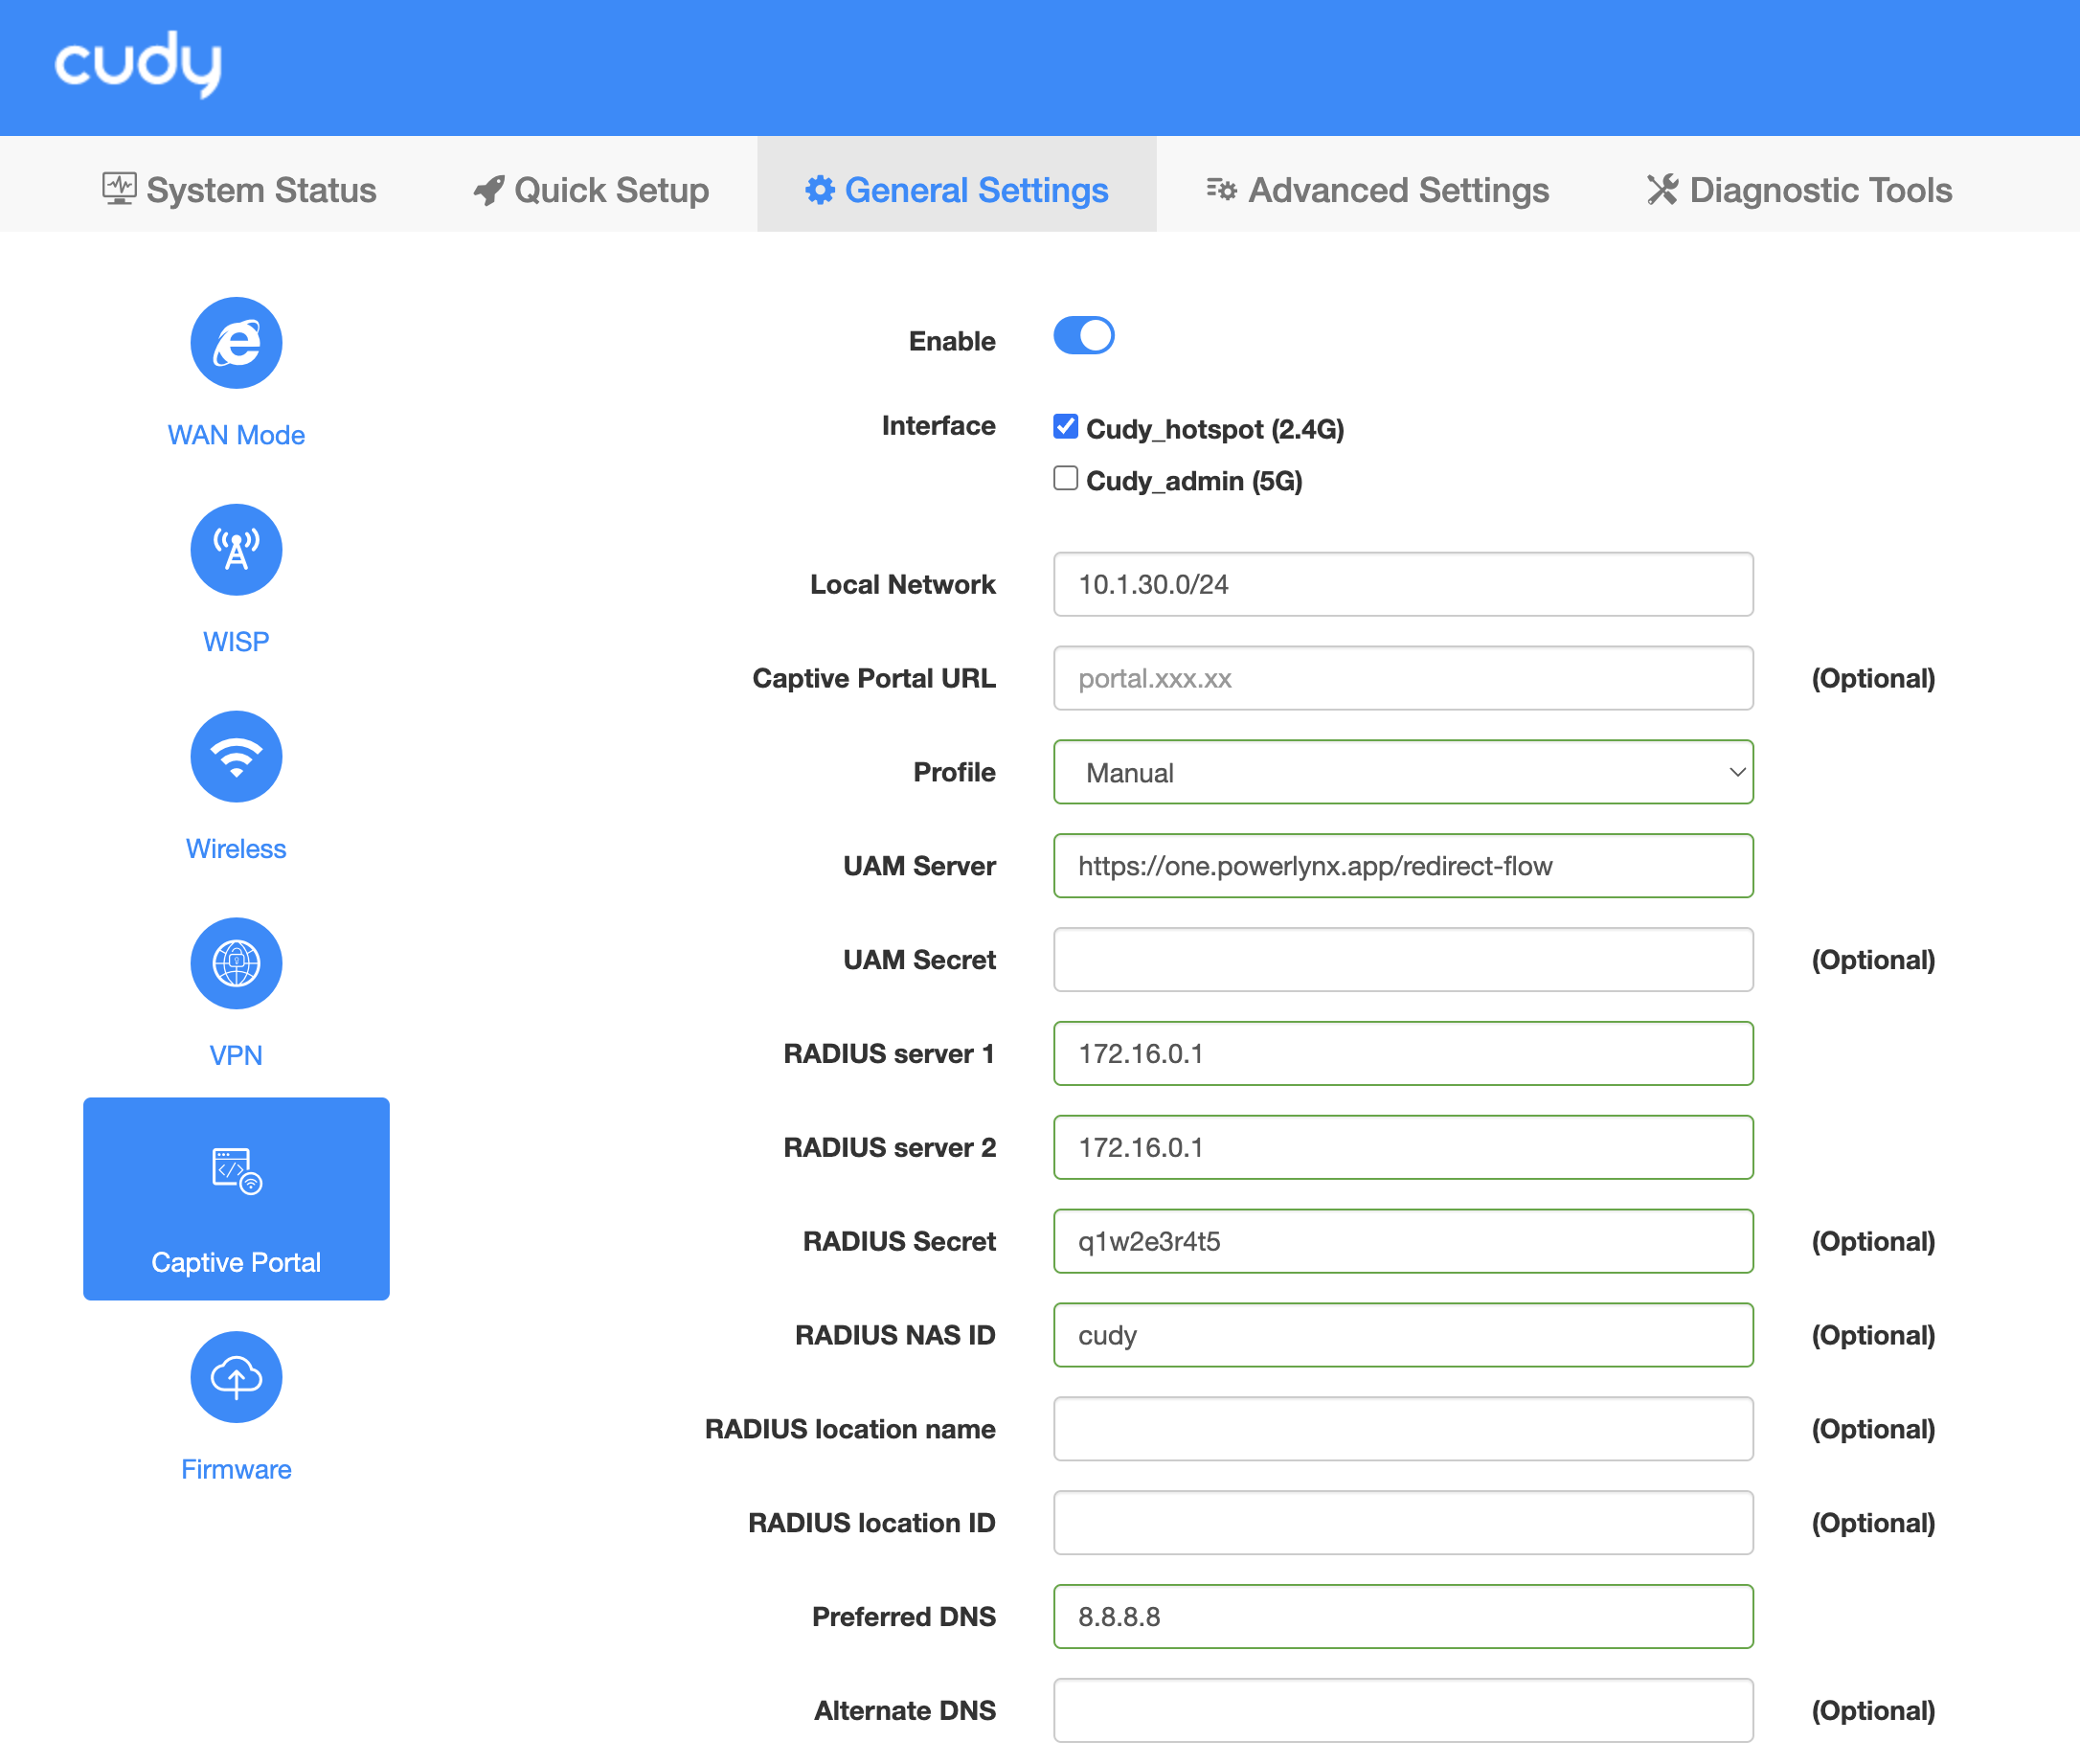
- Turn on the
Enableswitch. - Select the desired interfaces to enable the Captive portal under the
Interfacefield. - Set the
Profilefield toManual. - Set the
UAM Serverto valuehttps://<your_subdomain>.powerlynx.app/redirect-flowreplacing<your_subdomain>with your Powerlynx installation subdomain. - Set the
RADIUS server 1andRADIUS server 2to172.16.0.1. - Set the
RADIUS secretto the same value as theRadius secretfield in the Powerlynx hotspot form. - Set the
RADIUS NAS IDtocudy. You can change it to whatever you want, but remember that this value is used to match specific locations and splash pages in Powerlynx. - Set the
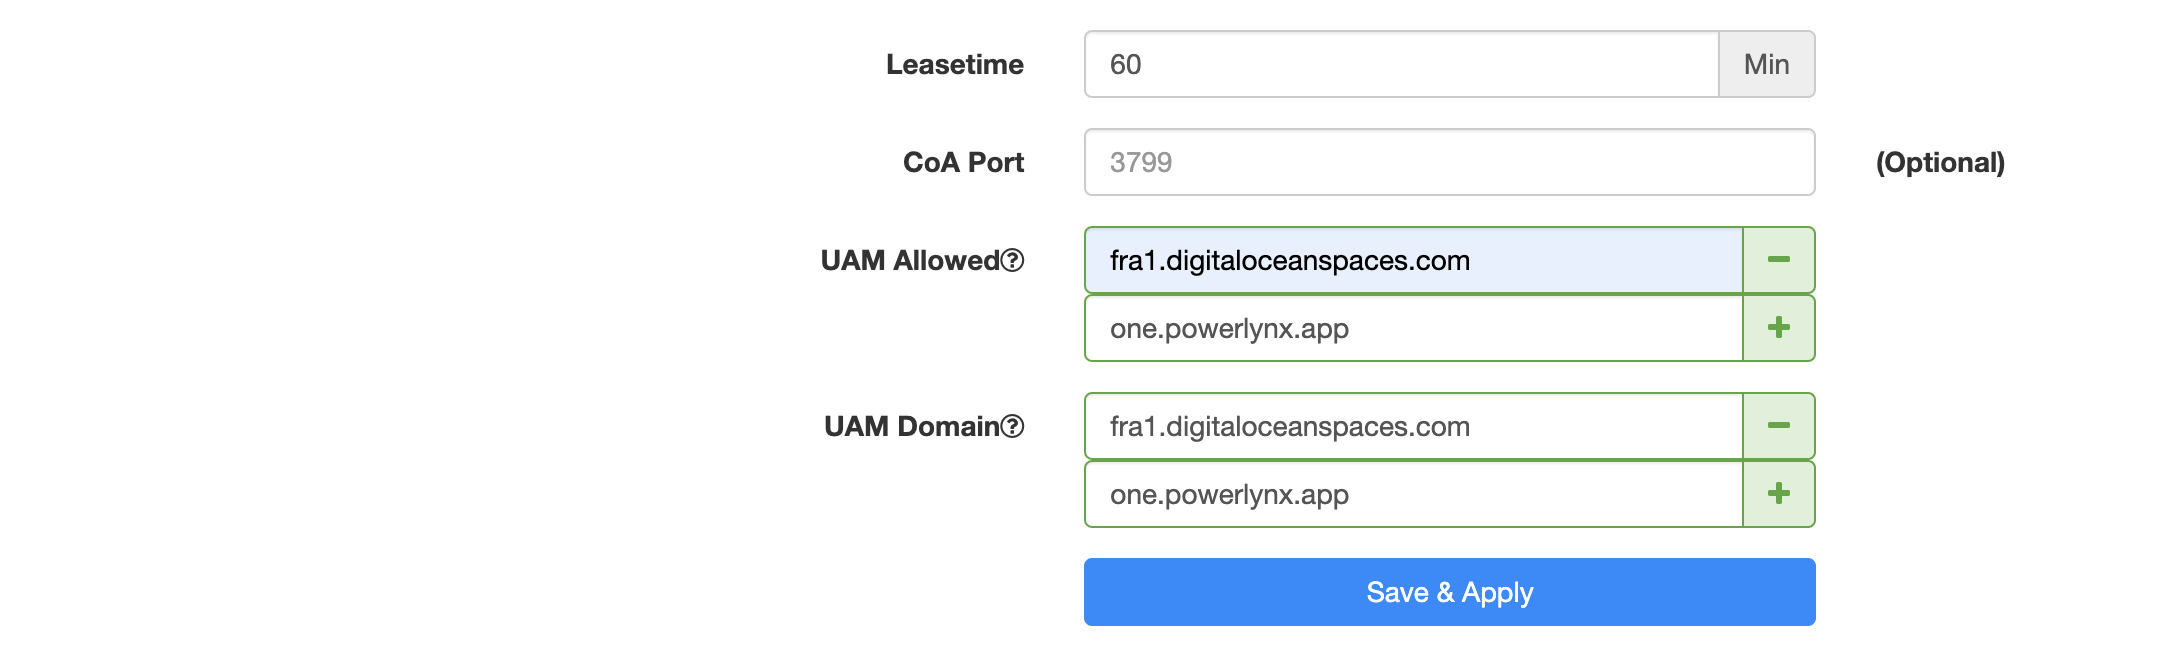
Preferred DNSto8.8.8.8. - Set the
CoA Portto3799. - Add
fra1.digitaloceanspaces.comand<your_subdomain>.powerlynx.appto both theUAM Allowedand theUAM Domainlists. If you use Netcash as your payment gateway, please refer to this list of UAM Allowed hosts. - Click on the
Save & Applybutton.
Link the device by its SSID
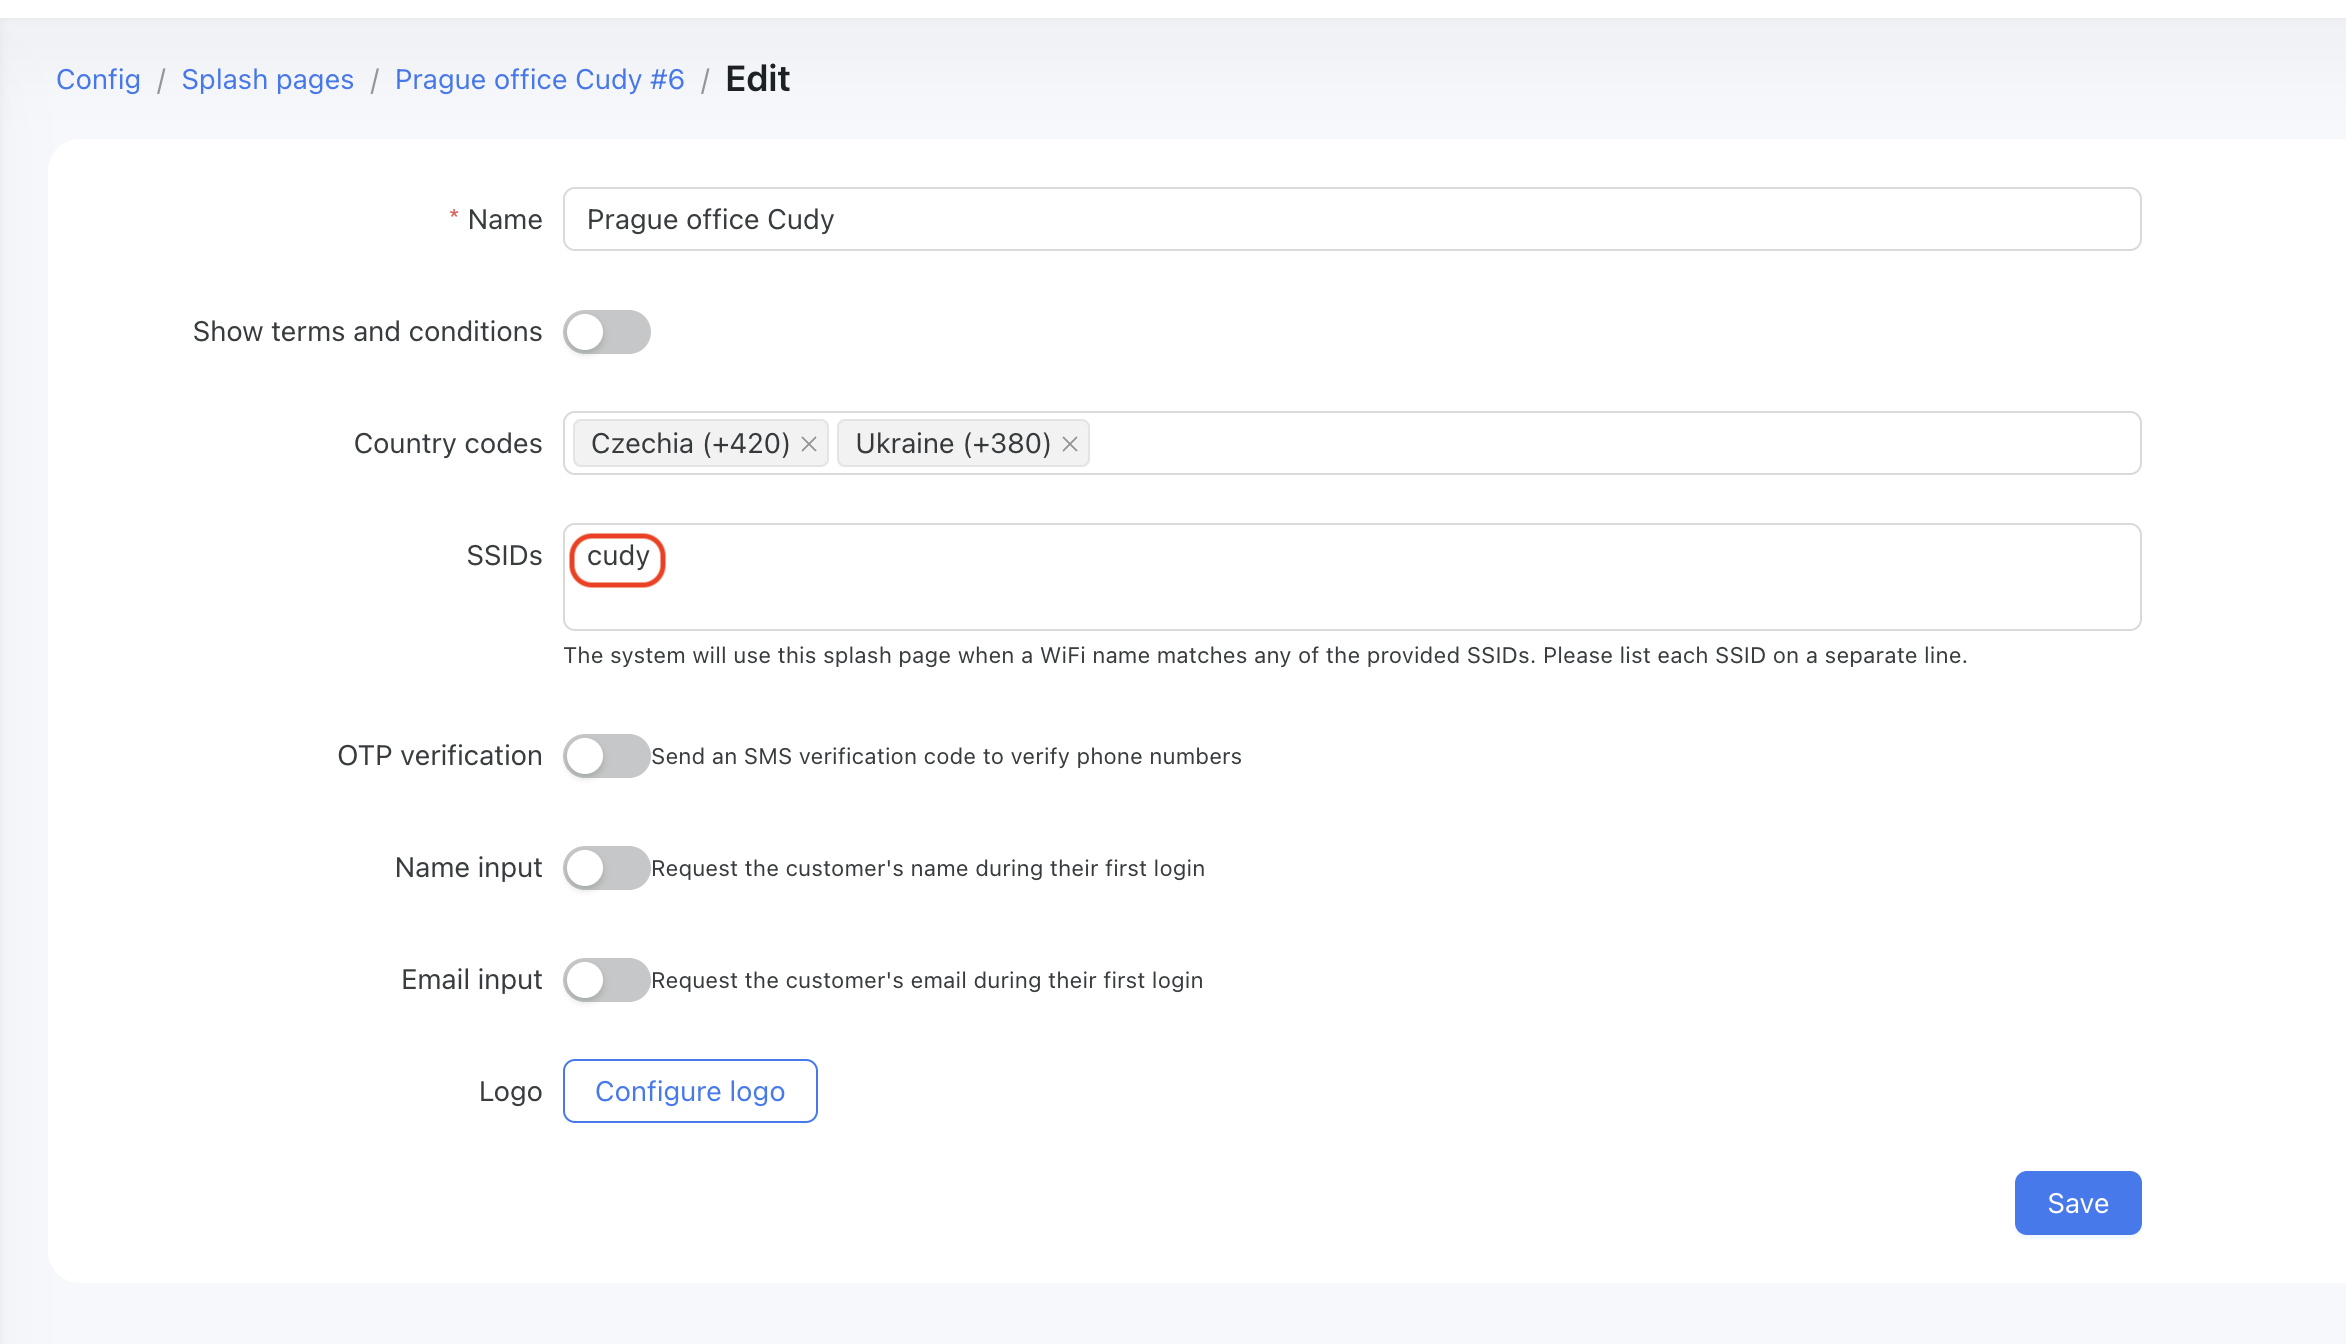
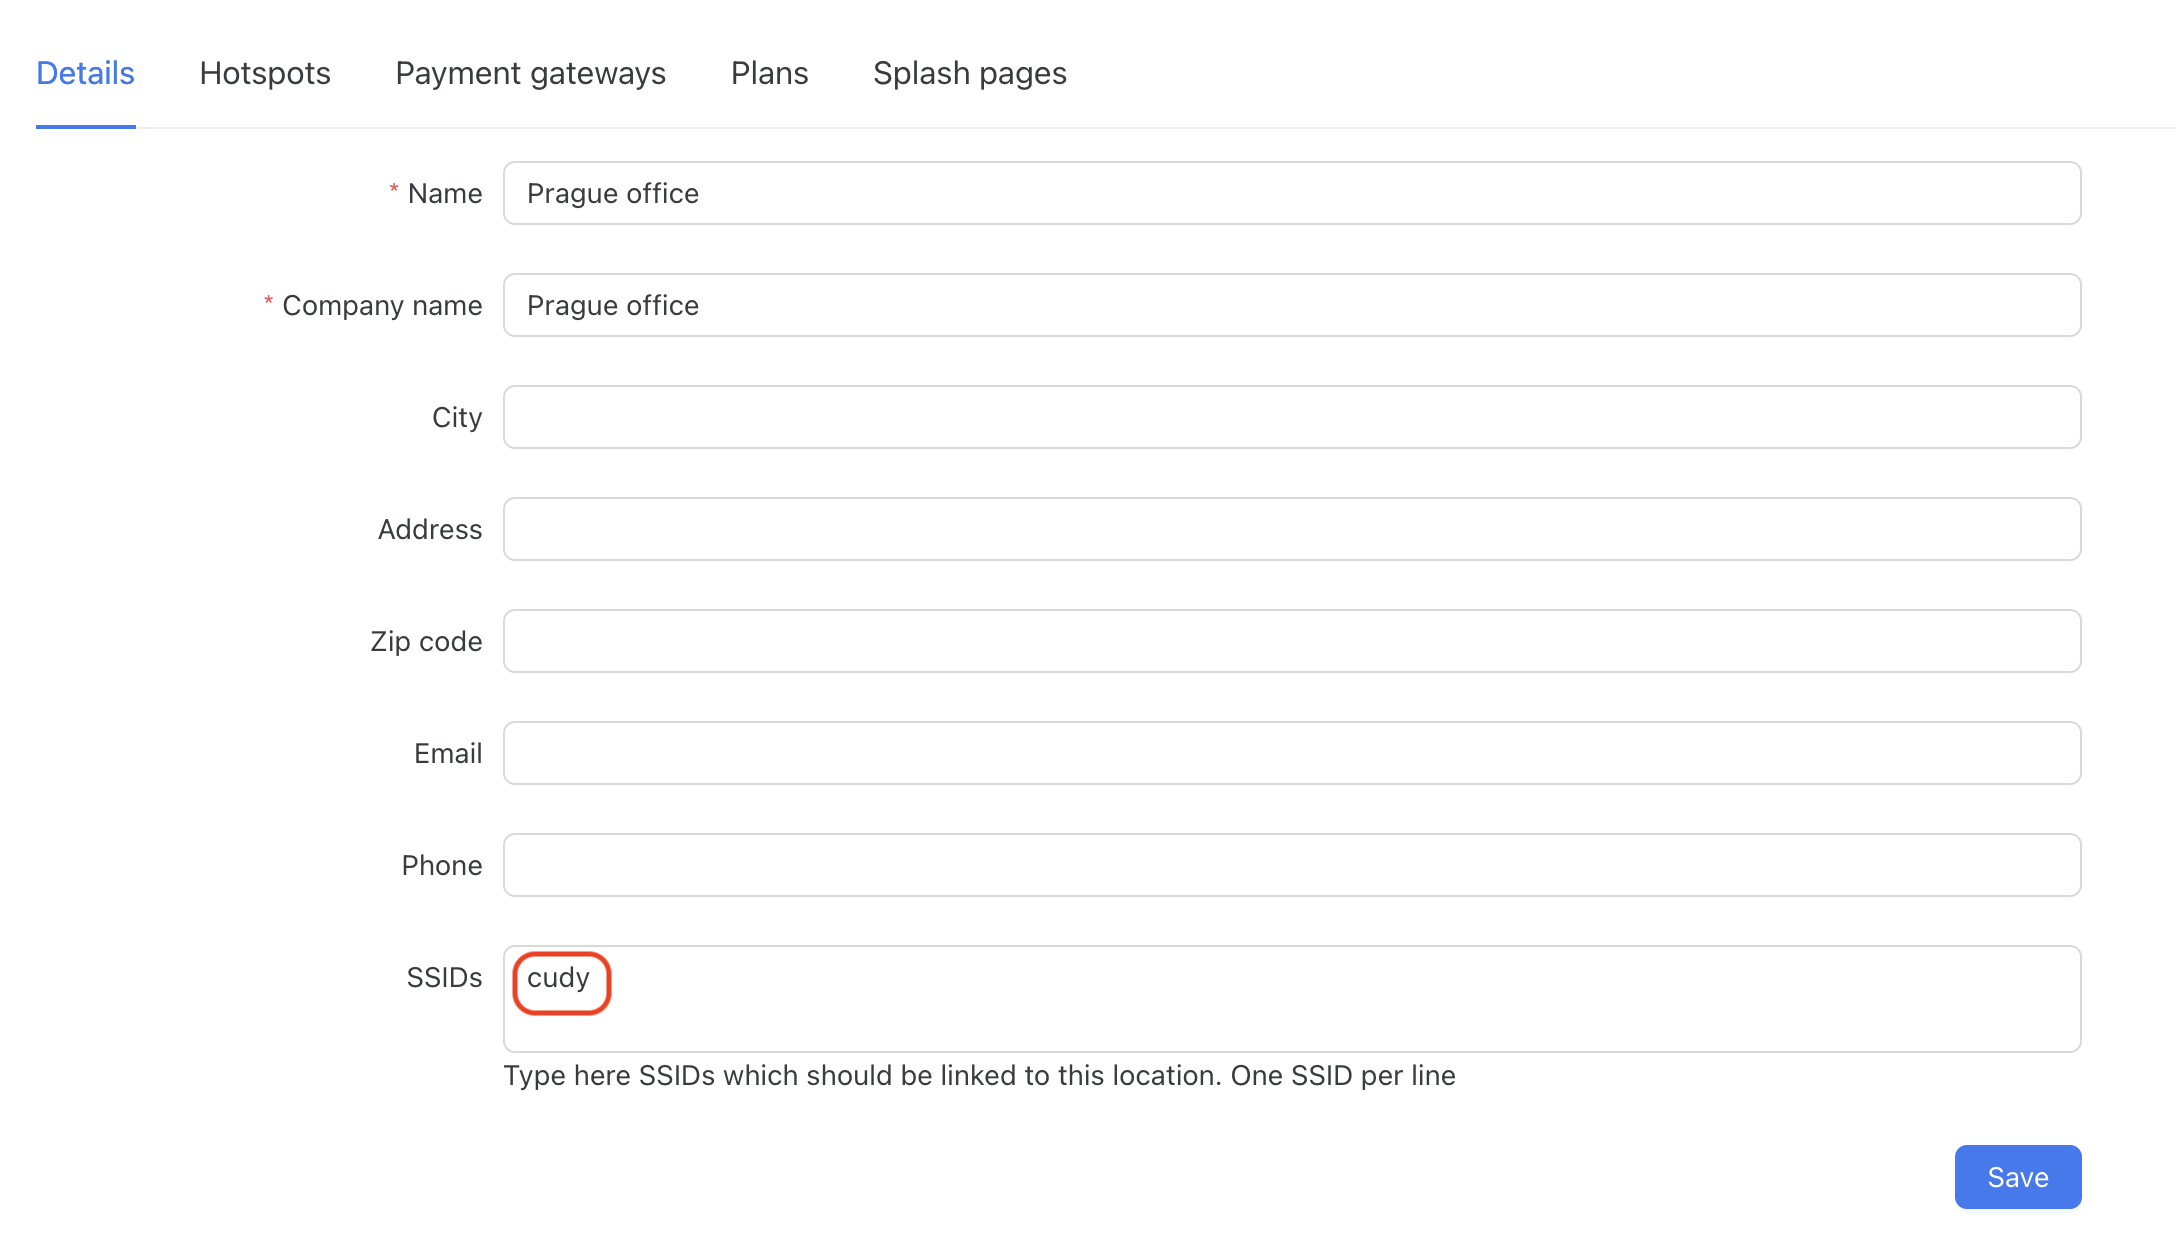
Go to Powerlynx and open the location where you have added your hotspot. Add the value cudy to the SSIDs field under the location and save the form.
Go to the location's splash pages and click on the desired splash page that should be used with your device. Add the value cudy to the SSIDs field under the splash page and save the form.