Data plans
Data plans are offering subscription templates describing how customers can access the network and what limitations they will have. Limitations can be network speed, traffic amount limitations, online time, number of devices connected and plan availability depending on the day of the week or time. Tariff plans in Powerlynx are templates for vouchers used for granting users network access.
You can view the list of all data plans and create a new one on the Data plans main menu section.
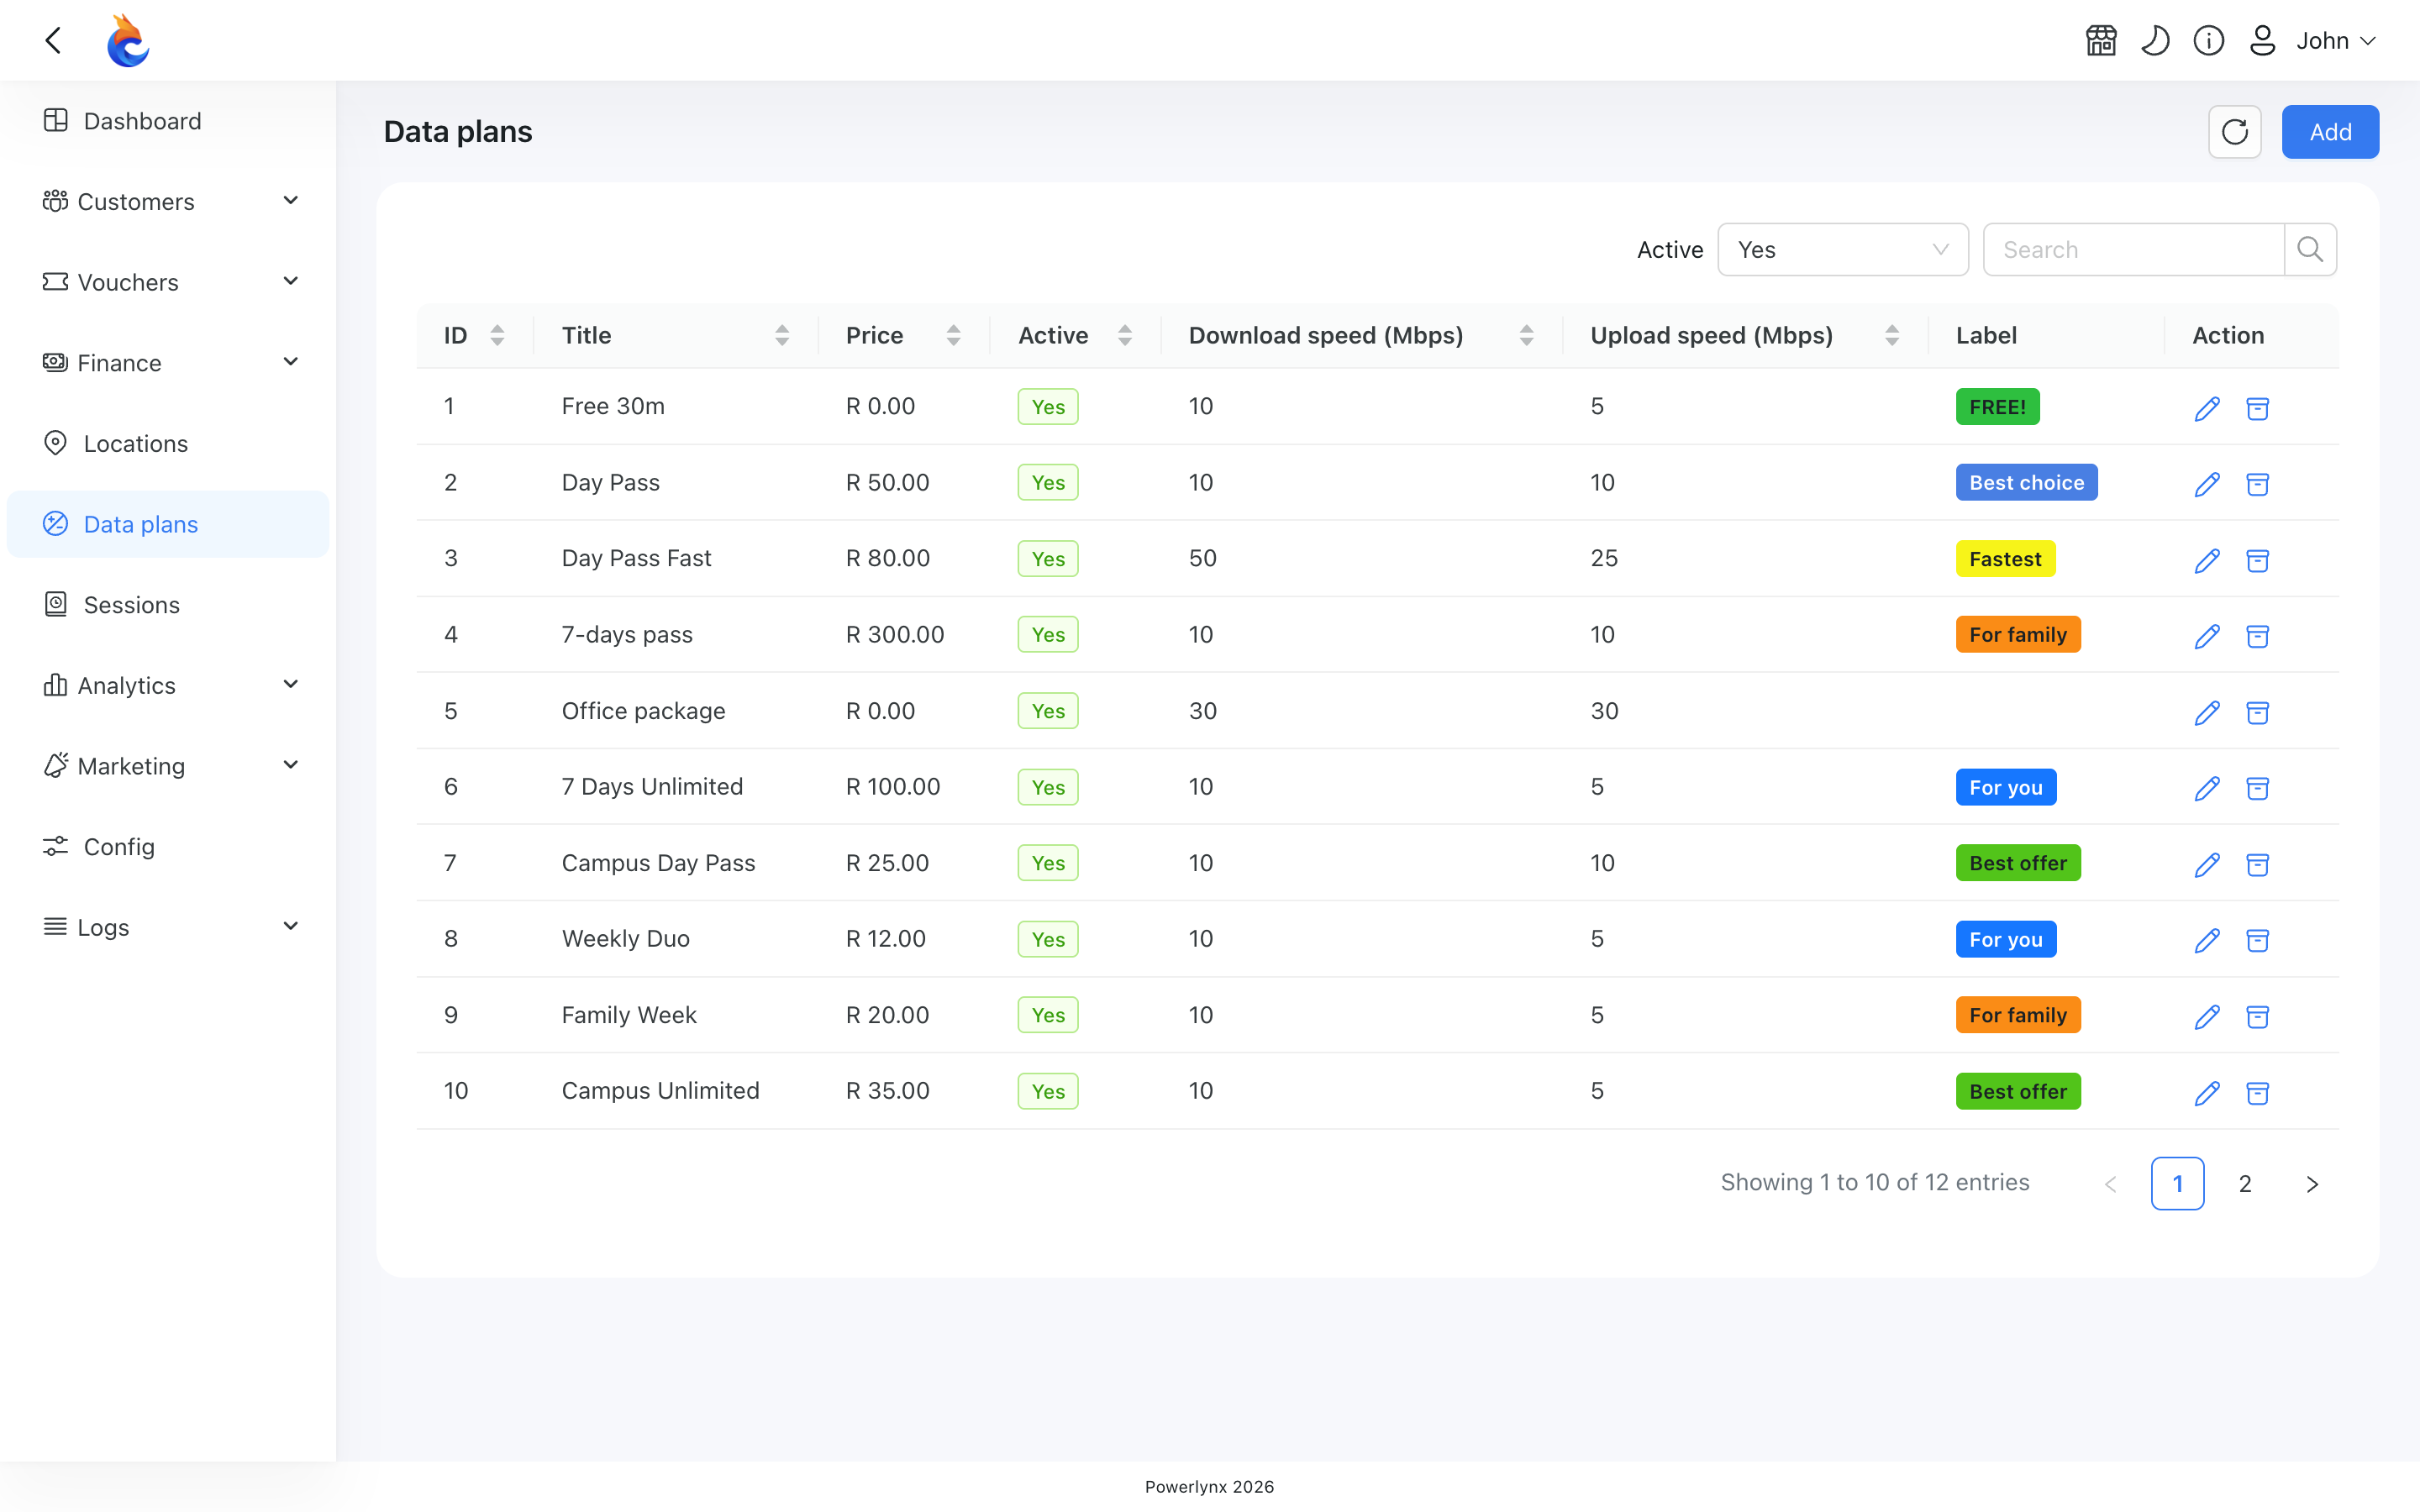
Data plans configuration
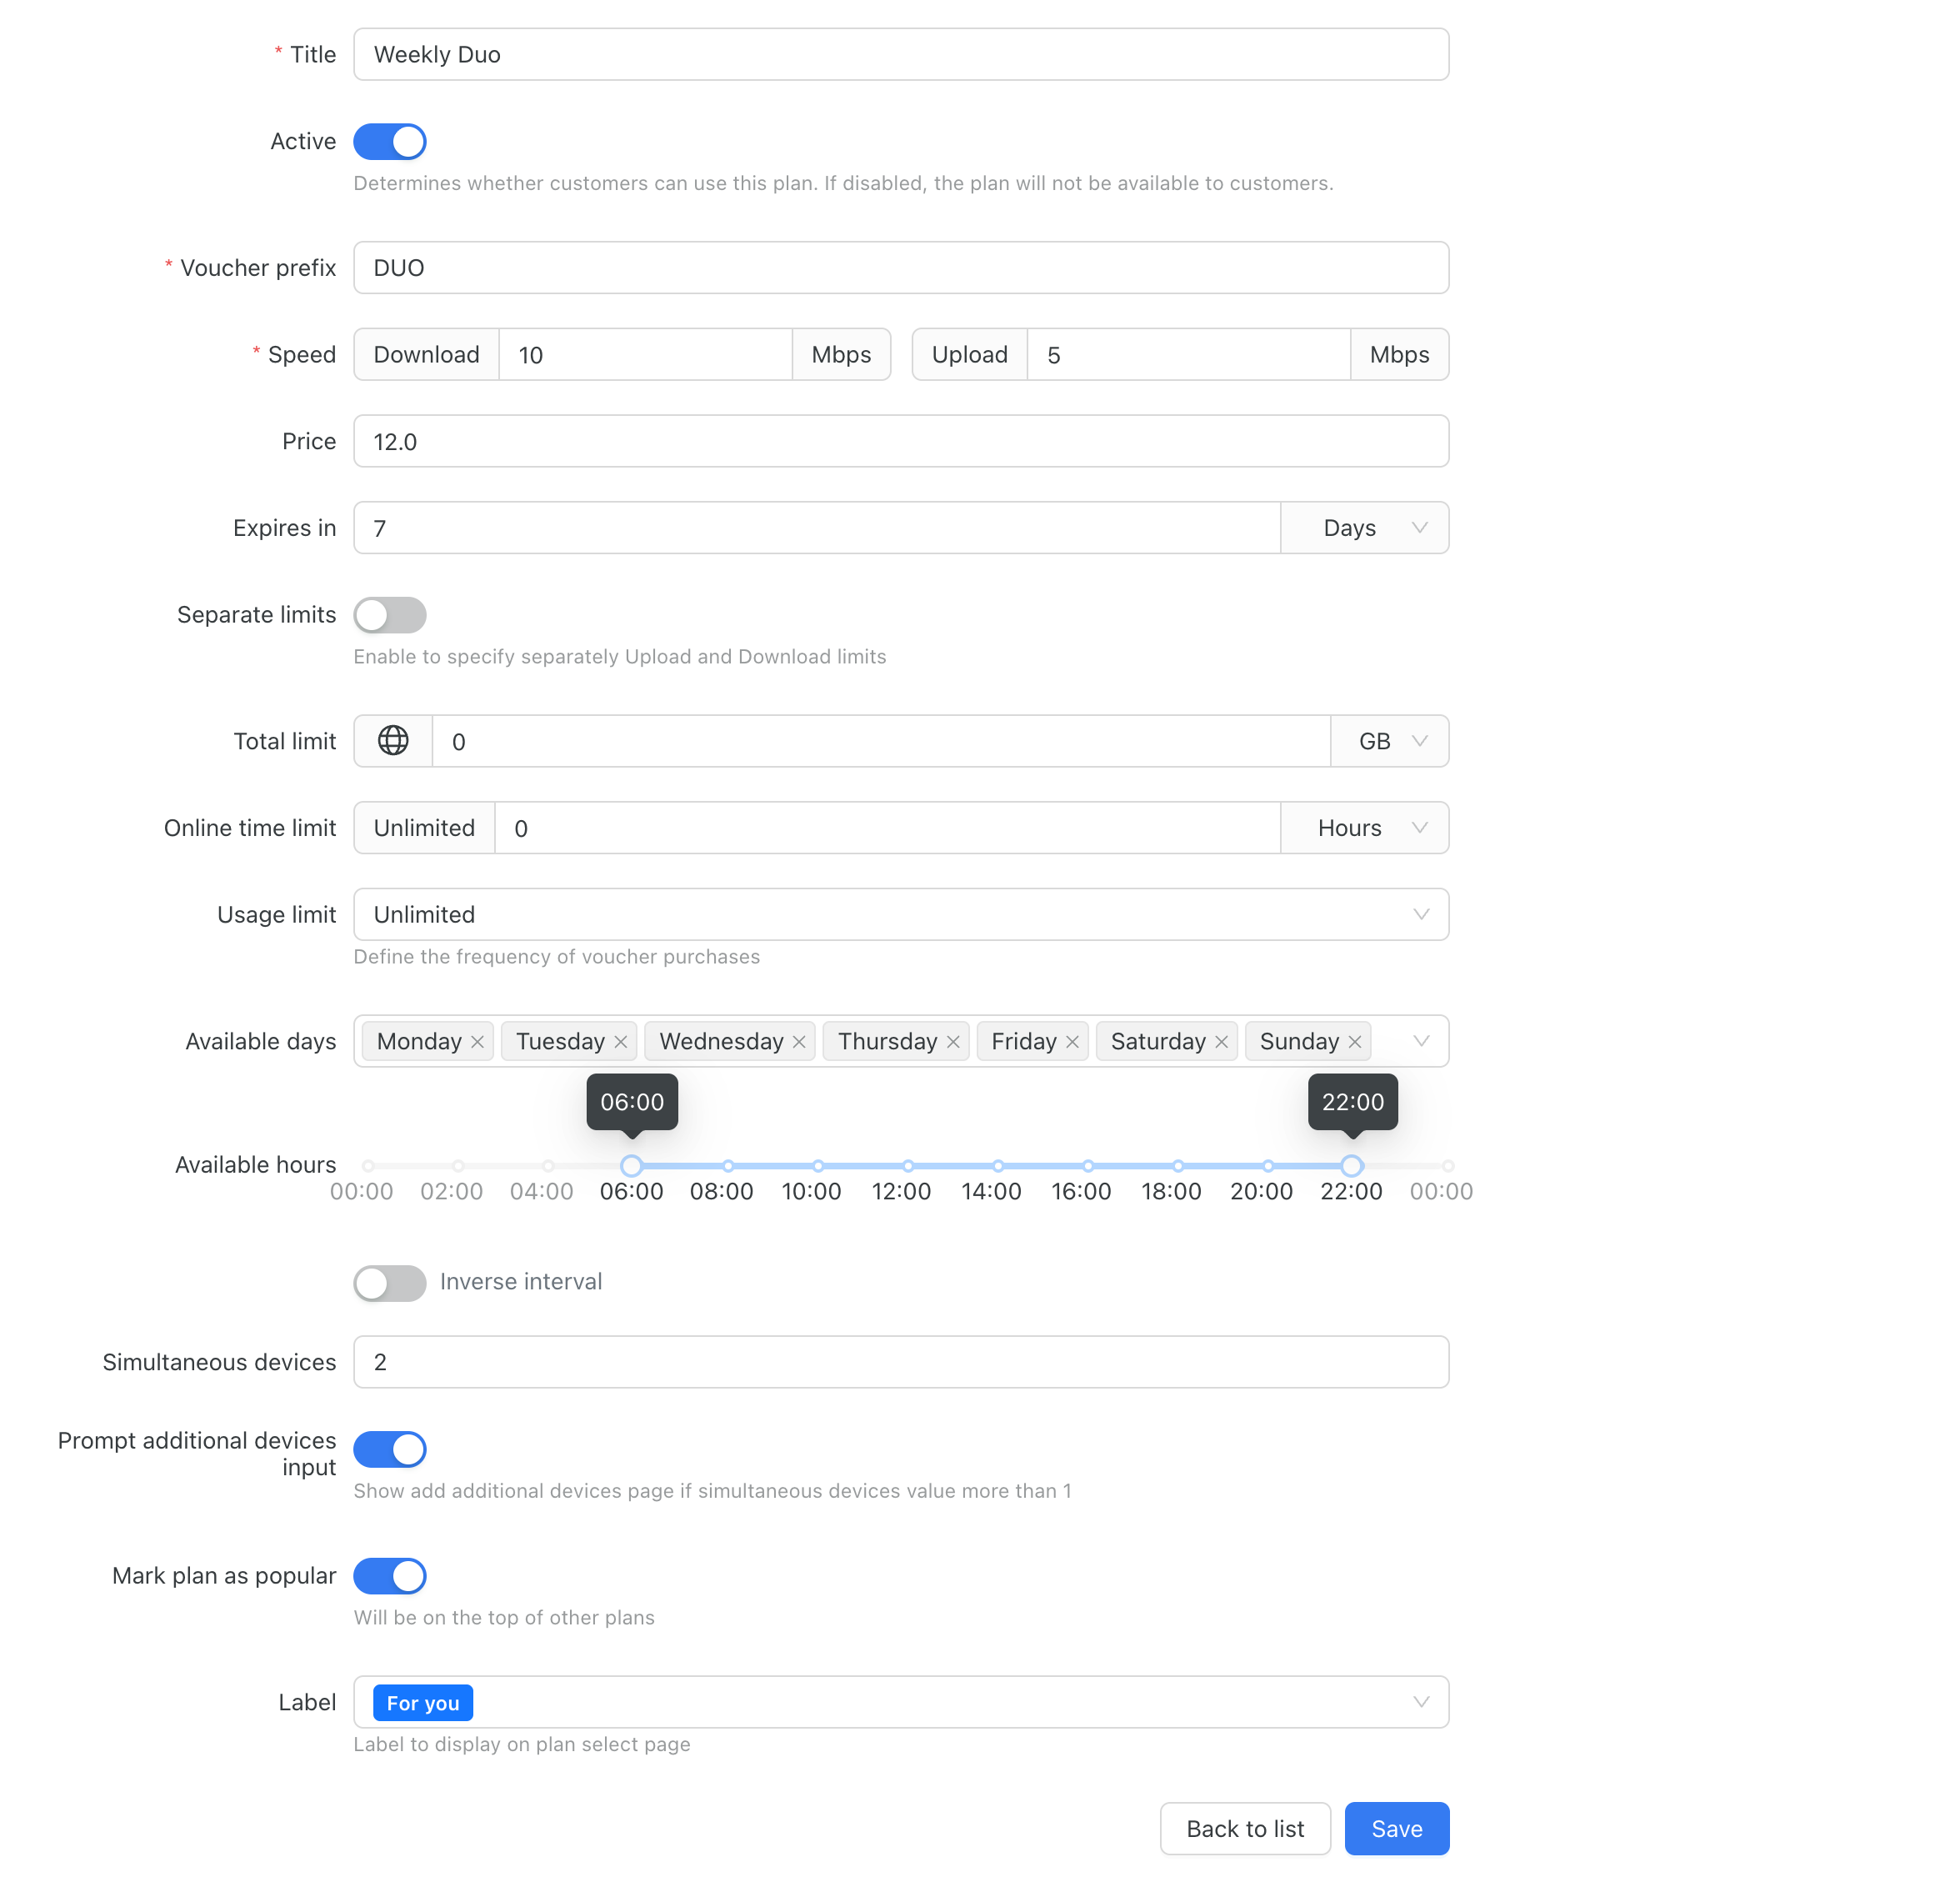
Data plan configuration options:
Title - the name of the plan. It will be displayed to customers on the splash page.
Active – the checkbox to enable or disable the plan. If it plan is disabled, it will not be displayed on the splash page.
Voucher prefix – the prefix that will be used for generating vouchers series for this plan.
Speed - Download and Upload speed available for this data plan, entered in Mbps. Fractional values are allowed, for example
2.048. See Speed units below.Price - the price of the plan. It will be displayed to customers on the splash page and this value will be used for buying plan using a payment gateway.
Expires in - Define the validity period for vouchers created from this data plan. The expiration can be set in minutes, hours, or days. For example, if you set "Expires in = 7 days", the voucher will automatically deactivate 7 days after it is created.
Separate limits – this checkbox allows you to separate download and upload traffic limits. If the checkbox is checked, limits from fields Download limit and Upload limit will be applied. If the checkbox is unchecked, the limit from the Total limit field will be applied for traffic limit.
Online time limit – the maximum time the customer can be online after buying the plan on the splash page.
If one of these limits is reached, the customer will be disconnected, and the voucher will be transferred to the status Used
Usage limit – how often the same customer can buy (or activate) the plan. It can be set to:
- Unlimited – no restriction.
- One time – the customer can get the plan only once. After that it no longer appears for them, while your other plans stay available.
- Once per day – once per calendar day; the plan becomes available again at midnight in your account's time zone.
- Once per 24 hours – once per rolling 24 hours, counted from the previous purchase.
- Once per week, Once per month, Once per year – once per rolling week, month or year, counted from the previous purchase.
This is useful for free plans — for example, to let a customer use a free plan once a day instead of ten times.
INFO
The limit is copied onto each voucher when it is created, so changing a plan's usage limit later does not affect customers who already used it. For example, switching a One time plan to Unlimited won't make it available again to a customer who already had it; to let that customer buy it again, delete their earlier voucher of this plan (disabling it is not enough).
Available days – it is the list of days when the plan is available. For example, if you set the list to Monday, Tuesday, Wednesday, the plan will be available only on these days.
Available hours – it is the time range when the plan is available. For example, if you set the range from 08:00 to 18:00, the plan will be available only from 08:00 to 18:00.
Available days and hours control only when the plan can be bought. A voucher that was already bought keeps working outside these days and hours, until its own limits run out.
Simultaneous devices – The maximum number of devices that can connect to the network simultaneously using the same voucher, sharing its limits concurrently.
Prompt additional devices input - If this option is enabled and Simultaneous devices is greater than 1, the customer will be prompted on the splash page to add additional devices. They must enter each device’s MAC address to connect it to the voucher.
Mark plan as popular – marks the plan as popular for your own reference. The flag is shown in the Popular column on the location's
Planstab, but it does not change the position of the plan on the splash page. The order of the plans is controlled by the drag-and-drop order on the location's Plans tab.Label - Create labels in
Config → System → Labelsand assign them to data plans. They’ll appear on the splash page. See Data plan labels for details.
Speed units
Speeds are in Mbps throughout the admin panel, so you never have to convert anything in your head:
- The Download and Upload fields on the plan form, and the two speed columns in the plans list.
- The speed limits shown on a voucher (
Vouchers → List) and on a voucher series (Vouchers → Series) — those are read-only, inherited from the plan the voucher came from. - The download and upload limits of trial sessions, under
Config → Captive portal → Trial sessions.
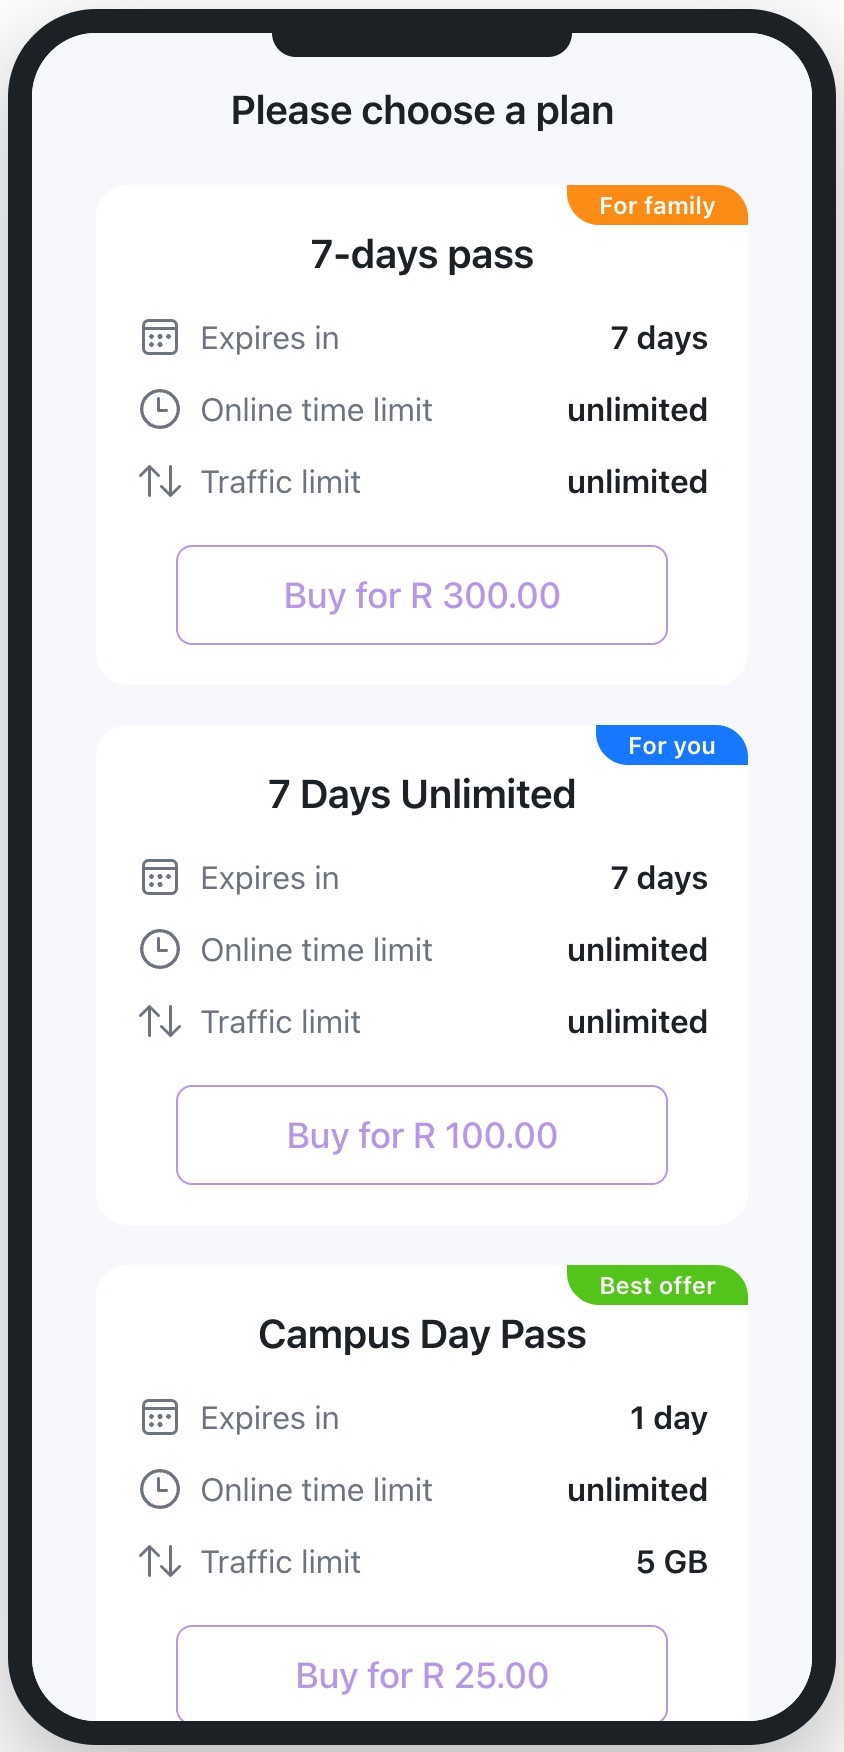
A plan you enter as 5 Mbps reads as 5 Mbps everywhere — in the list, on its vouchers, and on the plan card your customers see on the splash page. Powerlynx counts speed decimally, the way network speed is normally quoted: 1 Mbps = 1000 kbps.
INFO
One place still works in kbps on purpose: the rate limit attributes of a NAS type, under Config → System → NAS types. The template variables .tx_rate_limit (upload) and .rx_rate_limit (download) hold the plan's speed in kbps, which is why the ready-made templates multiply them by 1024 to get bits per second. Leave that as it is — don't rewrite those templates for Mbps, or the speed your routers apply will be off by a factor of a thousand.
Enabled data plans available for location
Customers can select data plans or buy using payment gateways on the splash pages while trying to connect to Wi-Fi. For this, you should enable plans for the location. To enable a data plan for a location, go to the Locations section location from a list, where you want to enable/disable the plan, click on the Plans tab, and enable or disable data plans using checkboxes Enabled to select the plans you want to allow for this location.
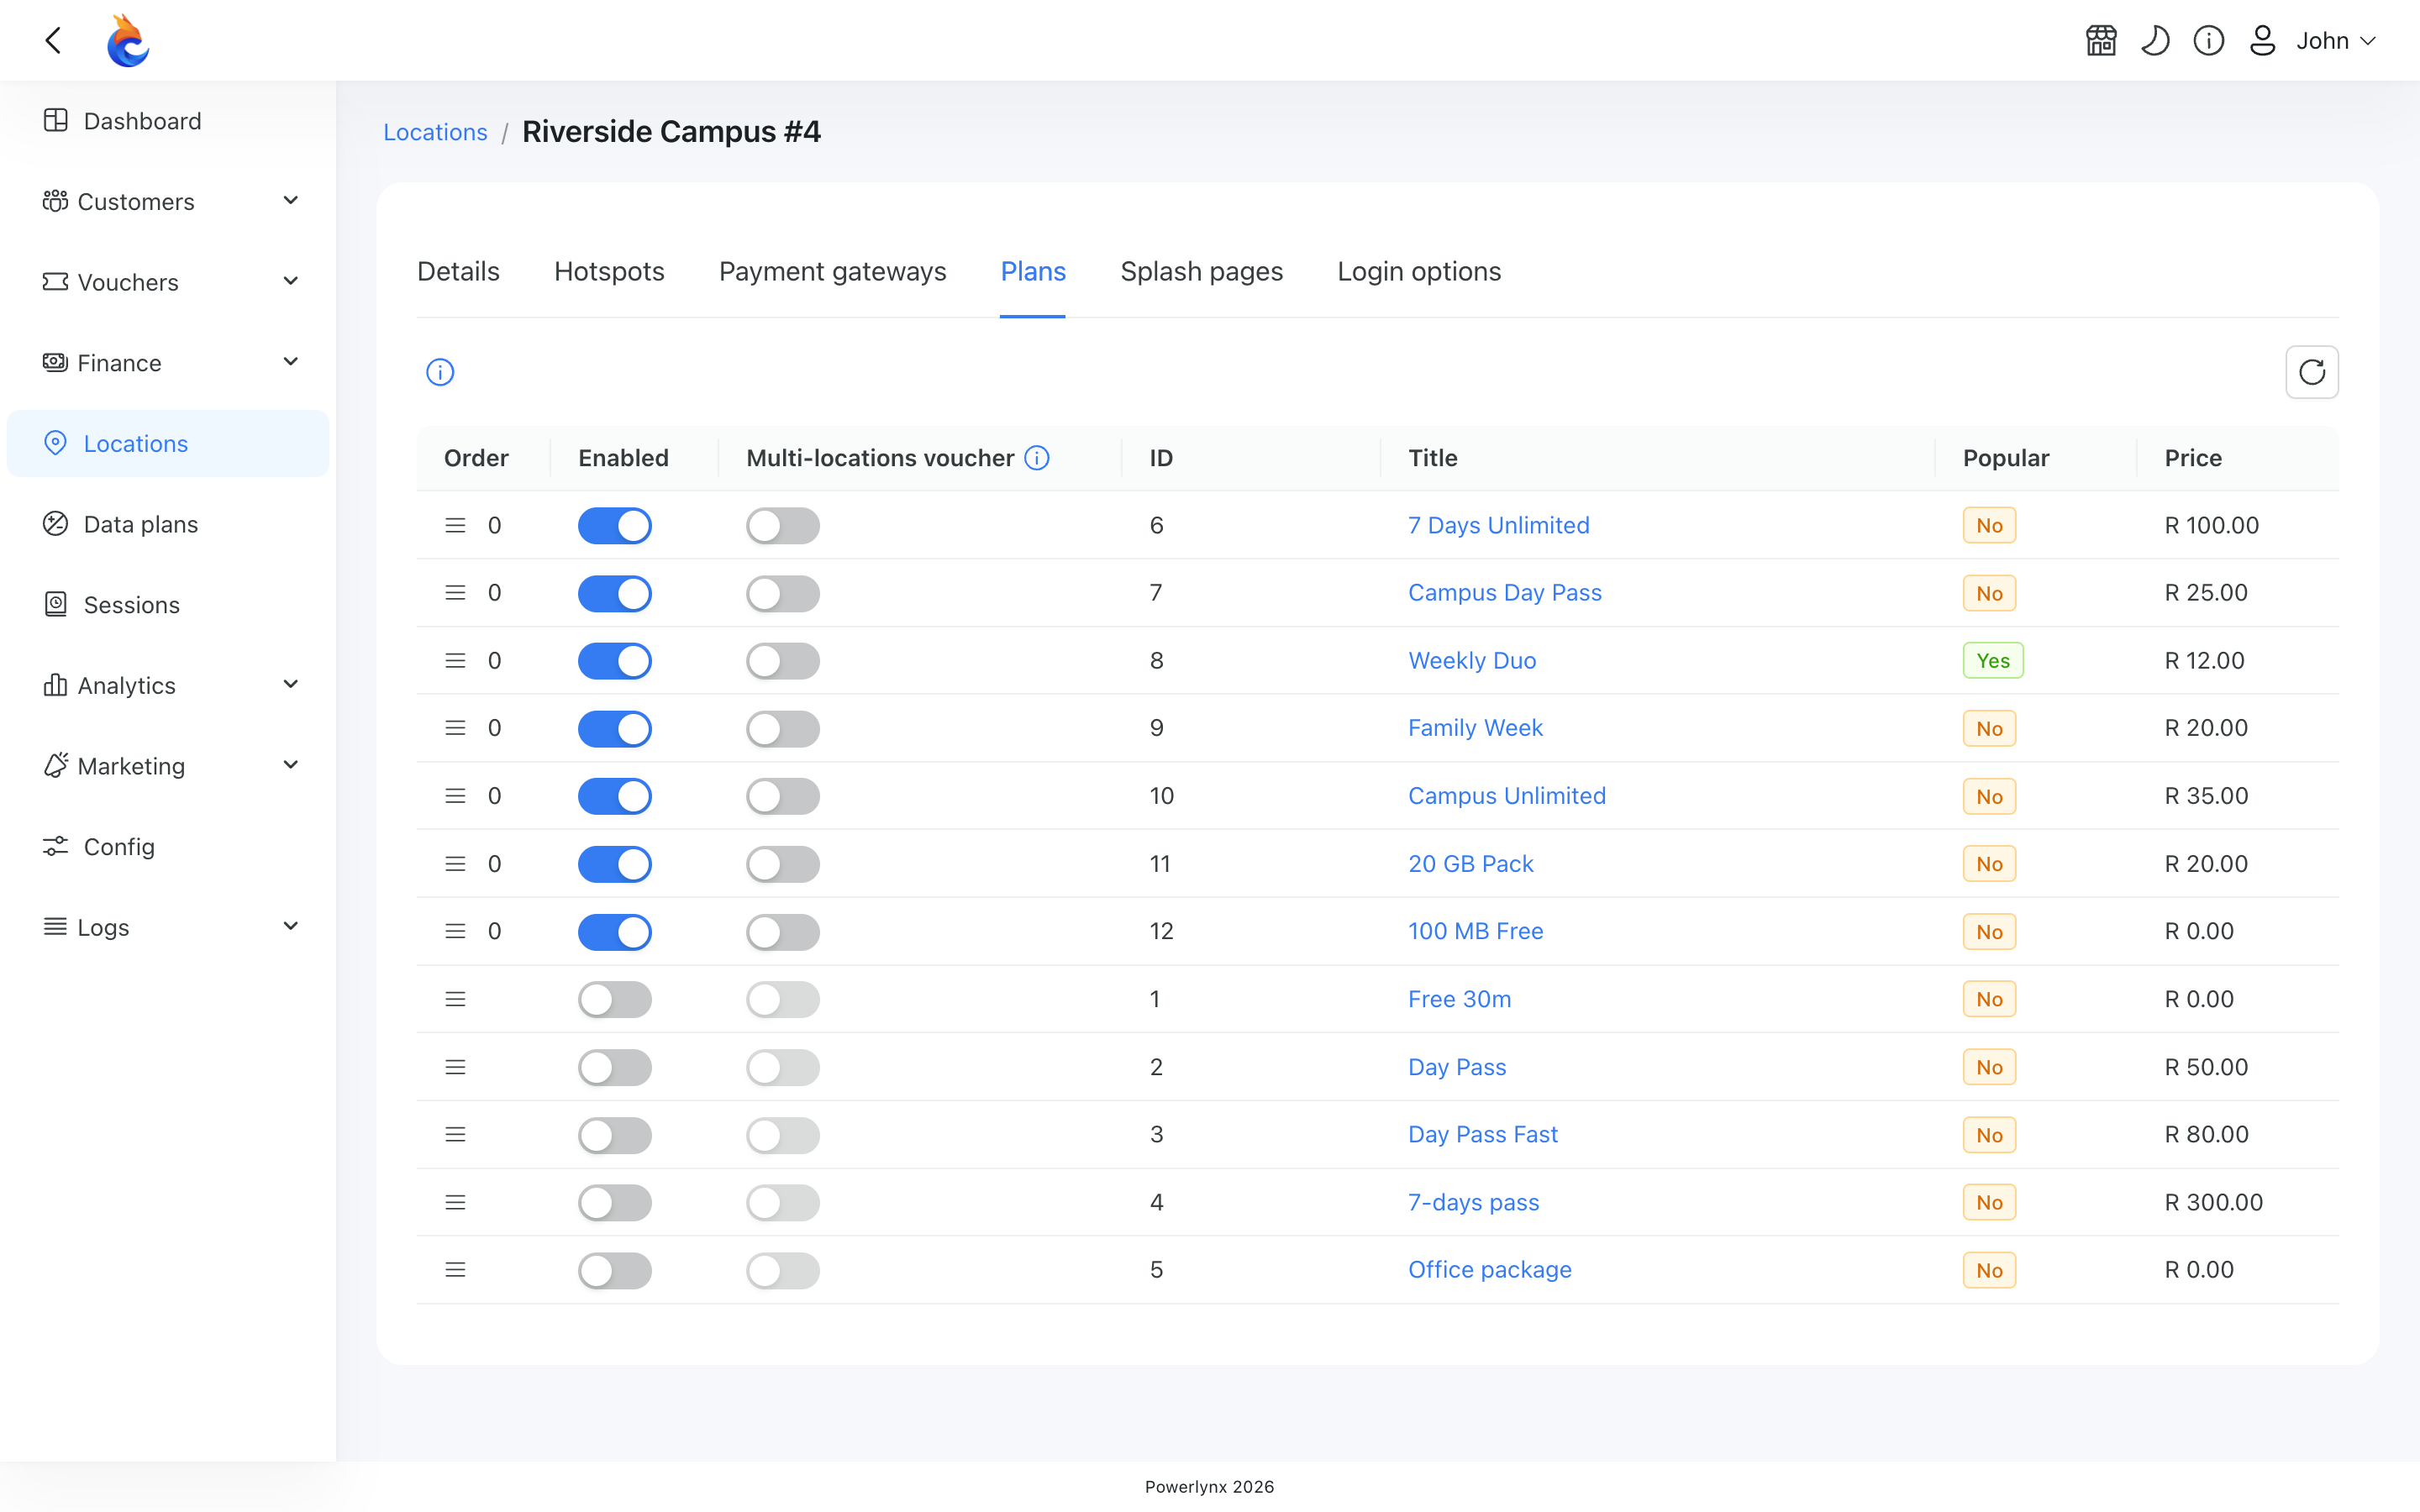
The Order column on the same tab defines the order in which the plans are shown to your customers on the splash page. Drag a row by the handle on its left to move a plan up or down — the plan at the top of the list appears first on the splash page. The order is stored per location, so repeat it for every location where the plan should come first.
TIP
To make a plan stand out visually as well, assign it a label (for example "Most popular") in addition to placing it first in the list.
Usage examples
Example №1. Paid plan with traffic limit
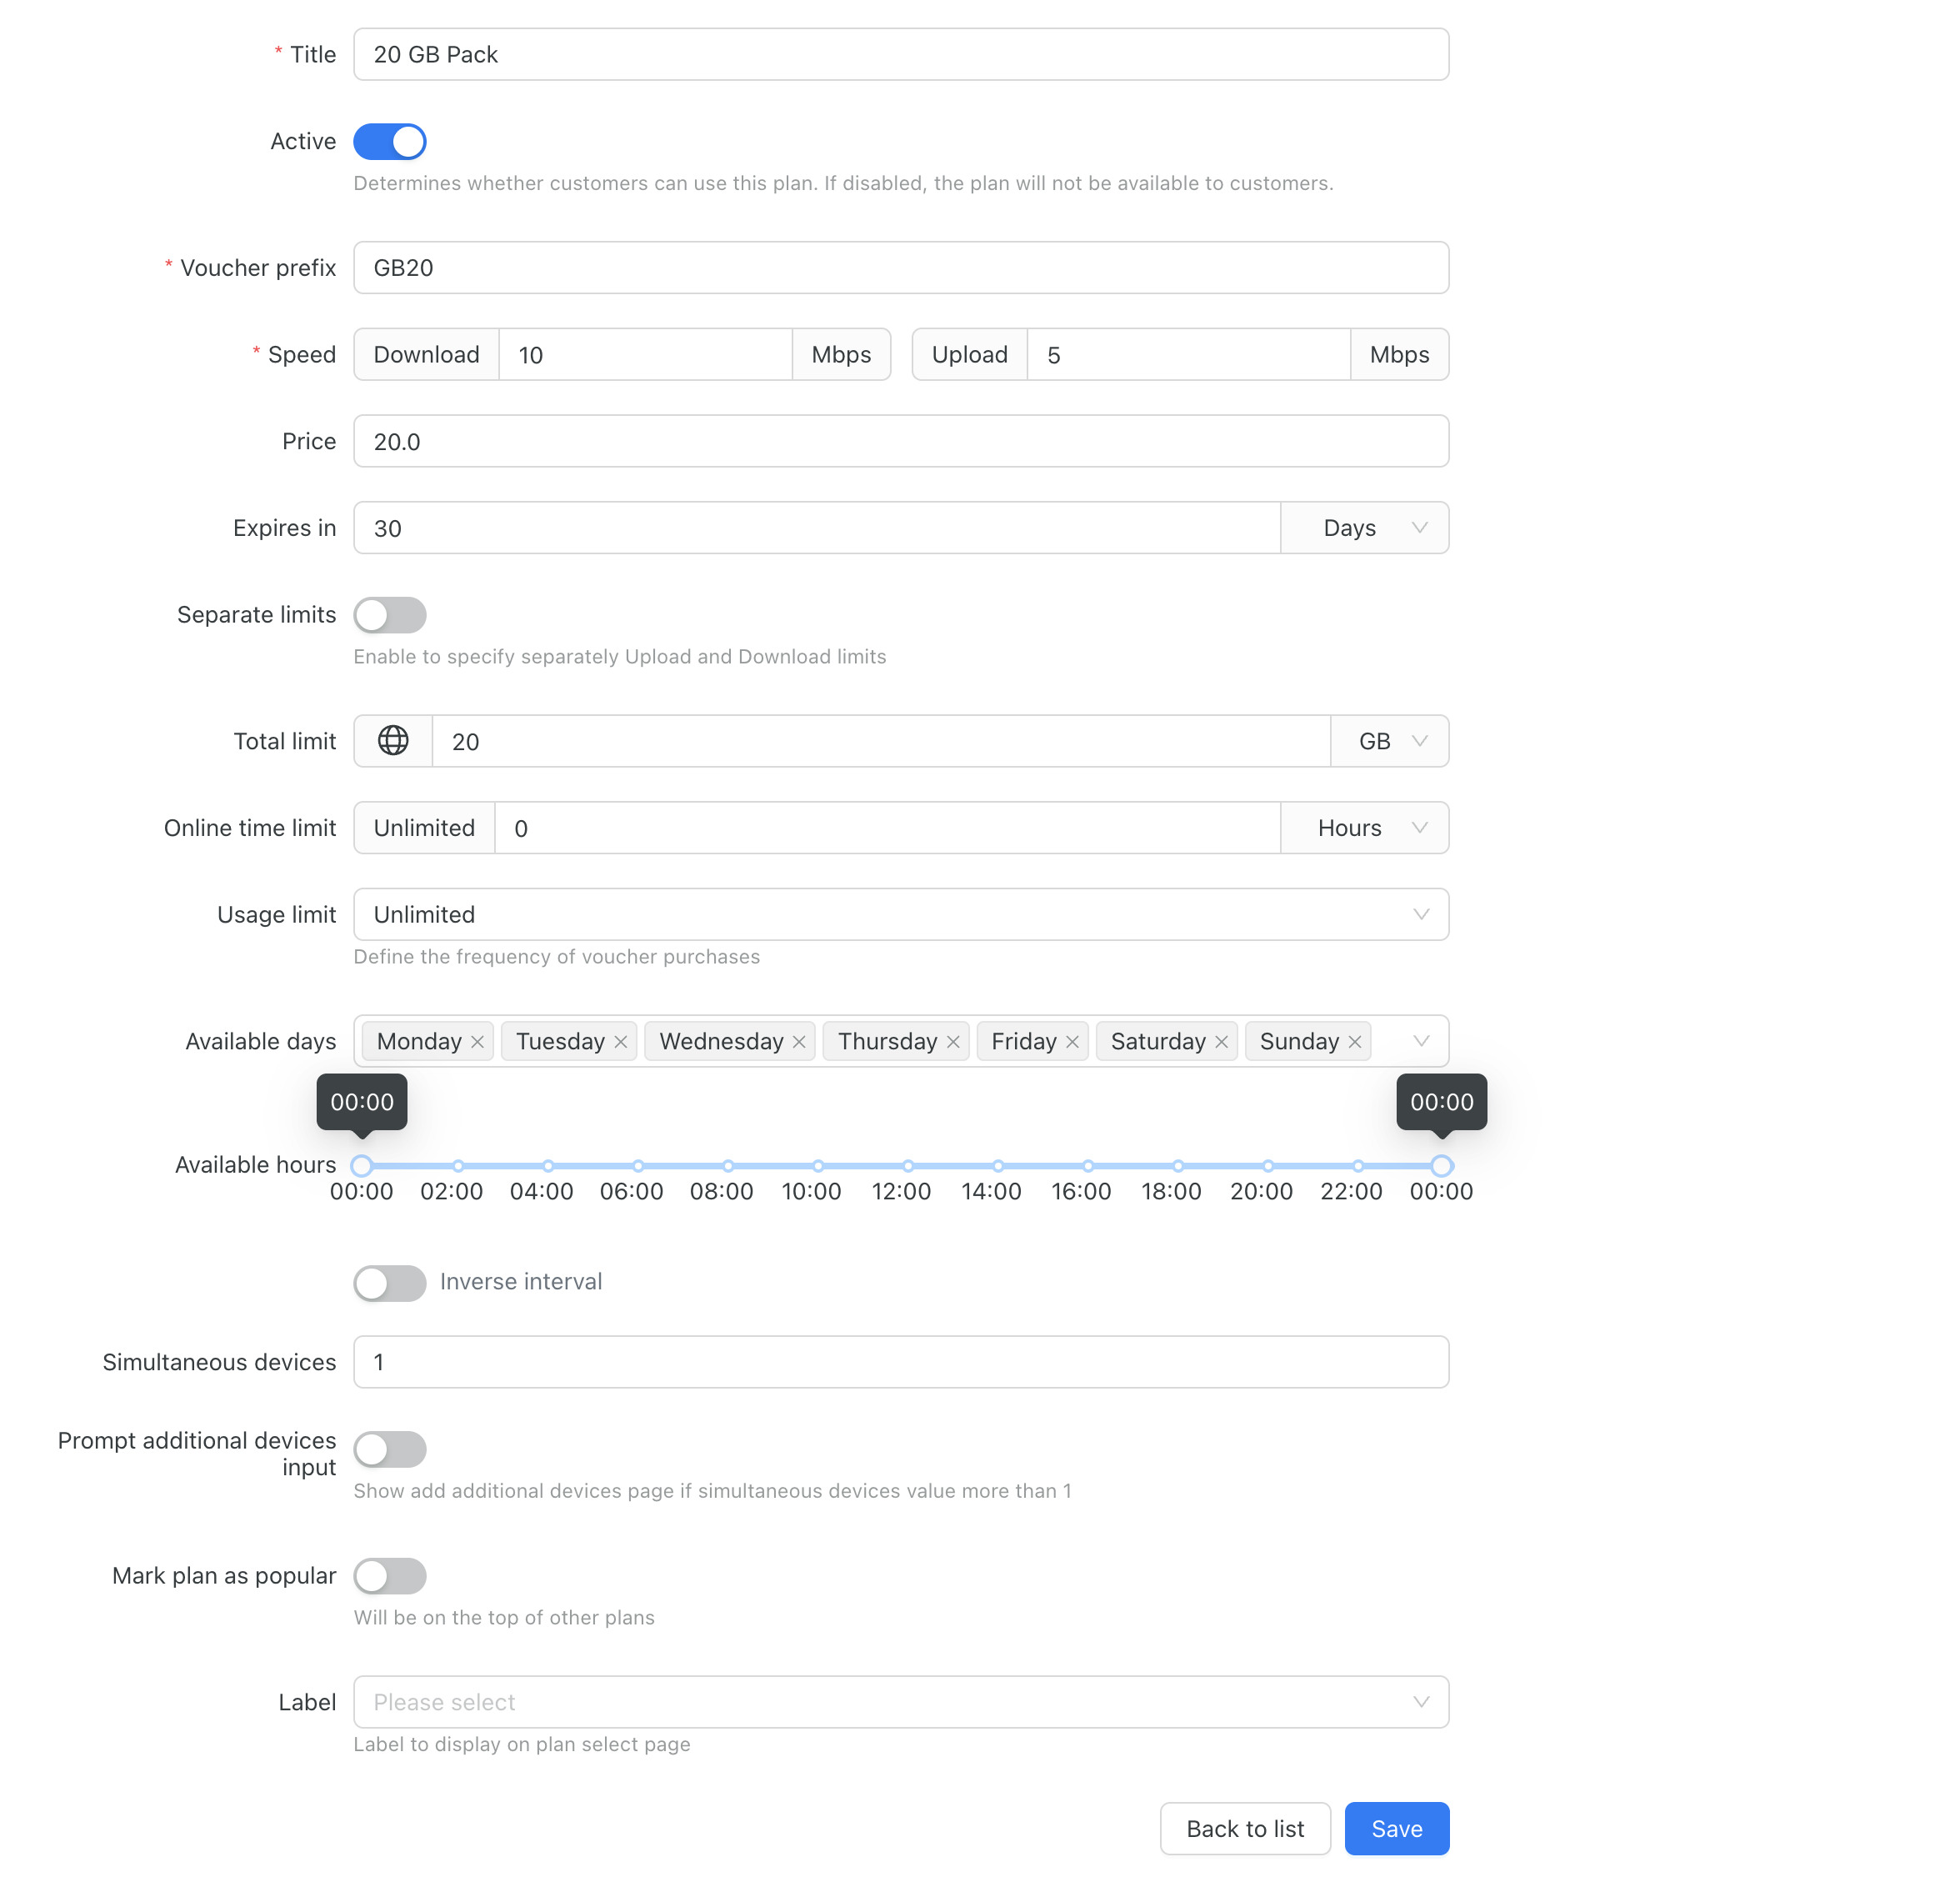
In this case, the customer can purchase a plan with a 20 GB traffic limit for $20. There is no expiration until the data is fully used, and no session time limits. The user only pays for the data limit, and the plan can be purchased multiple times per day.
Example №2. Free plan that can be used only once
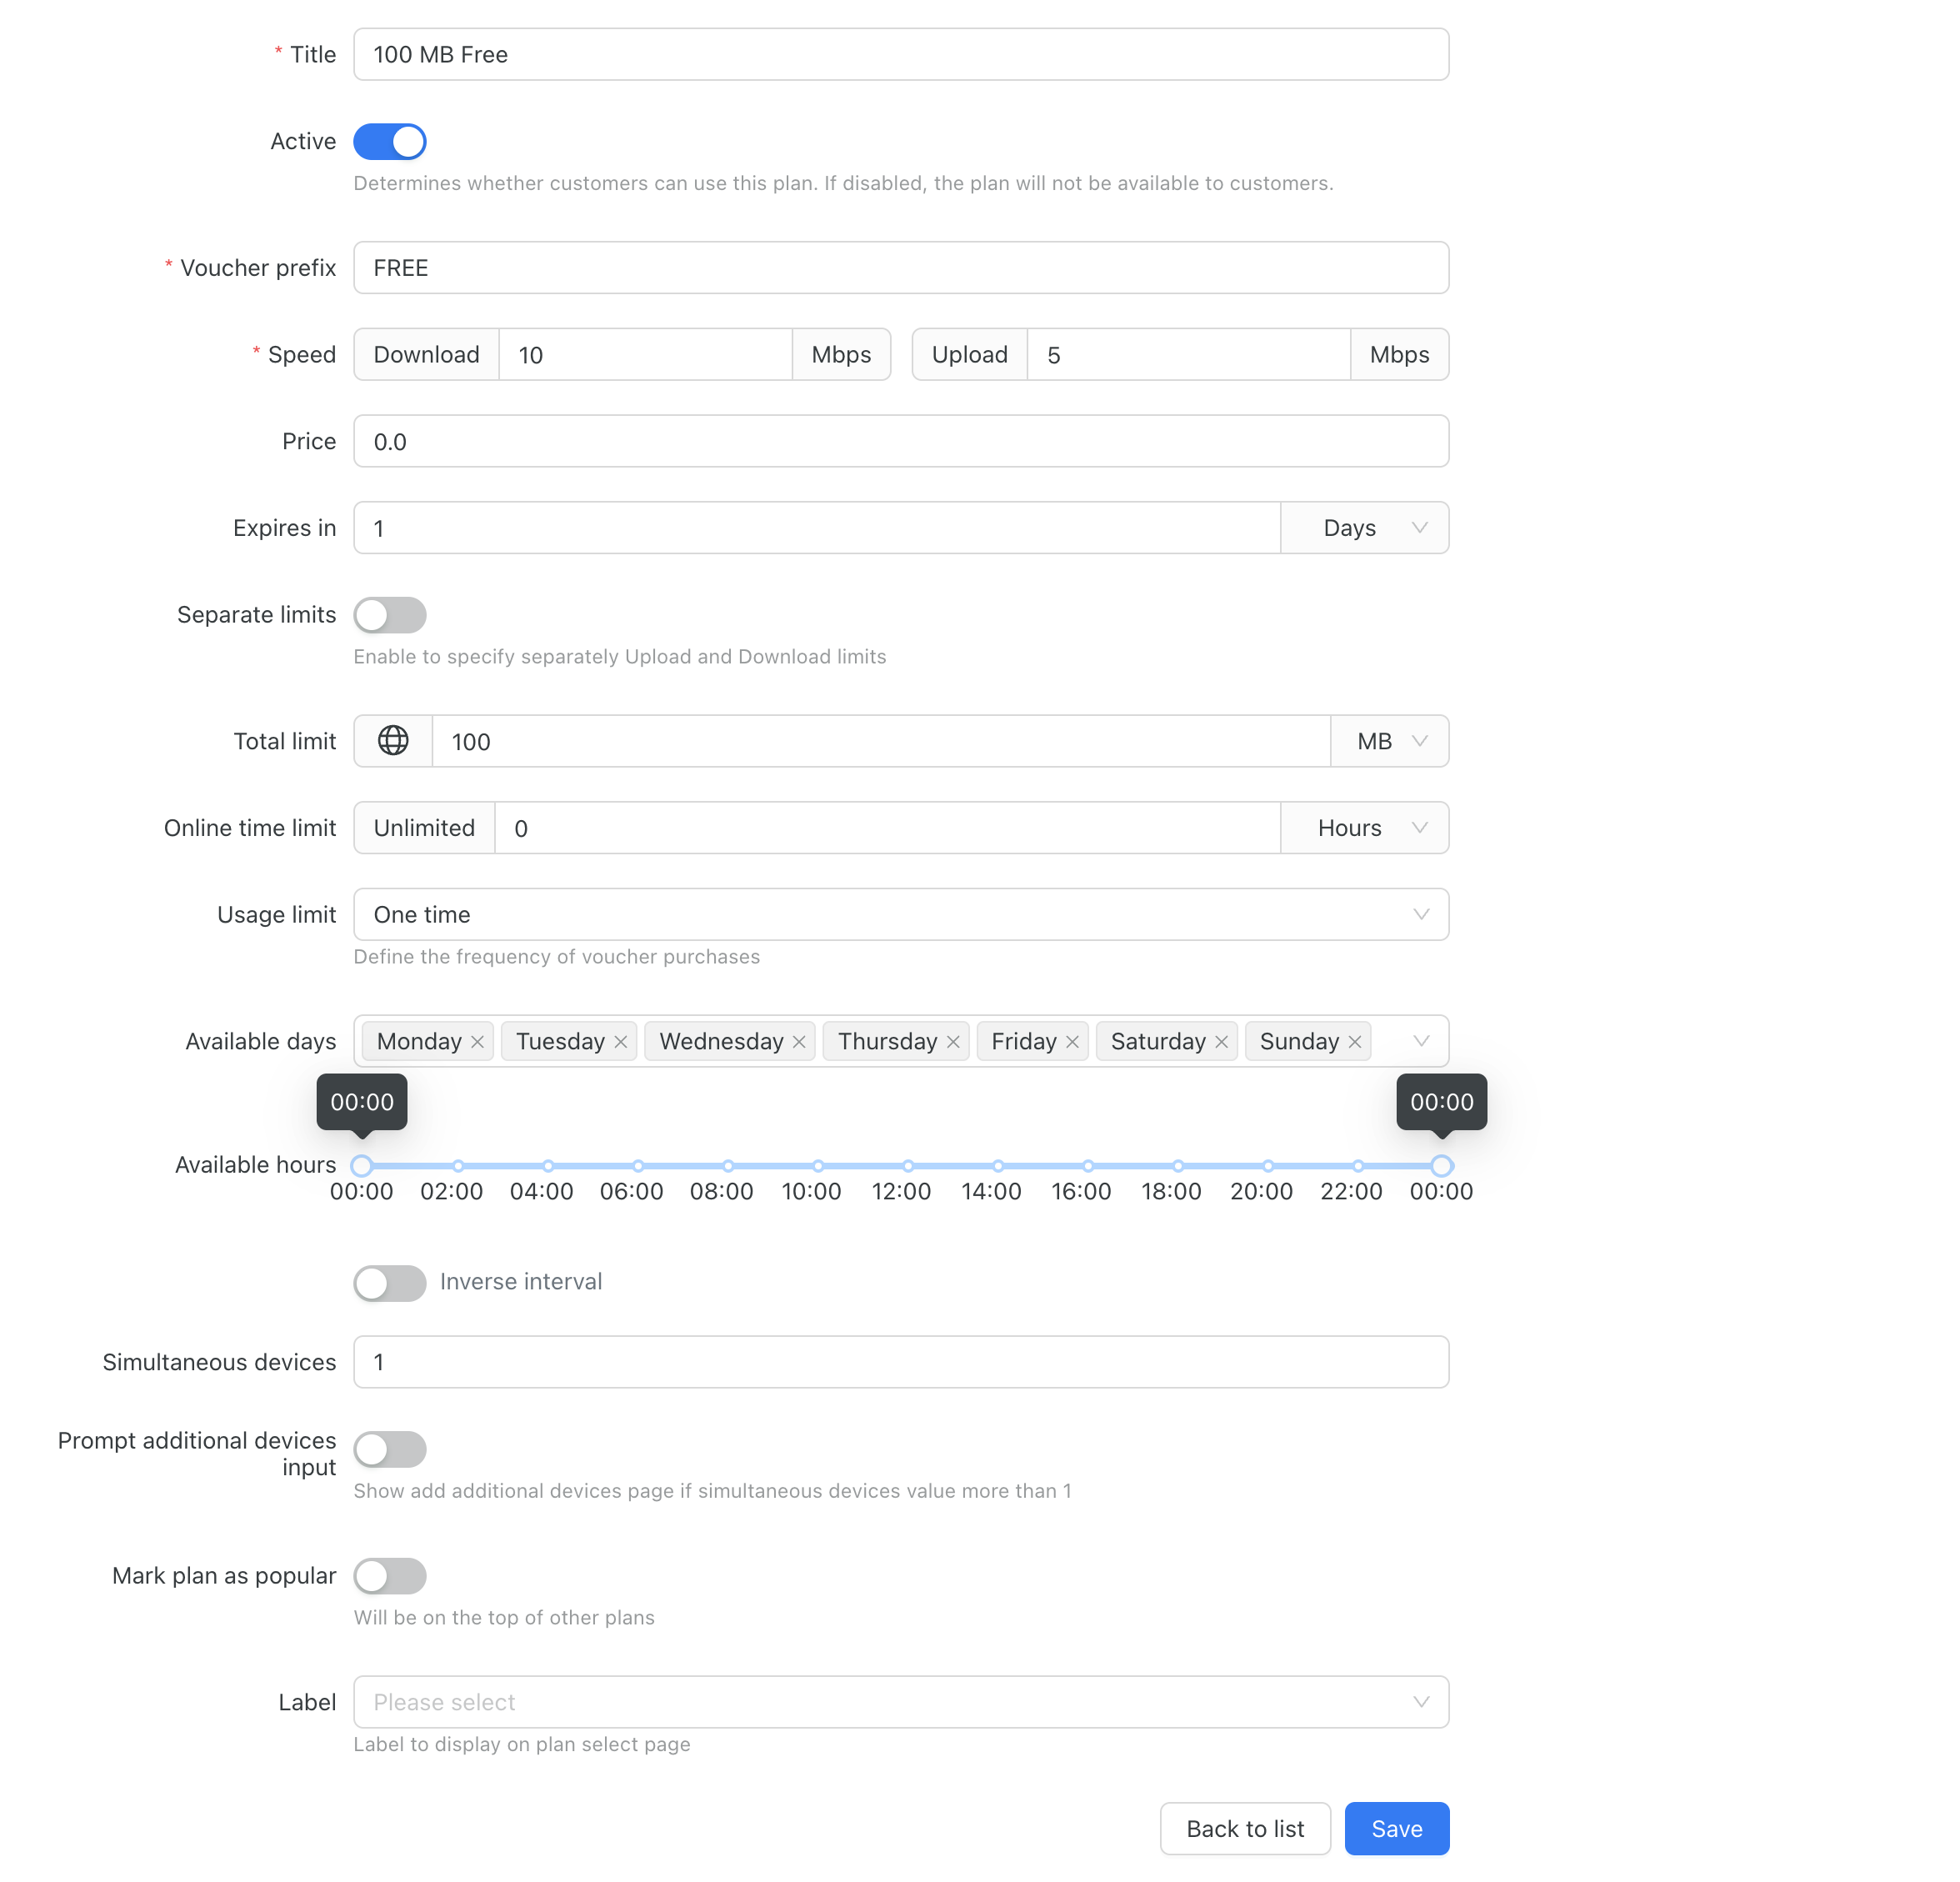
In this case, the customer can use the plan only once (Usage limit = One time). It includes a 100 MB traffic limit and expires 1 day after creation. This setup is ideal for guest access, where you want to offer 100 MB of free data per customer, one time only.
The same approach works for a short free trial — for example, Expires in = 2 minutes with Usage limit = One time gives each customer a single free 2-minute session. The limit is per customer, and a customer is identified by their phone number, so it stops casual repeats but not someone who signs in with a different number.