Customers
Every person who logs in through your splash page becomes a customer in Powerlynx. Open Customers in the main menu and pick someone from the list to see their card — their details, the vouchers they hold, the devices they connect with, and a full history of what happened on the account.
Associated devices
The Associated devices table on the customer's Information tab lists the devices linked to that customer's vouchers. For each one you see its MAC address, the name it was given, the last voucher and location it was used on, the last hotspot it connected through, and whatever Powerlynx could recognise about the device itself. Every row links straight to that voucher and location, and the Add button plus the per-row Edit and Delete actions are on the right.
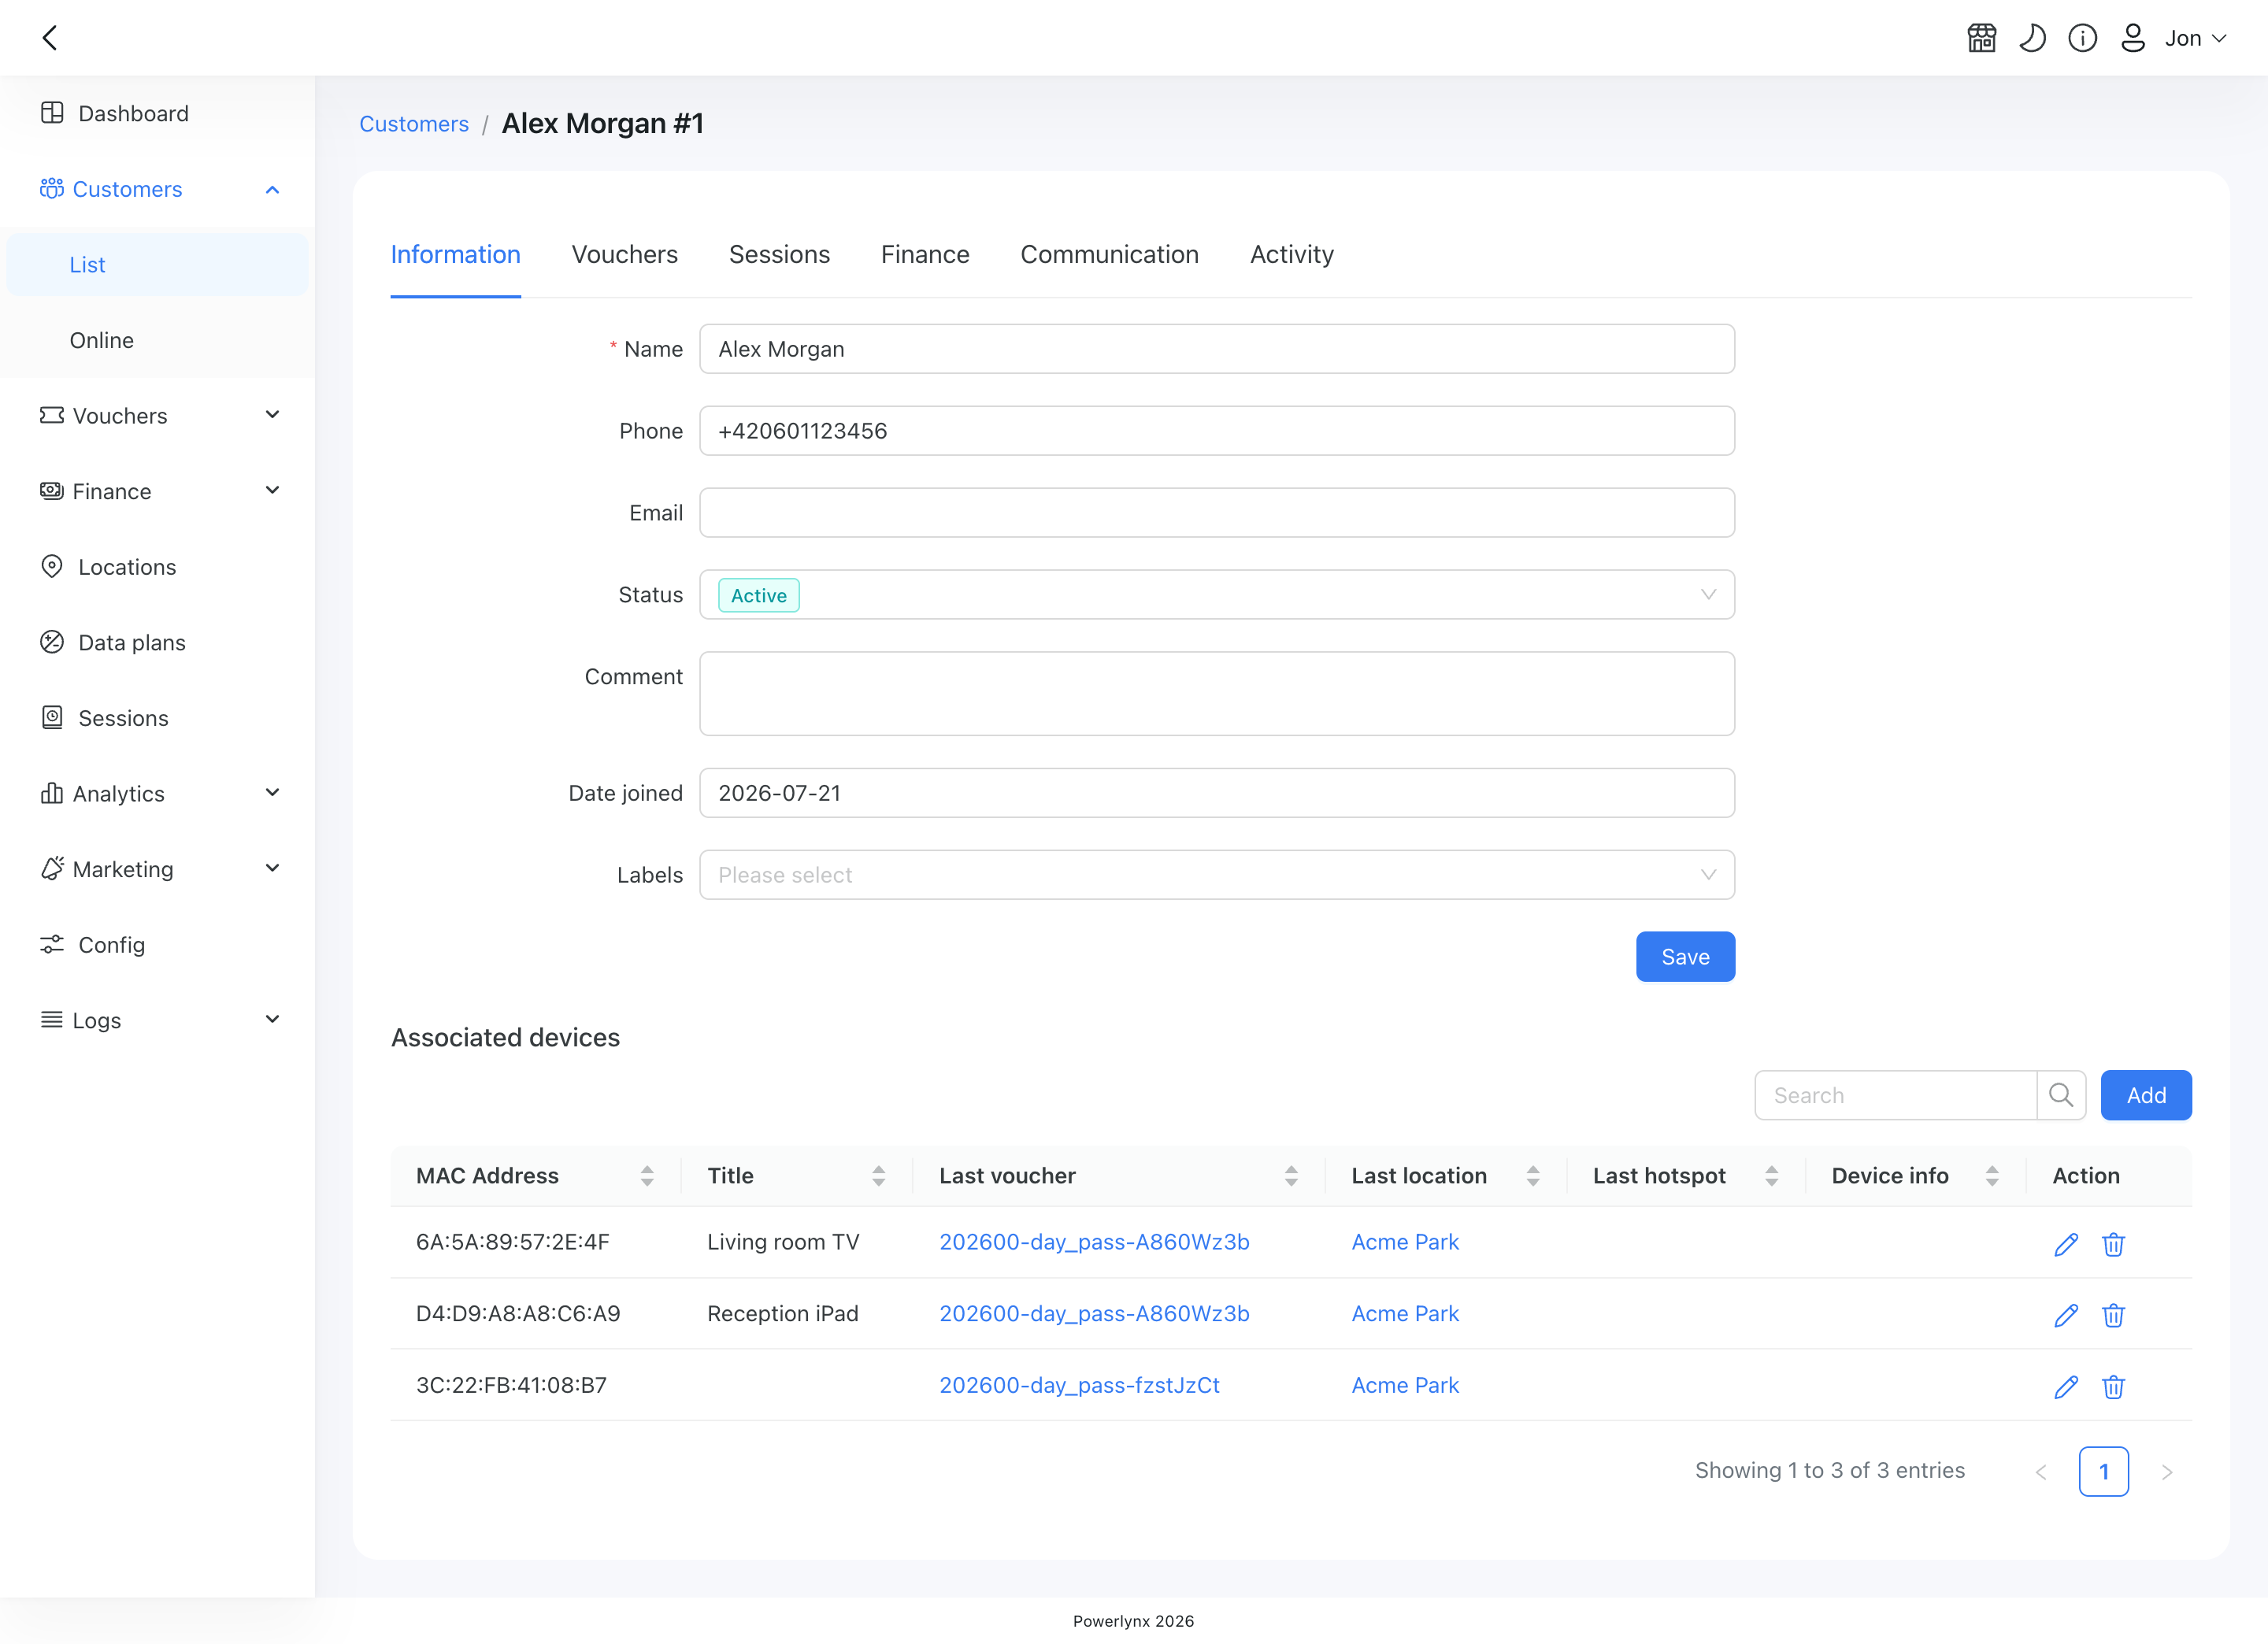
Devices normally end up here on their own: a customer's phone is linked when they log in, and they can attach extra devices themselves during the sign-up flow (see Manually add related MAC addresses to vouchers). This table is for the cases where you need to step in — a guest reads their Smart TV's MAC address to you over the phone, someone mistyped a character, or a device has to be taken off the account.
INFO
A device is always attached to one of the customer's vouchers — that is what gives it its plan, its limits and its location. So every action here starts with the question of which voucher the device belongs to.
Adding a device
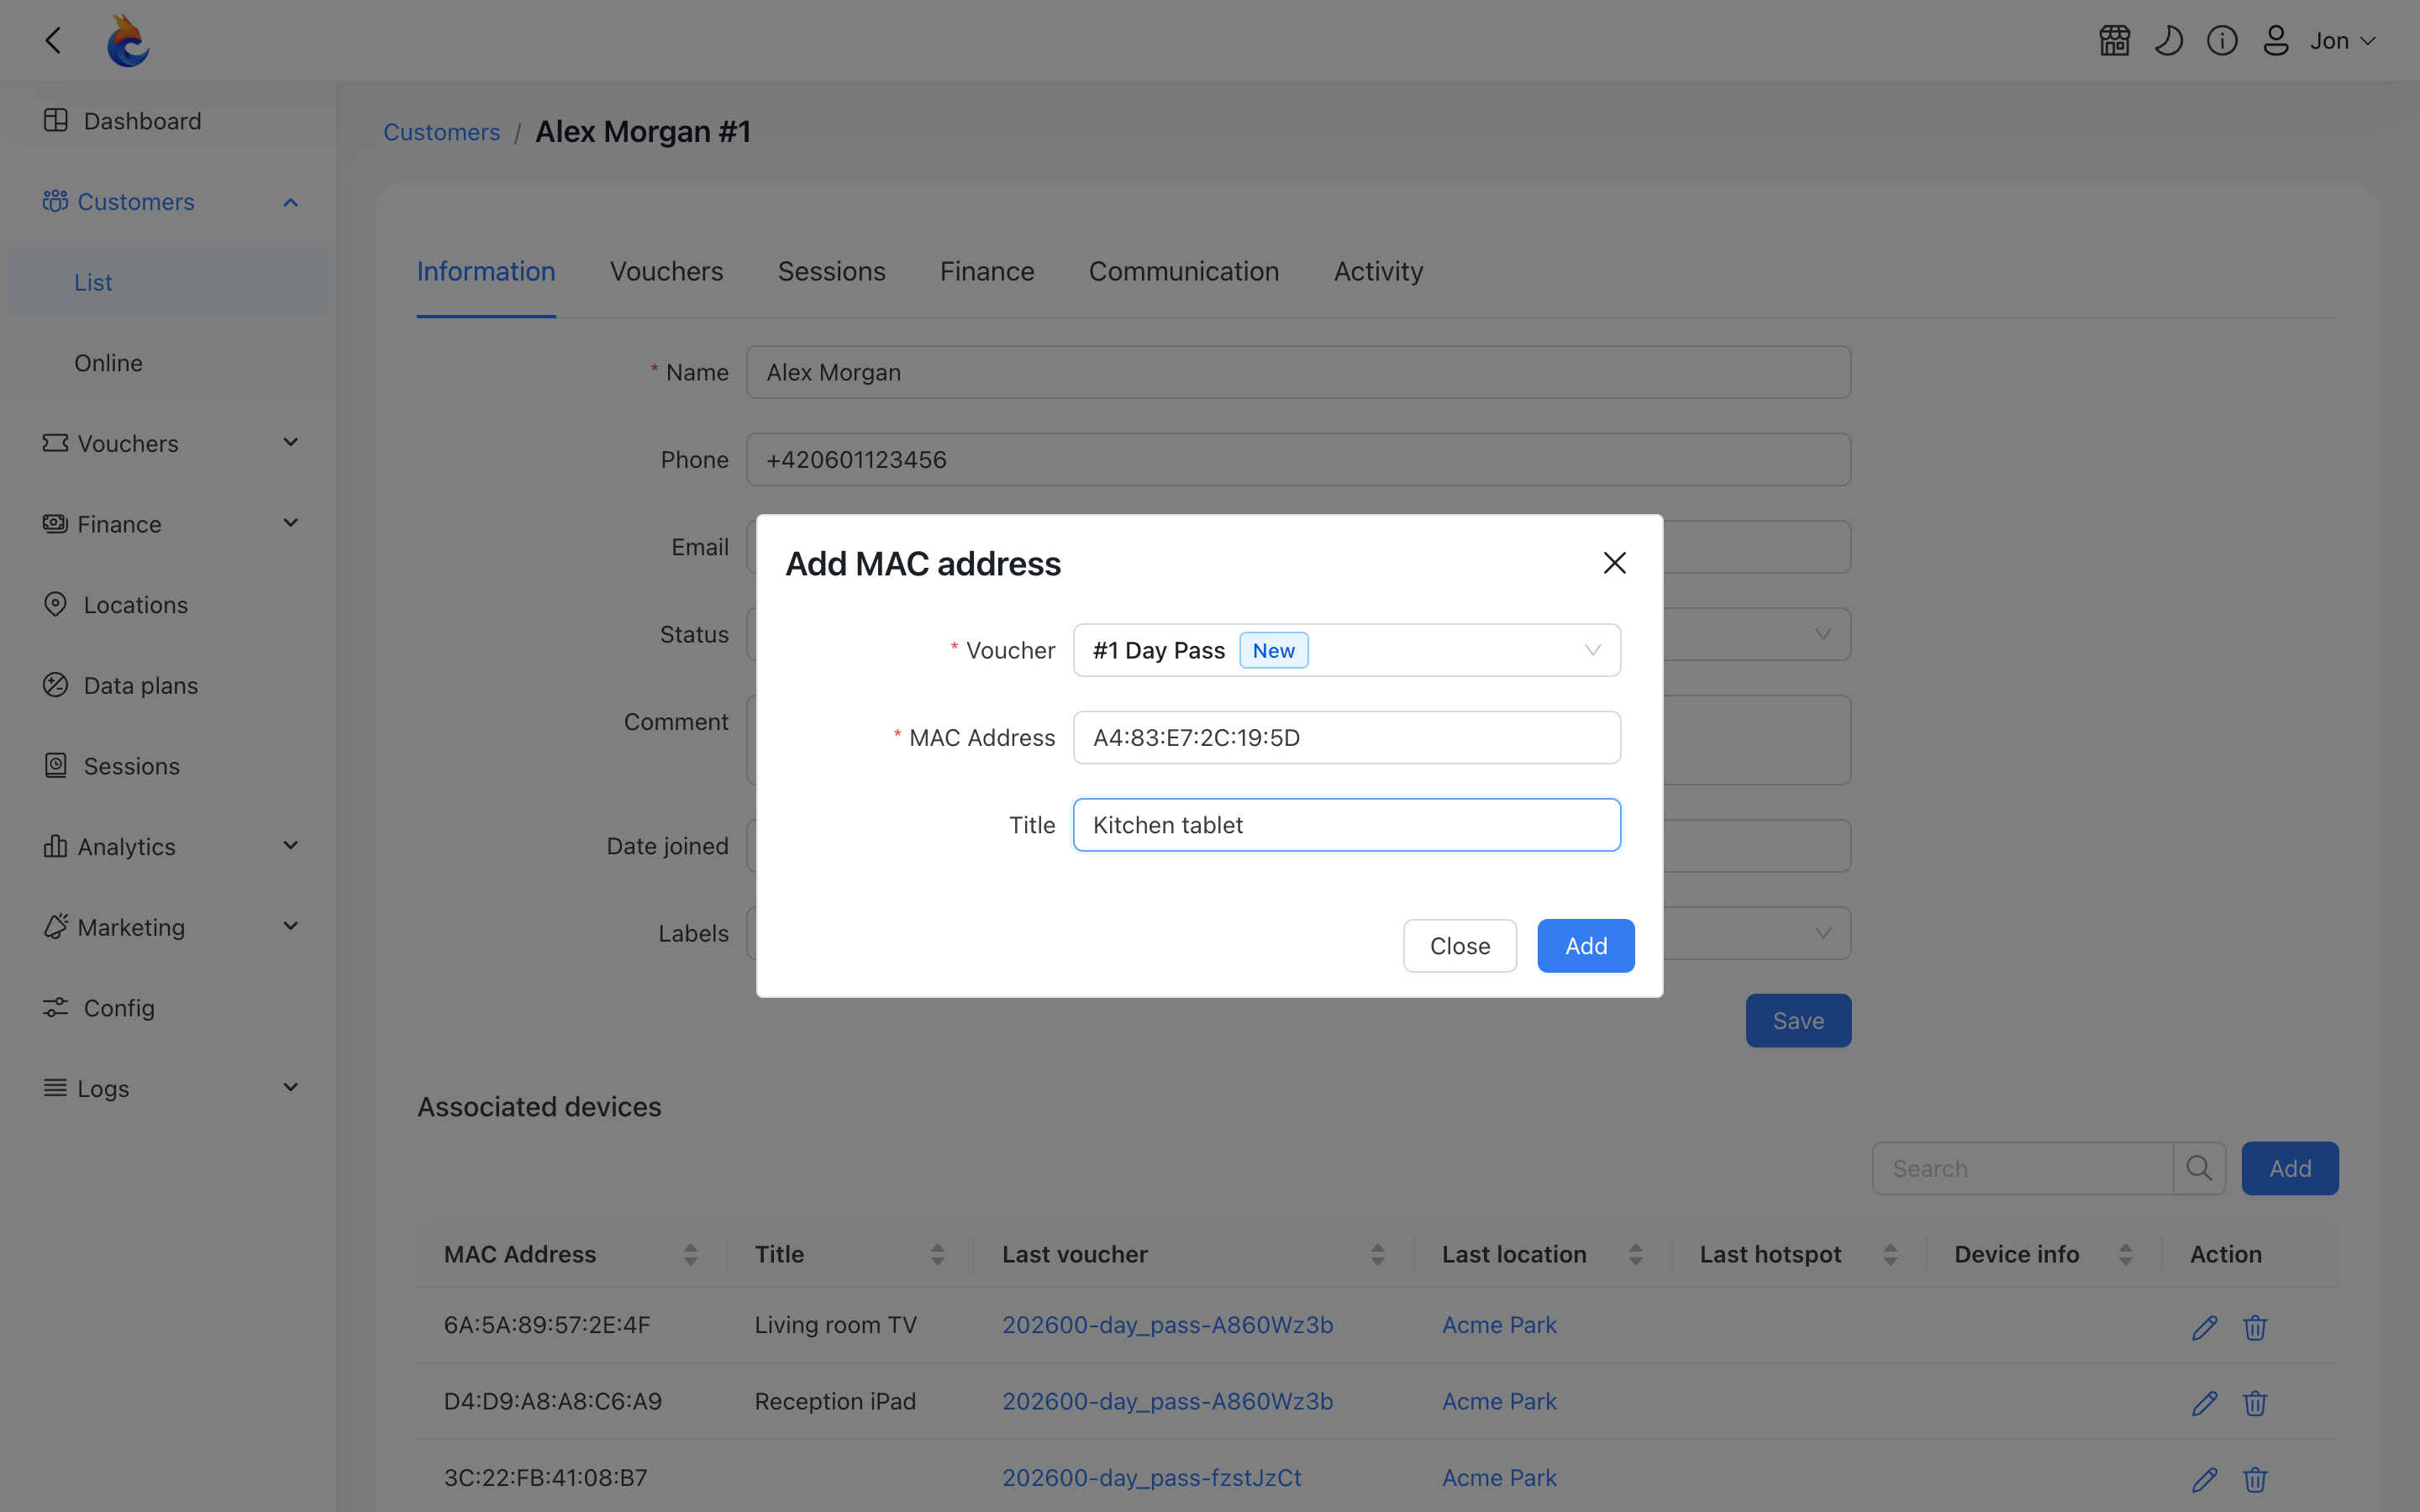
Click Add above the table and fill in the dialog:
- Voucher — one of this customer's vouchers. Each option is labelled with its number, plan name, status and full code, so you can tell them apart at a glance. Only that customer's own vouchers are offered.
- MAC Address — the device's MAC. The field formats itself as you type, so you don't have to worry about capitals or separators.
- Title — an optional name for the device, such as
Living room TV. It makes the table far easier to read later.
The number of devices a voucher can carry comes from its data plan's Simultaneous devices setting. If the voucher is already full, adding another device is refused — remove one of the existing devices, or pick a voucher with room to spare.
Editing a device
Use the Edit action on the row to correct the MAC address or change the device's name.
The voucher can't be changed here — editing only touches the MAC and its title. To move a device onto a different voucher, delete it and add it again under the voucher you want.
Deleting a device
The Delete action asks you to confirm, then removes the device from the customer.
WARNING
Deleting from the customer page removes the device record altogether. This is not the same as removing a MAC on the voucher page, which only detaches the device from that voucher and leaves it on the customer's account.
When a MAC address is already in use
A MAC address can belong to only one device at a time. If you enter one that is already registered — to another voucher, or even to a different customer — Powerlynx shows a Confirm linking MAC Address dialog telling you exactly which customer and which voucher currently hold it.
Confirming takes the address away from its current owner and links it here. Cancelling changes nothing.
TIP
Because you can see who the address belongs to, this is a deliberate hand-over rather than an accident. On the captive portal a customer typing somebody else's MAC address is simply refused — they are never shown another customer's details, and they can't take a device over.
What happens to a device that is online
If the device has a live session when you edit or delete its MAC address, that session is dropped immediately, and the device reconnects and is authorised again against whatever the account now says. This keeps what is actually connected in step with what the table shows — otherwise a device could keep browsing on a link that no longer exists.